Multi Level Dispositions
Introducing Multi Level Dispositions
Dispositions, while implementation specific details may vary, and customer use cases may vary, provide the ability to gain additional insight into contacts between your organization and your organization’s customers.
Until recently, ConnectPath has offered a single tier Disposition solution – e.g. the agent, based on the queue is presented with a single drop down to select one option from.
With Multi Level Dispositions, your agents can be given the ability to further drill down into the Disposition, in a tree like fashion, providing greater clarity than provided by a single tier disposition model.
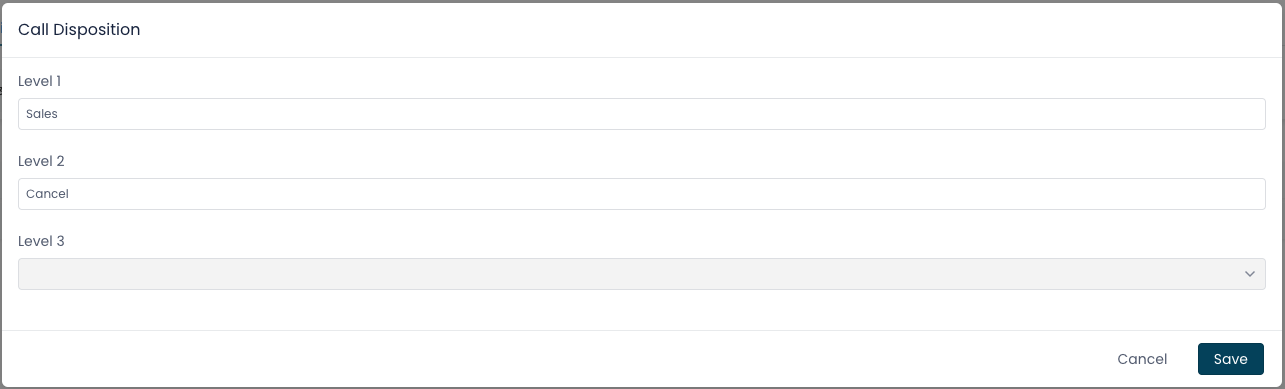
Once configured, upon the end of a contact, much like with single tier dispositions, the agent is presented a model with a variety of preconfigured selections.
As the agent selects an option at each tier, the list of options at the next tier is populated, allowing for further refinement, as depicted below:
Reporting, much like the single tier predecessor, will display both the Disposition in it’s own field as well as write it to the Attributes in the CTR, which can be used with external analytics solutions:


Multi level dispositions do not coexist with single tier dispositions, and upon enabling multi level dispositions, the single tier disposition feature will be disabled. Incidentally, upon disabling multi level dispositions, the single tier disposition feature is reenabled, which provides an easy migration path in the event you opt to roll back the capability.
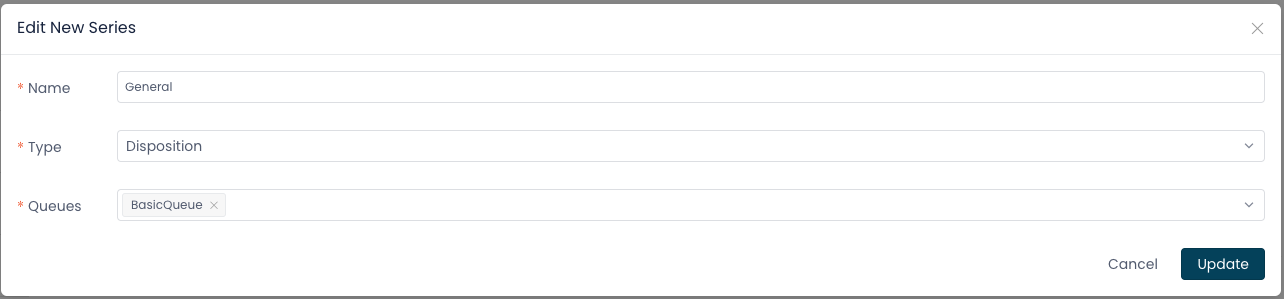
Once you enable dispositions, you are presented with a blank slate and start by clicking “Add new series”. The Series is where you would select the queue or queues to be used in the invocation of the multi level disposition prompt to the agent. You can also give it a name to refer back to. In our example we are going to create a general series, that may be used for catch all queues that may support both sales and support contacts:
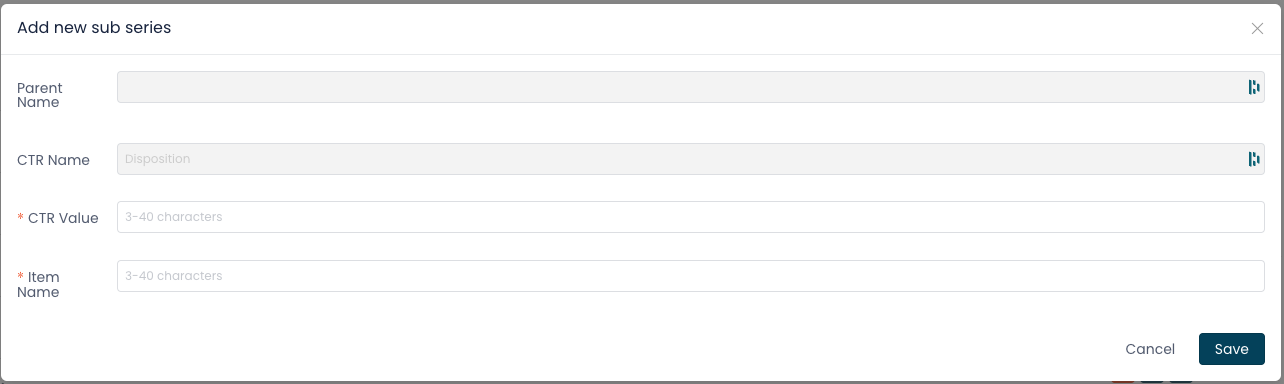
From here, you would add a sub series, starting at level 1, these would be the first tier of values that may be selected by an agent. You would specify the name (to be displayed to the agent) and the value to be written to the CTR:
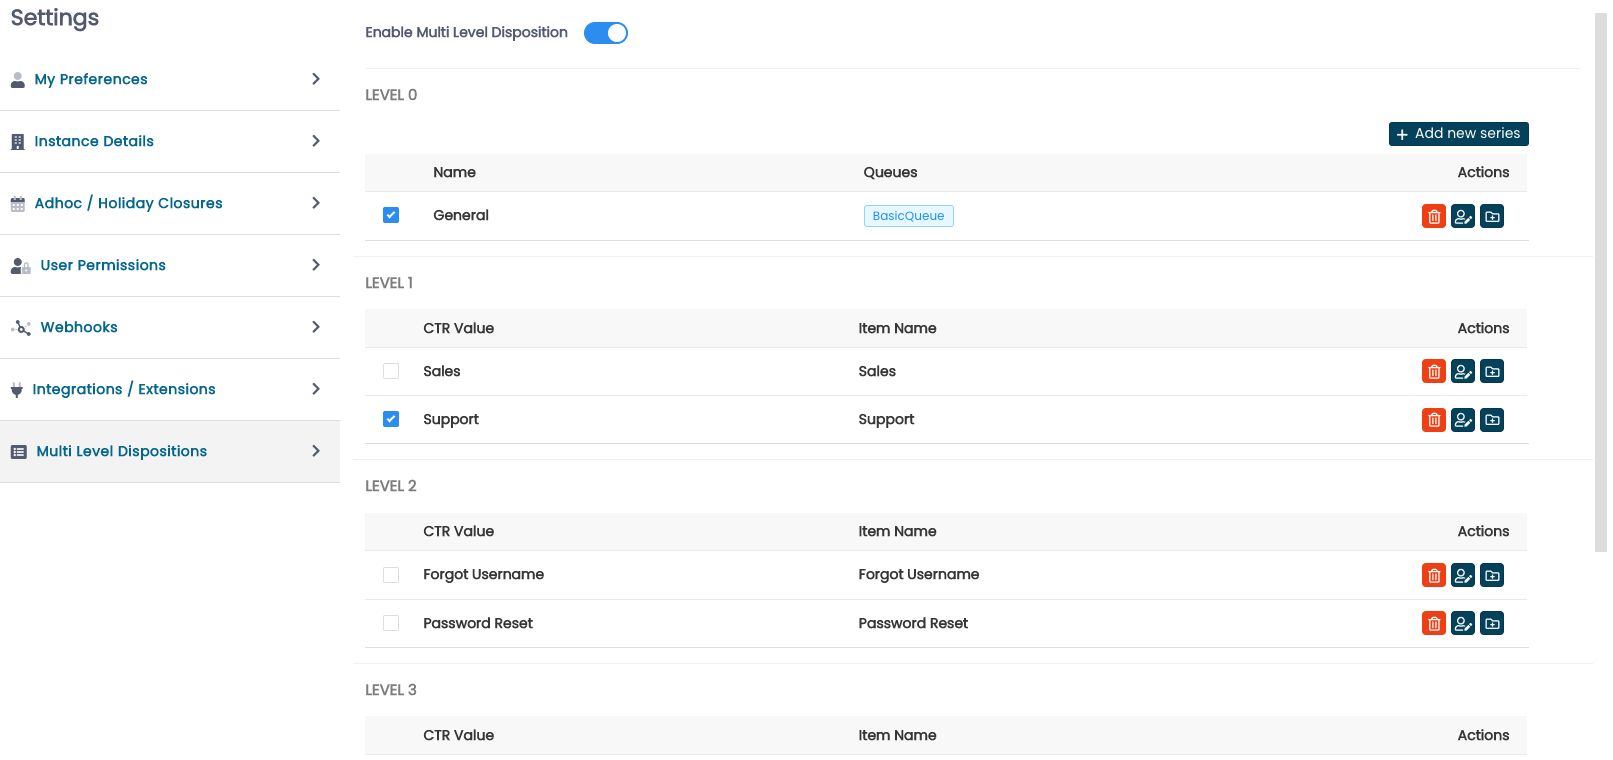
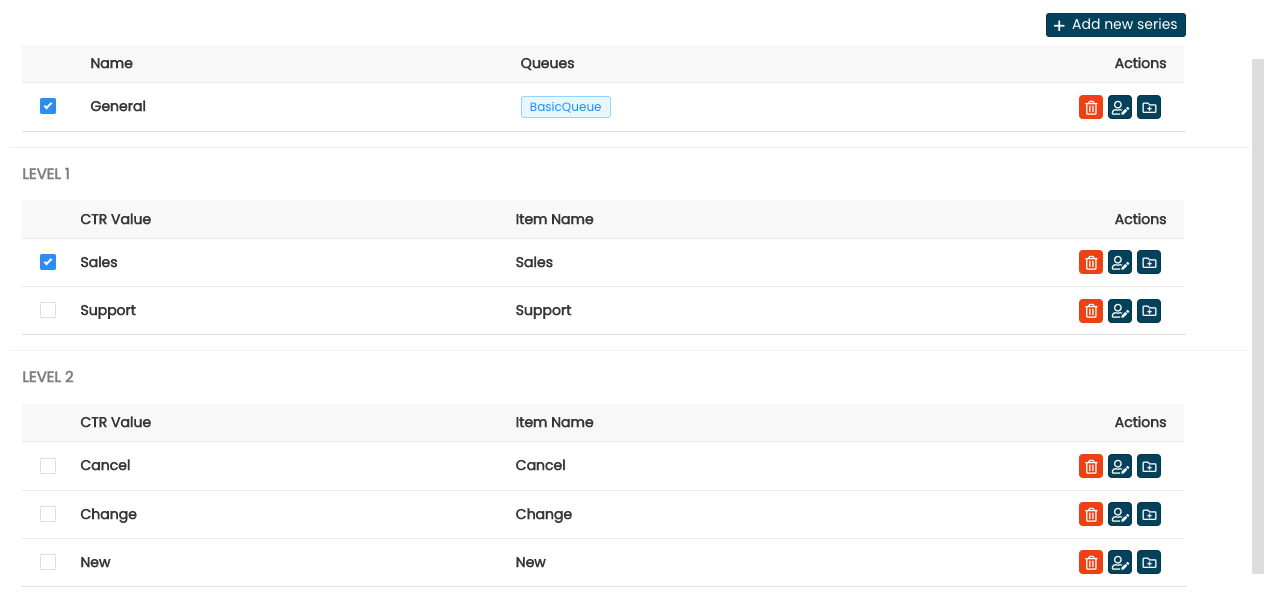
Once you have populated Level 1, you will notice each row has a checkbox beside it, checking this box will allow you to create or edit options at Levels 2 and Levels 3. Continuing with the theme above, Level 1 will be used to specify whether this was a Sales or Support call and Level 2, as displayed below, will provide options of Cancel, Change or New to agents who select the Sales option at Level 1:
Once you are satisfied with the new disposition structure, you can enable it using the “Enable Multi Level Dispositions” toggle located at the top of the series page.