ConnectPath - Two Way SMS/MMS Configuration with Twilio
This document will walk you through the initial setup of Twilio and ConnectPath to support the receipt of SMS and MMS messages from Twilio into ConnectPath as well as the origination of SMS and MMS messages from ConnectPath to Twilio.
It’s broken up into four sections so that users of ConnectPath who have already setup Twilio or setup ConnectPath to receive messages from Twilio but wish to send messages from ConnectPath to Twilio may jump straight to those sections.
SMS/MMS messages received from Twilio to ConnectPath, for new conversations, will utilize the Contact Flow specified under the Twilio Webhook configuration in ConnectPath. Once a conversation has been established, it will be pinned to that agent, via one or more tasks, until the agent ends the conversation, in which case subsequent messages from the same SMS/MMS number will result in a new conversation.
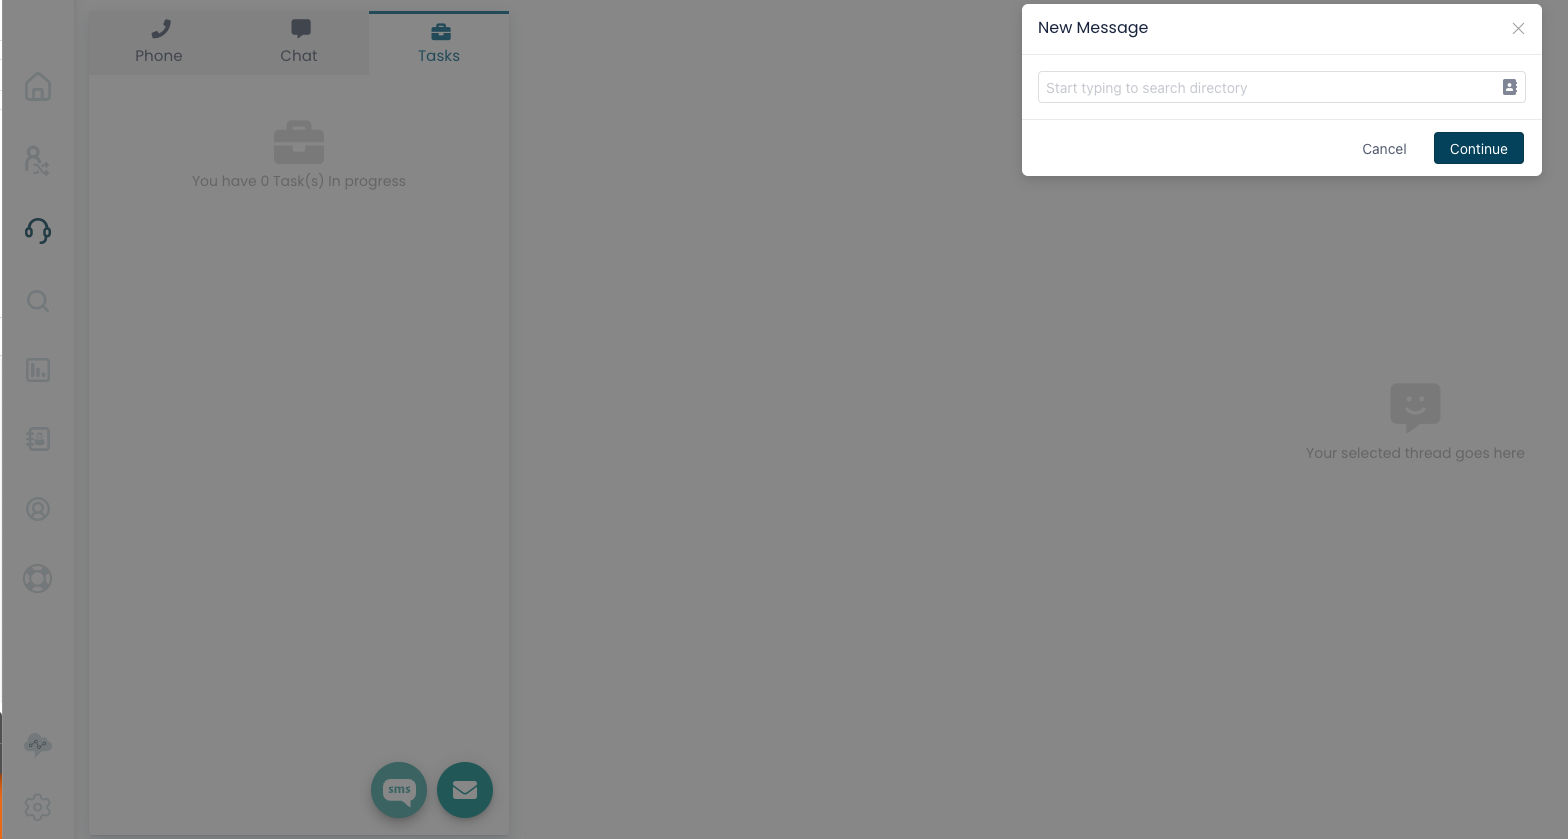
For SMS/MMS messages originated from ConnectPath to Twilio, the agent may initiate the message under the Engage tab by selecting Tasks and clicking on the SMS icon at the bottom of the screen. This will prompt the agent for a phone number and upon clicking continue, a Task will be created in Amazon Connect, routed to that agent and auto-accepted in ConnectPath. At that point the agent may start composing his/her message. This creates a new conversation, which follows the same rules as SMS/MMS messages received from Twilio, e.g. it is pinned to the agent until the agent ends the conversation:
Setup Twilio Webhook in ConnectPath
This step will generate the Webhook URL required in the Setup Twilio Step and provide ConnectPath the Twilio credentials required to respond to a conversation or create a new conversation with the Twilio APIs.
In ConnectPath, Under Settings, Webhooks, click +Webhook to begin creating your Twilio Webhook.
On the first screen, give it a name and description, and set the type to SMS and Provider to Twilio:

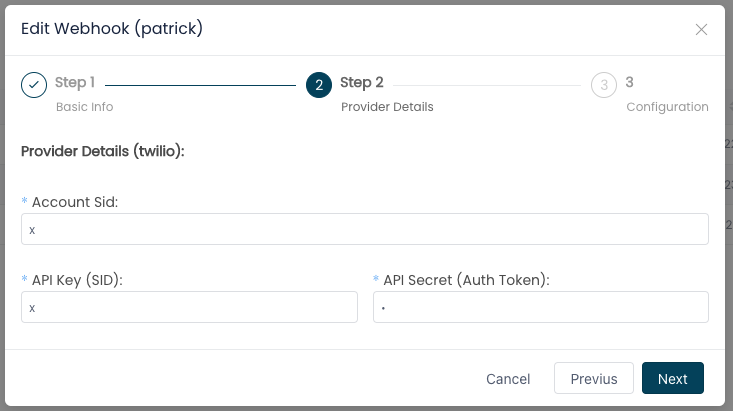
Click Next and enter the Account SID, API Key (both values are the same) and API Secret, which can be found on the Twilio Project’s dashboard:
Click Next:
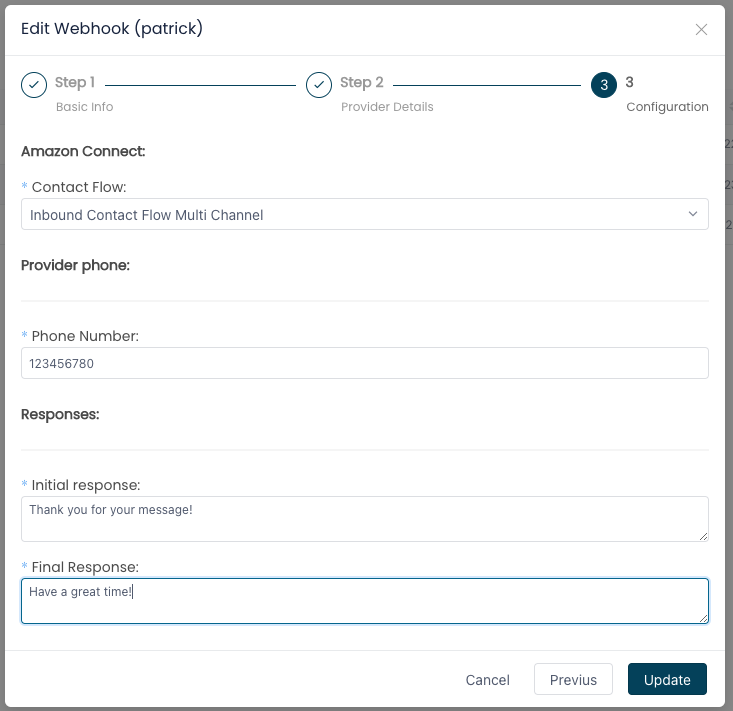
Finally, select a Contact Flow, Sample inbound flow (first contact experience), is an out of the box Contact Flow designed to work with Tasks, and can be used or modeled to customize your own Contact Flow, enter the default SMS/MMS phone number to use when originating SMS/MMS messages from ConnectPath (e.164 format without the leading +), and then messages for Initial and Final Responses:
Once done, click Update.
This completes the creation of the Twilio Webhook in ConnectPath.
Setup Twilio
For conciseness, the steps in signing up for Twilio, creating a Project in Twilio, adding a payment method to that Twilio Project, validation of your contact details and other prerequisite steps required to acquire a 10-digit number (regulatory) or non 10-digit number are not covered here.
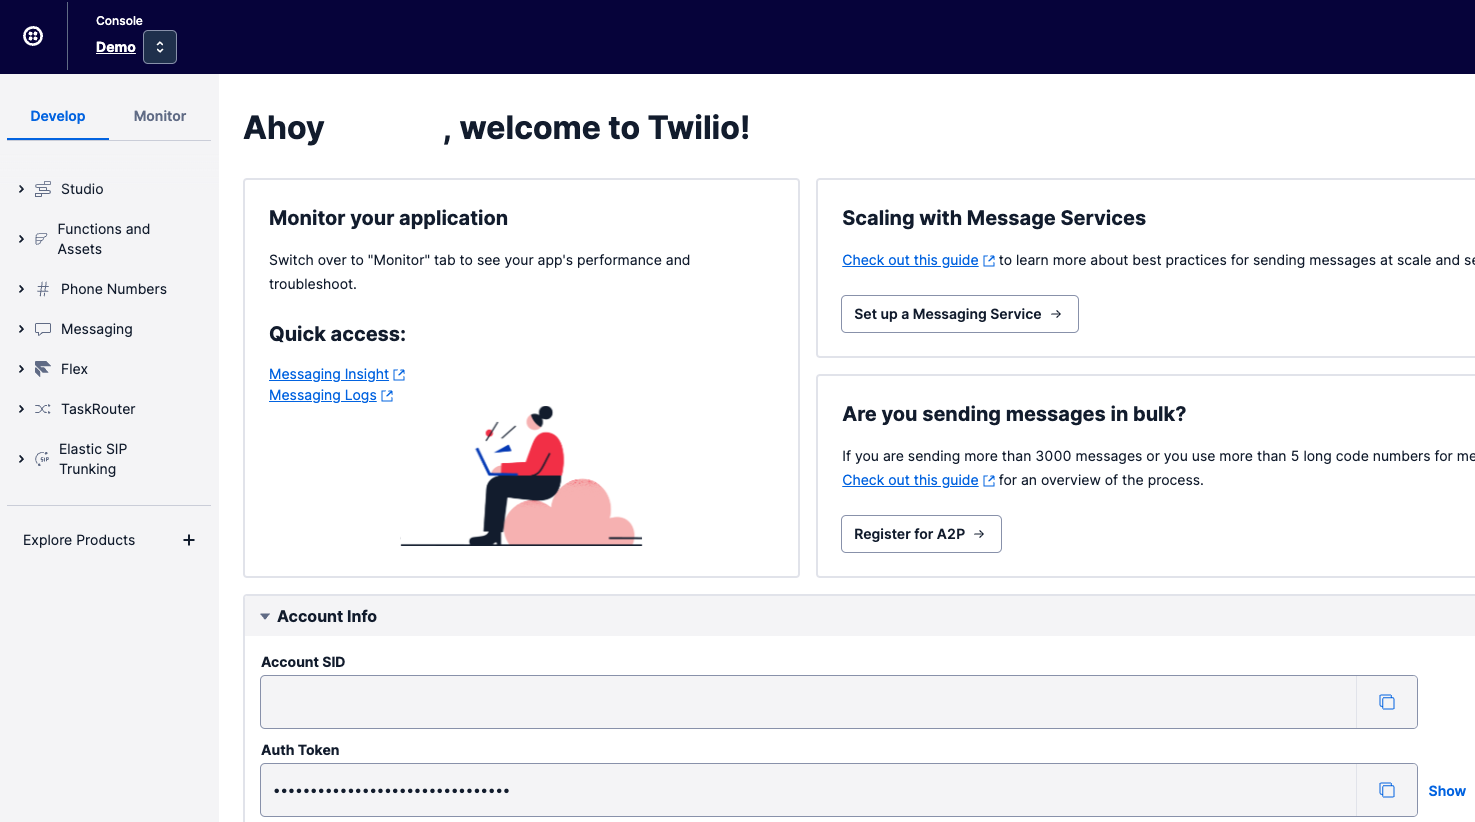
On your Twilio Project’s dashboard, note the Account SID and Auth Token – you’ll need to provide this information when you setup the Twilio Webhook in ConnectPath:
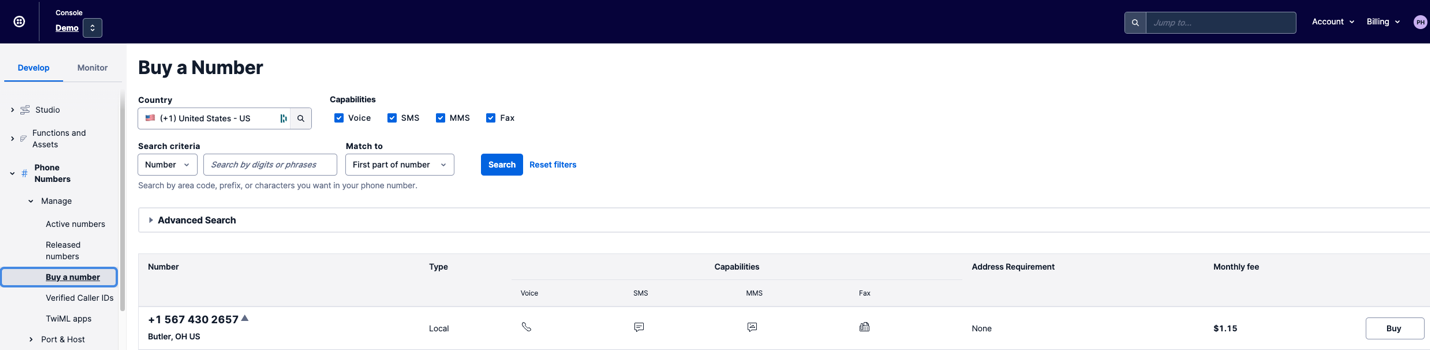
Under Phone Numbers, then Buy a number, find a number that suits your needs (Country, criteria, etc.) that supports SMS and MMS:
Under Messaging, then Services, click Create Messaging Service. Upon doing so, you will be presented with the following screen:
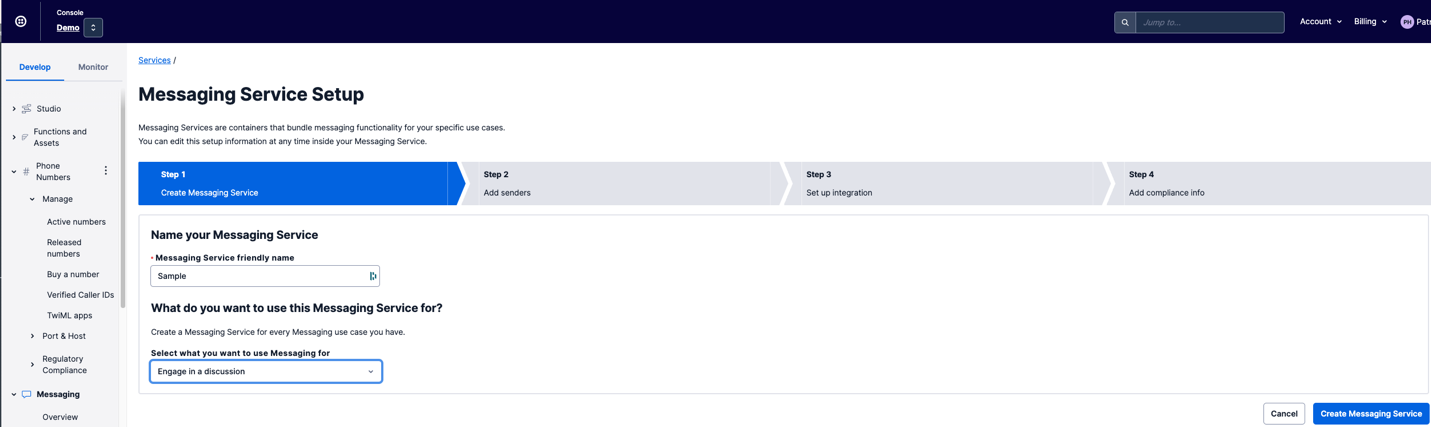
Name your messaging service and then select “Engage in a discussion” as the Messaging Service use case. After that, click Create Messaging Service, then Add Senders, and you will be presented with the following screen:
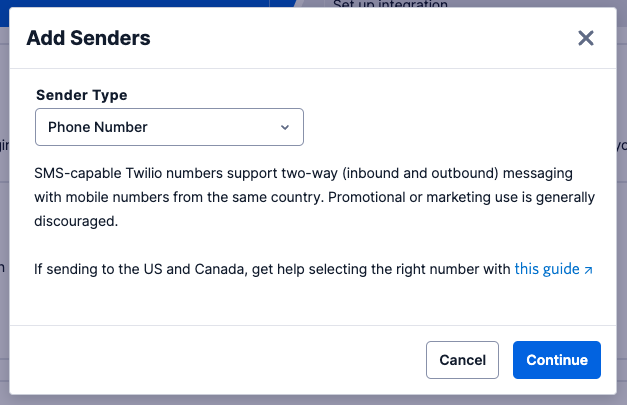
Select Phone Number, then Continue, and you will be presented with the following screen:
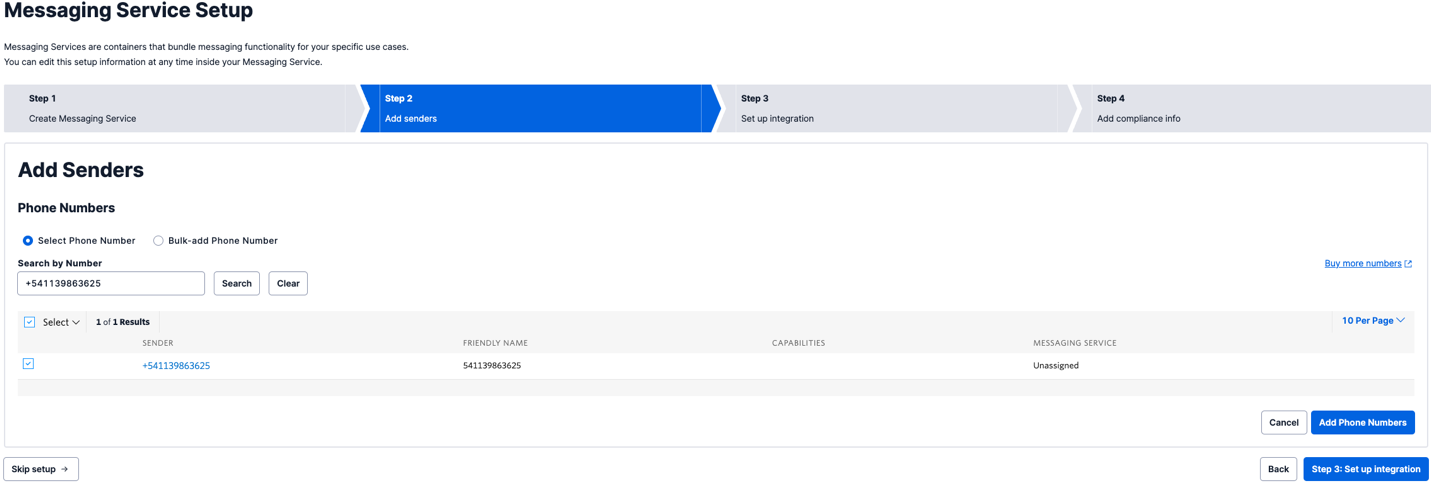
Select the phone number you acquired in a prior step, click Add Phone Numbers, then click Set up integration:
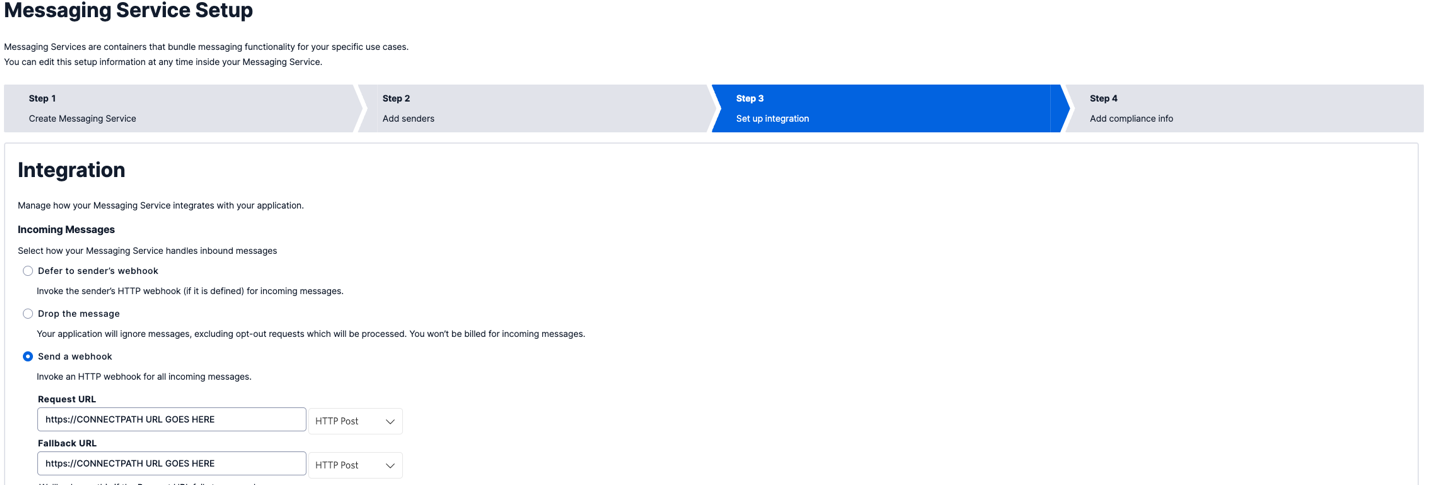
Select the radio button “Send a webhook” and enter the URL provided in the ConnectPath Twilio Webhook Screen (more details are under the “Setup Twilio Webhook in ConnectPath”
step) in the Request URL and Fallback URL fields. Once done click Add Compliance Info and you will be presented with the following screen:
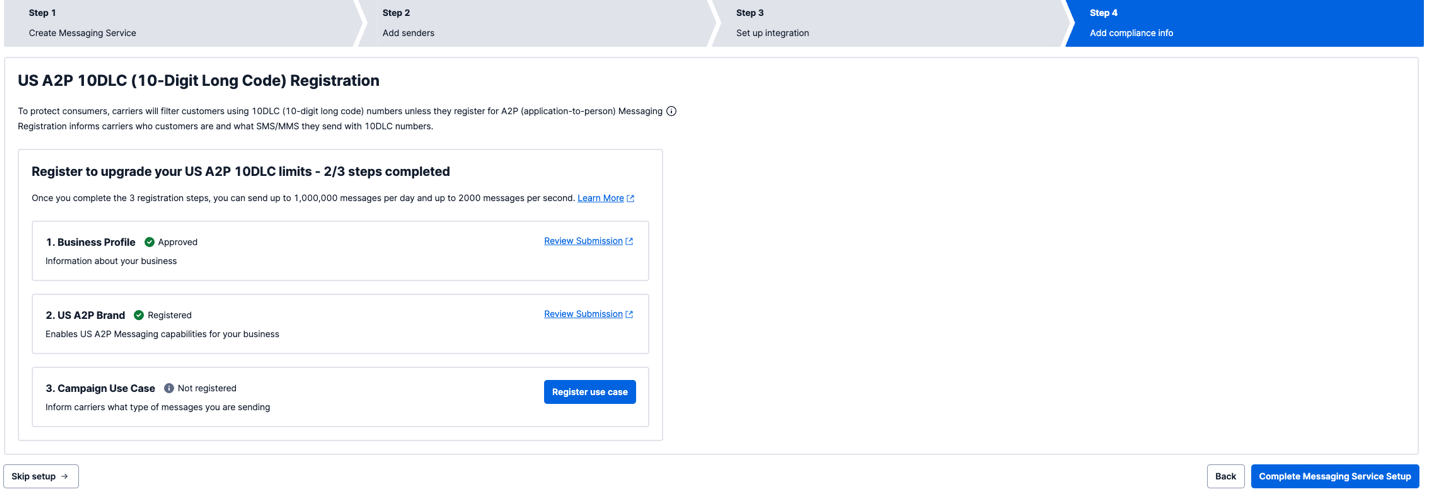
Finally, click Complete Messaging Service Setup.
At this point you have completed the steps required to provision an SMS/MMS phone number in Twilio and integrate it with ConnectPath via the Twilio Messaging Service API.
Create outbound Contact Flow in Amazon Connect
For SMS and MMS messages initiated by an Agent in ConnectPath, a Contact Flow is utilized to route the subsequent Task to the agent initiating the outbound message and as such you will need to create a simple Contact Flow in Amazon Connect
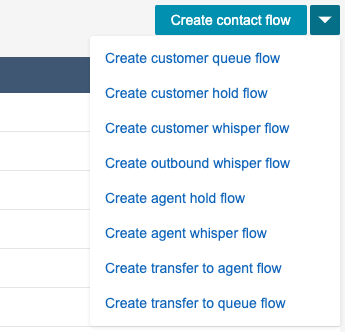
In the Amazon Connect Console, go to Contact Flows and then Click Create contact flow, the default type of Contact Flow is sufficient and there is no need to select one of the other options present:
In the new Contact Flow screen, select Import, and then select the file downloaded from HERE


Finally, select Save and Publish, setting the name or noting the name of the Contact Flow
This completes the creation of the Contact Flow required by ConnectPath for originating SMS/MMS messages from ConnectPath to Twilio.
Setup Contact Flow in ConnectPath for Outbound Usage
This step will set the Contact Flow, created in the previous step, as the default one utilized when originating an SMS/MMS message from ConnectPath.
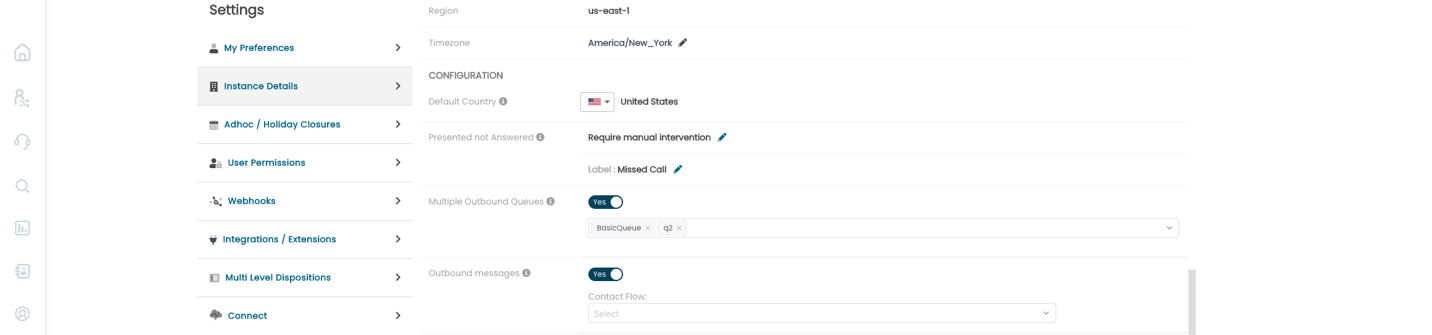
Under Settings, Instance Details, set the Outbound messages toggle to Yes and select the Contact Flow previously created (default name is “Assign to Agent”):
Upon selecting the Contact Flow, the preference should be saved automatically, and no additional steps are required to enable the functionality.
This concludes the setup steps required to enable Two Way SMS/MMS with Twilio in ConnectPath.