Pinpoint (SMS) ConnectPath Integration (Chat)
This document will walk you through the initial setup of Pinpoint and ConnectPath to support the receipt of SMS messages from Pinpoint into ConnectPath. ConnectPath now supports the integration of Amazon Pinpoint and ConnectPath via Amazon Connect Chat. This is a change in approach from our other “Webhook” based integrations, such as Twilio that use Tasks. With Chat, we can natively store and analyze the transcript as well as perform advanced routing of the request through Contact Flows, including ones with Lex. Pinpoint provides an alternative to other SMS providers in that it’s fully integrated into AWS, does not requiring an establish account and usage is charged on demand to the same AWS account as your Amazon Connect Instance.
For conciseness, the steps in signing up for creating the Pinpoint Project, requesting a number, registering a number and exiting the Pinpoint sandbox are not covered here, however, in a future release, we will support, where possible, the automatic execution of these steps. While in the Pinpoint project, note the Pinpoint Application ID (https://docs.aws.amazon.com/pinpoint/latest/apireference/apps-application-id.html) and Number (prefixed with a 1 for the country code) that you wish to use for SMS.
Once the project is created, with the phone number, you will proceed to the ConnectPath Settings then Instance Settings and begin the integration steps.
Go to the integrations screen and start the three-step process:
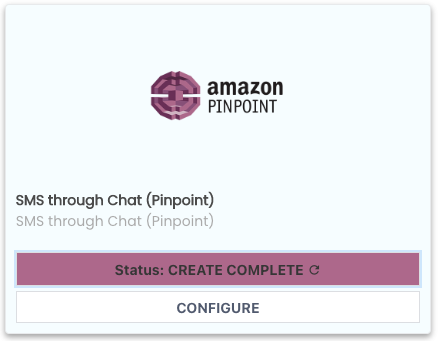
Locate the Amazon Pinpoint card, note that the status will not show create complete until you complete the three-step process. To begin, click Configure.
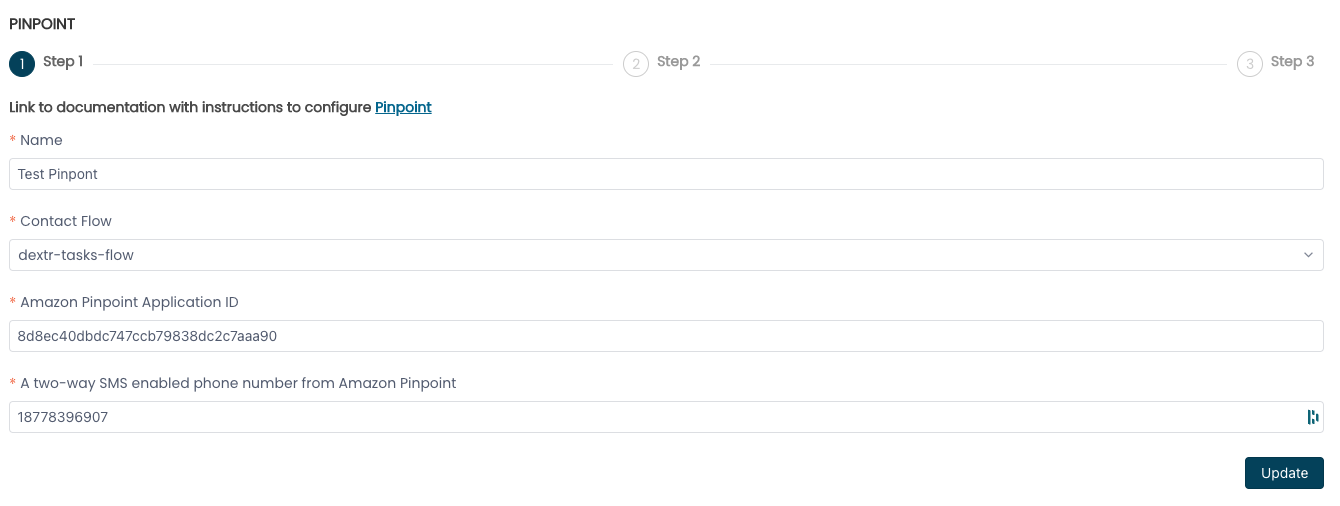
On the first screen, you will give the integration a name, and then enter the Contact Flow, Application ID (https://docs.aws.amazon.com/pinpoint/latest/apireference/apps-application-id.html) and Number (prefixed with a 1 for the country code) previously noted. As this creates a Chat Contact, you’ll want to use a Contact Flow designed for Chat and not voice (e.g. shouldn’t ask for DTMF, etc.). The out of the box Contact Flow is suitable for test or customization purposes.
Once done and you click next step, you’ll be presented with the option to deploy the CloudFormation Stack:

Upon clicking Deploy you will be taken to a new browser window, in which you can deploy the integration CloudFormation Stack, like how you deployed the baseline ConnectPath CloudFormation Stack when you onboarded your Amazon Connect Instance to CloudFormation.
Follow the steps in the CloudFormation console and when deployment has finished, you can go back to the ConnectPath screen you left off on, Click Next and then Validate. Once status shows Create Complete you may click Finish, which finishes the three-step process:

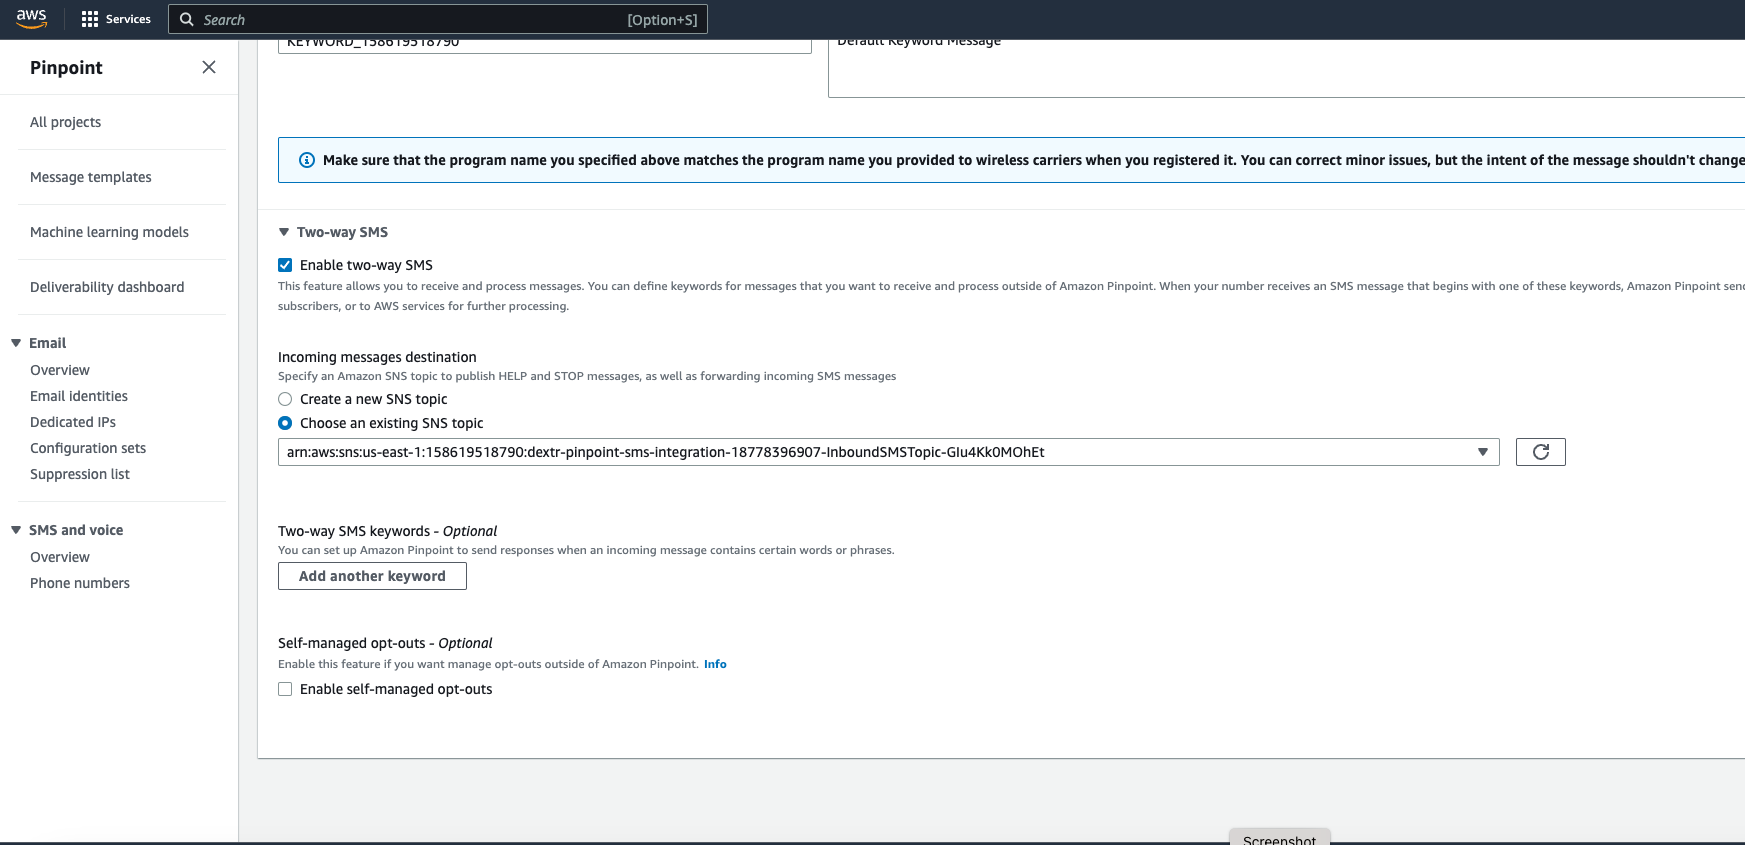
The CloudFormation stack creates additional AWS Resources in your Amazon Connect Account required to send and receive SMS messages between the Pinpoint number in your Pinpoint project and ConnectPath. One of these resources is an SNS Topic that you will need to point the number to.
To do that, go to the Pinpoint Project and the number, check the Enable two-way SMS box and select the Incoming messages destination of "…InboundSMSTopic…":
This concludes the setup steps required to enable Two Way SMS/MMS with Twilio in ConnectPath.