Microsoft Dynamics Integration
Microsoft Dynamics Integration
ConnectPath supports integration of Microsoft Dynamics integrating the full lifecycle of the contact (from start to finish) on both the backend (data) and frontend (agent) interfaces.
At each step of the contact (creation of the contact, termination of the contact and availability of the recording/analysis) the appropriate Dynamics record is created or updated. When the contact is routed to the agent, the appropriate Dynamics record is opened in ConnectPath, either as an embedded application or in a new browser tab.
Setup comprises three parts: Creation of an Azure AD Application Registration, applying the correct permissions to the Azure AD Application ID within Dynamics and configuration of the integration within ConnectPath.
Creation of an Azure AD Application Registration.
As far as Azure configuration goes, the steps will result in you generating a Client Secret, Client ID, and Tenant ID that you will use to configure ConnectPath. The steps are as follows.
Note that these steps are similar if you are using Office 365 OAUTH for E-Mail Webhook SMTP, or Microsoft Teams except for the API Permissions.
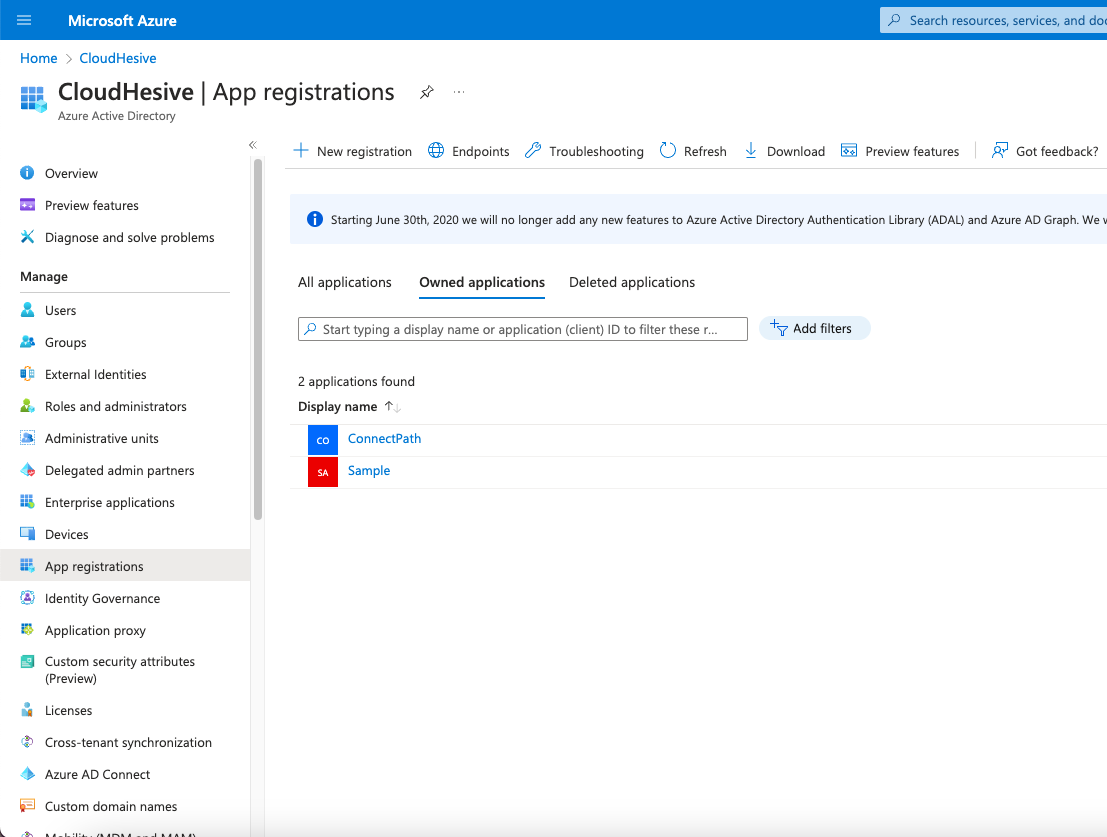
Under Azure Active Directory, go to App registrations and click New registration:
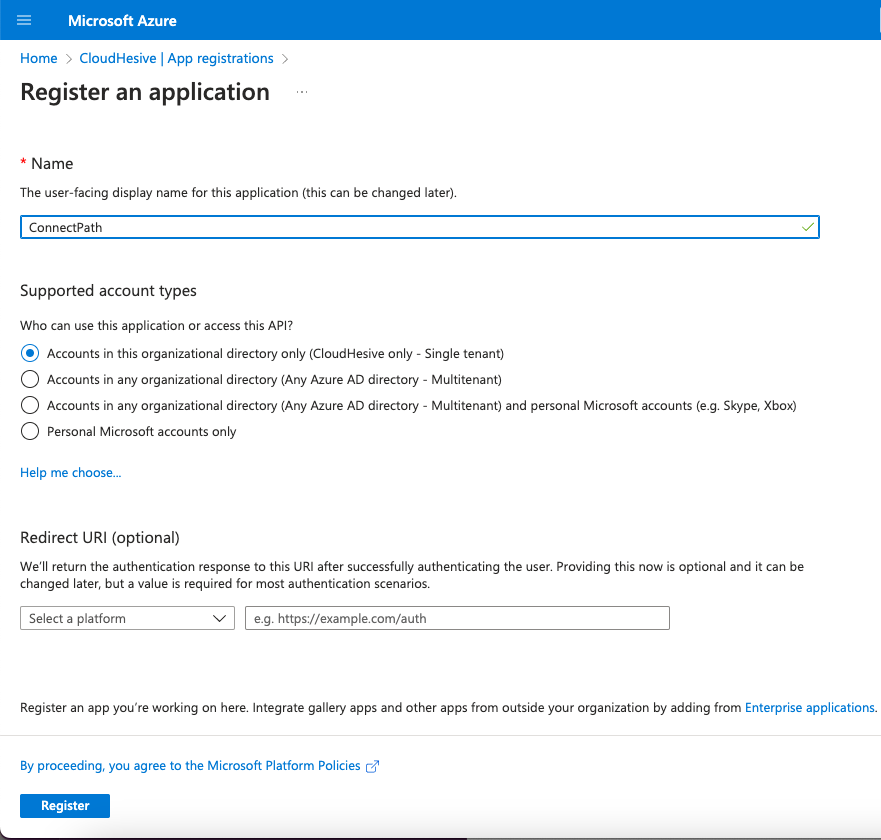
Enter a name for this App registration and click Register.
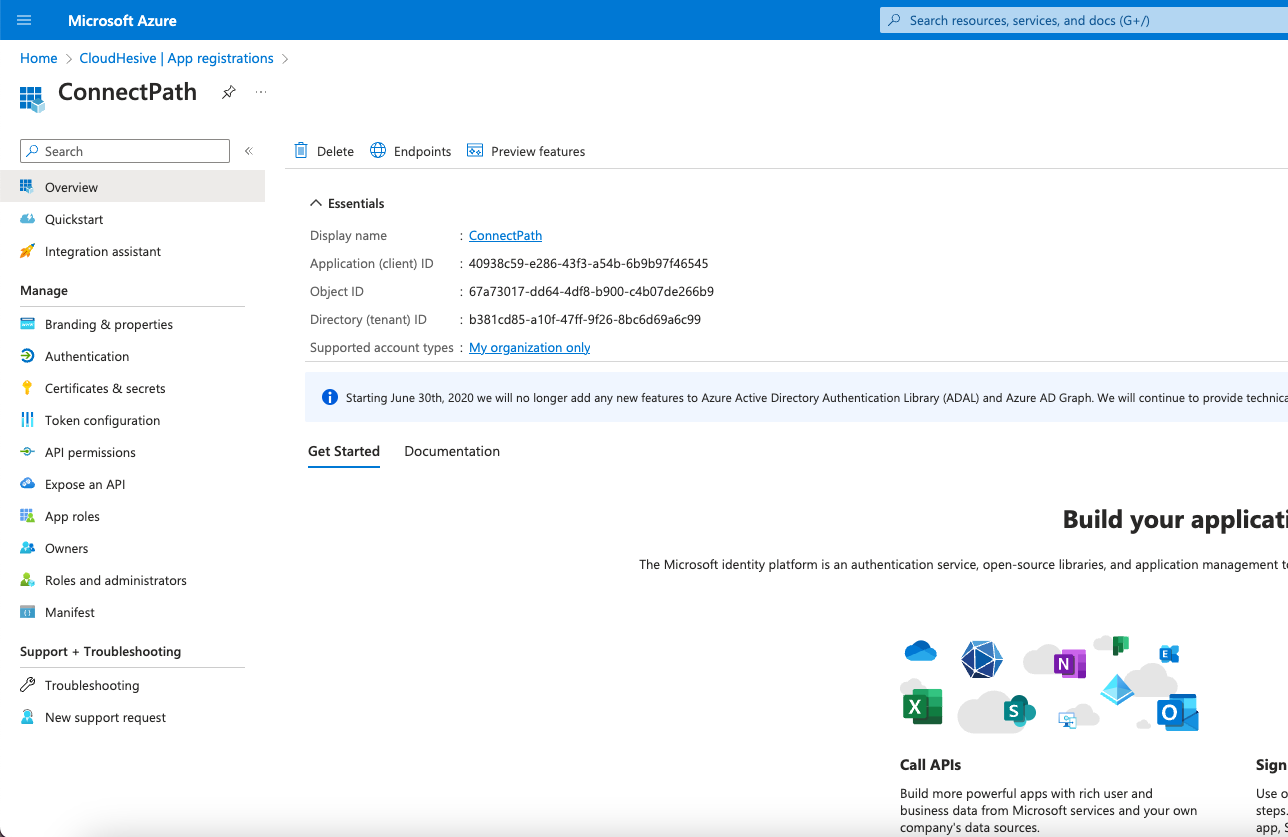
On the Overview screen of the App registration, note the Application (client) ID and Directory (tenant) ID as you will need those when you setup the ConnectPath portion.
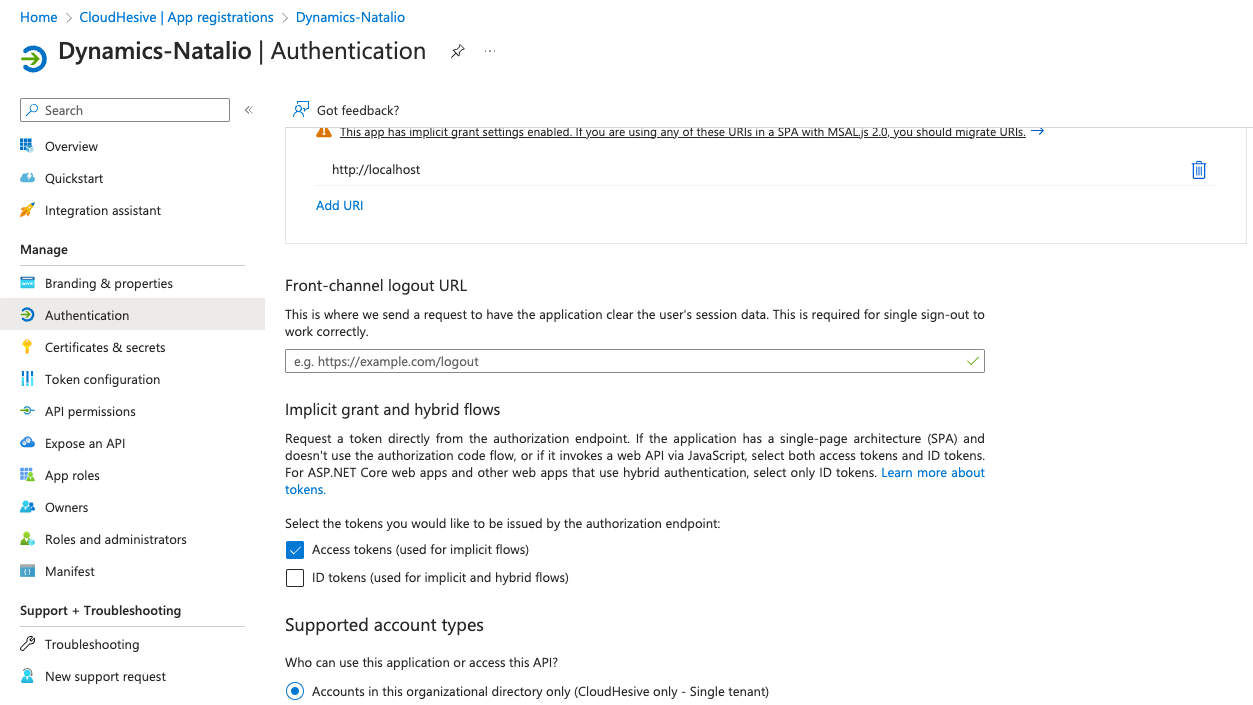
Go to Authentication and check the box for Access tokens:
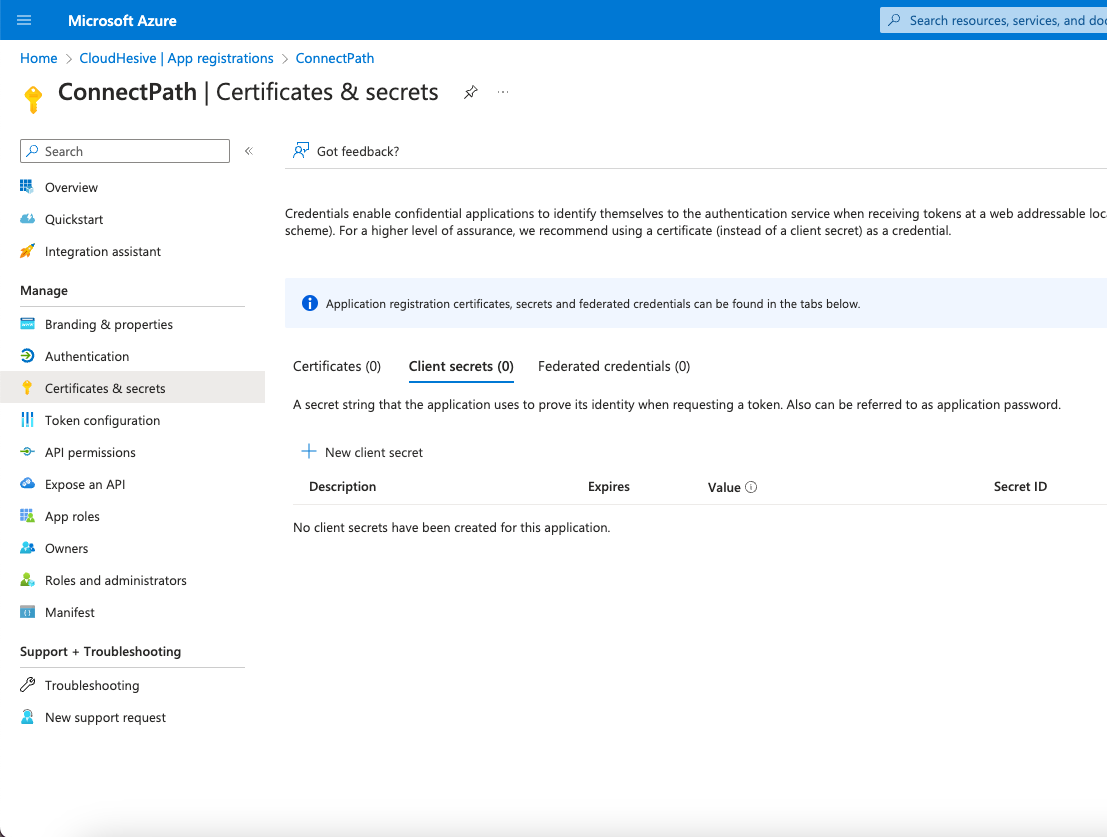
Go to Certificates & secrets and click + New client secret.
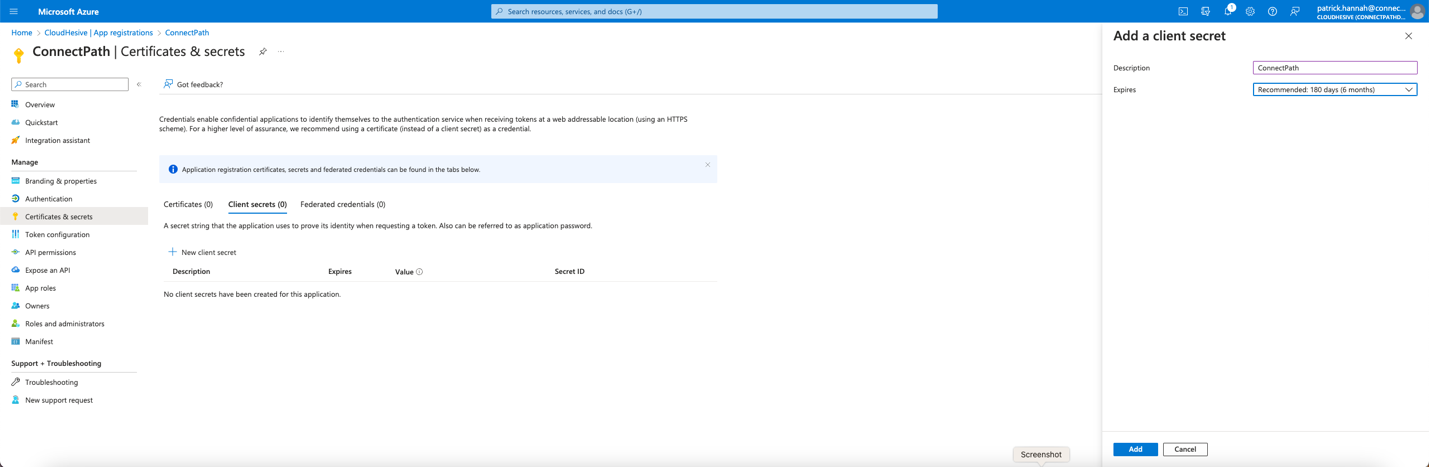
Give the client secret a name and set an expiration period (note that you will need to generate a new client secret ahead of this expiration period and update ConnectPath to avoid disruption when using the Microsoft Dynamics Integration with ConnectPath).
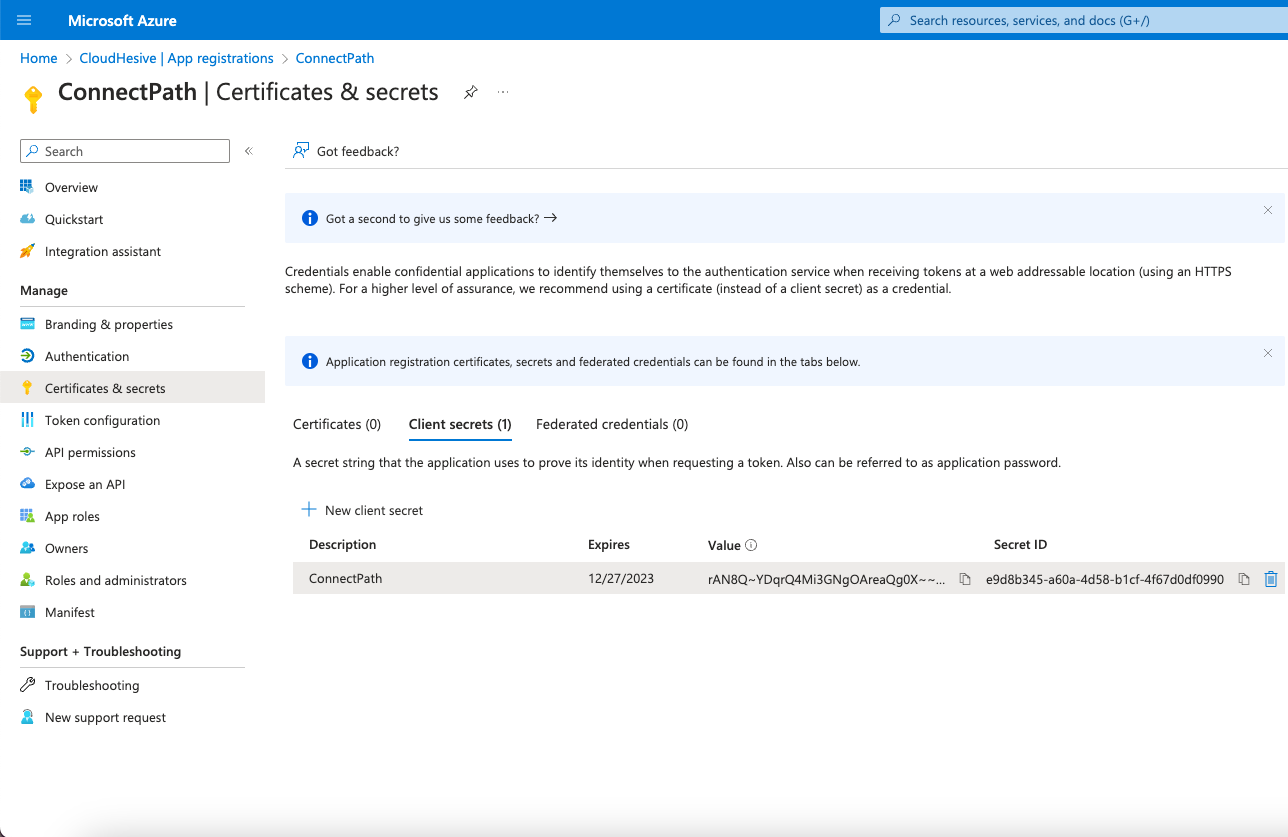
Note the Client Secret VALUE (not ID) as you will use that when you configure ConnectPath.
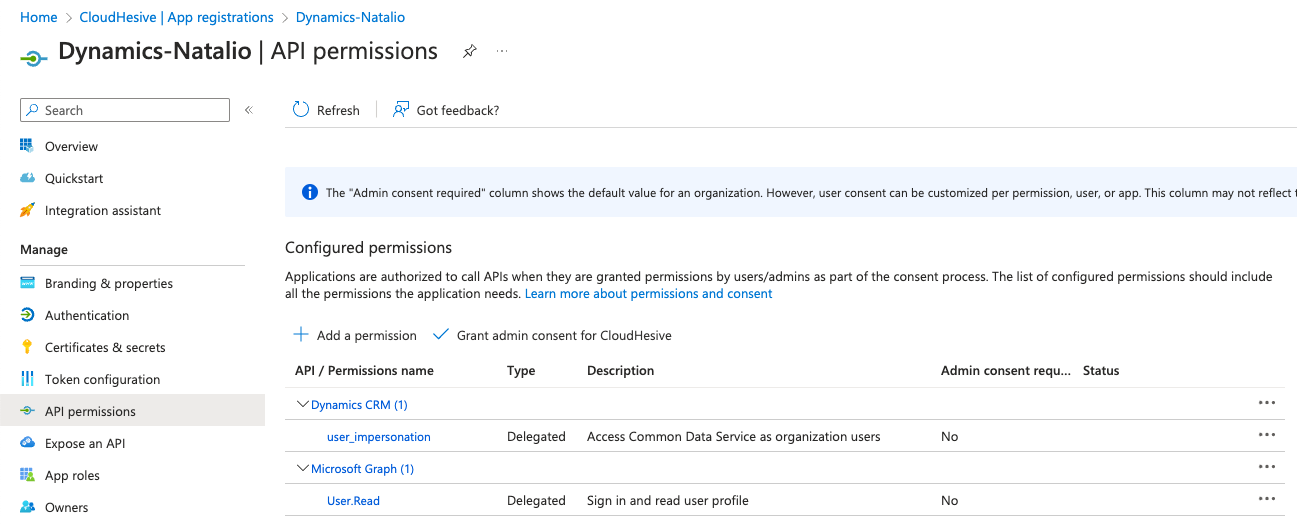
Go to API Permissions, click Add a permission, select Dyanmics CRM, select Delegated, search for user_impersonation and add it to the App. Once added click Grant admin consent for CloudHesive. Once these two steps are completed, your API permissions screen should look like the following. Note the Microsoft Graph Delegated Permission of user.read should be present by default:
Go to Expose an API and enter and create a Default scope with Admin and user consent. Note the Application ID URI will correspond to the Azure AD Application Registration ID and may be populated by default.
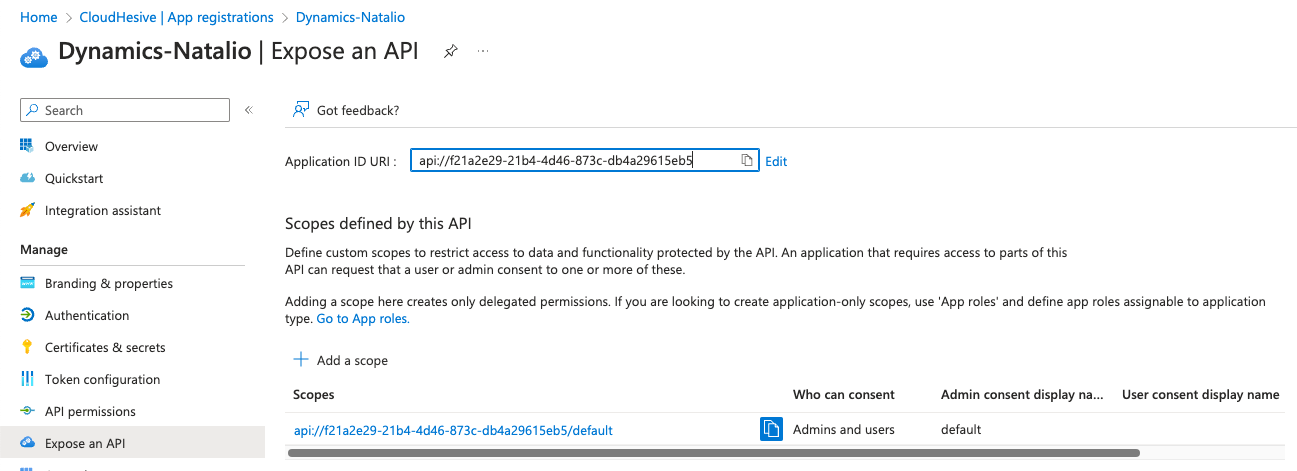
This completes the creation of the Azure AD Application Registration.
Applying the correct permissions to the Azure AD Application ID within Dynamics.
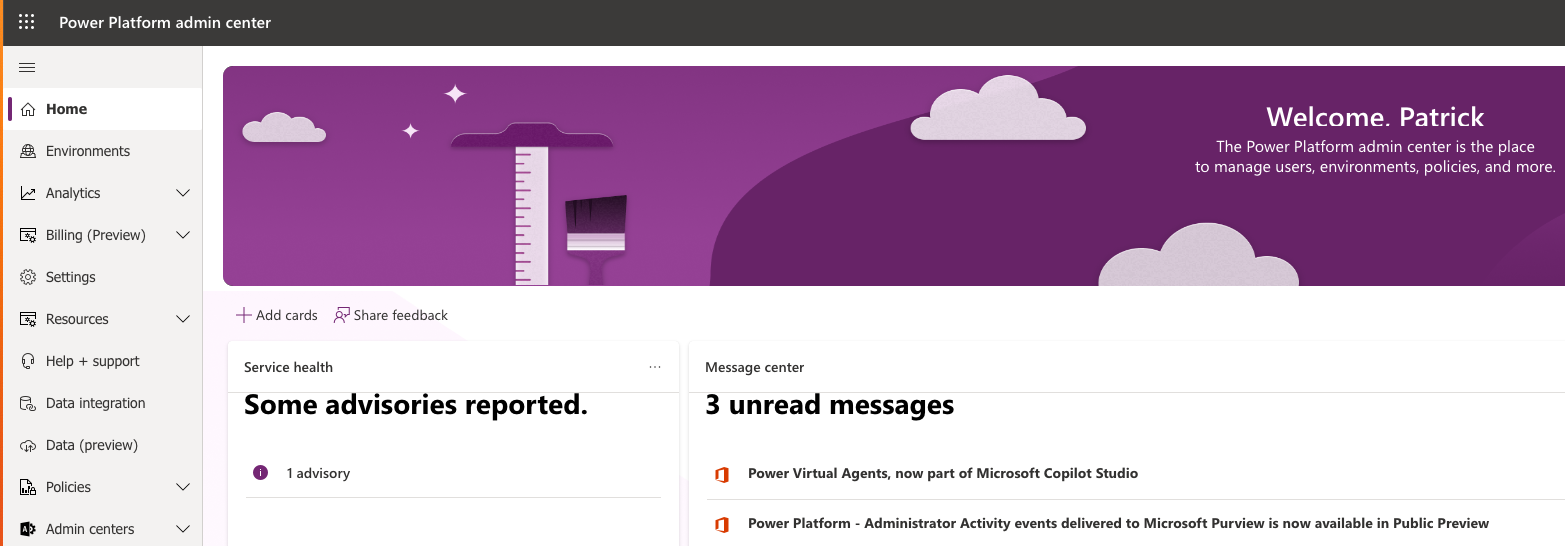
After the Azure AD Application Registration has been completed, you will need to apply the correct permissions to this Application within Dynamics. To do that you will go to the Power platform admin center:
Then, you will go to Environments:
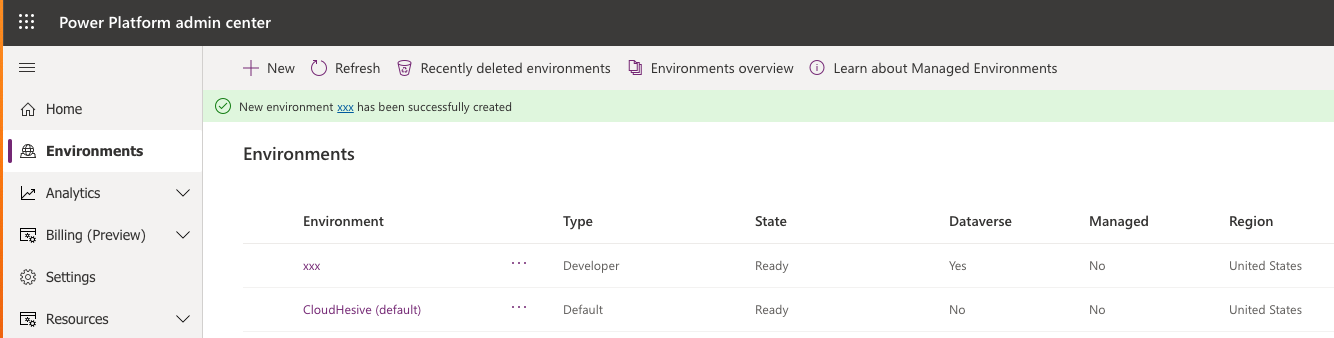
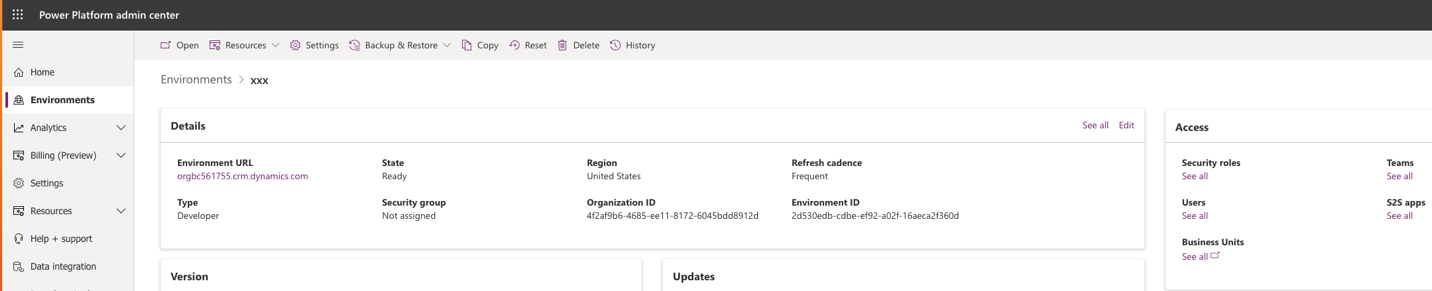
After that, you will open the Environment that you wish to integrate ConnectPath with and click See all under S2S Apps:
Then, you will click new App user:
Select the Azure AD Application you previously created:

Assign the user to the appropriate Business Unit and Security role and Click Create:

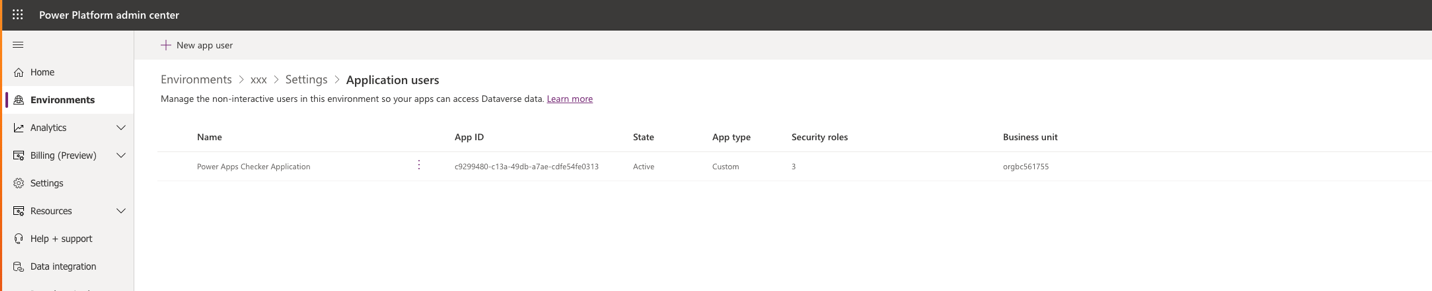
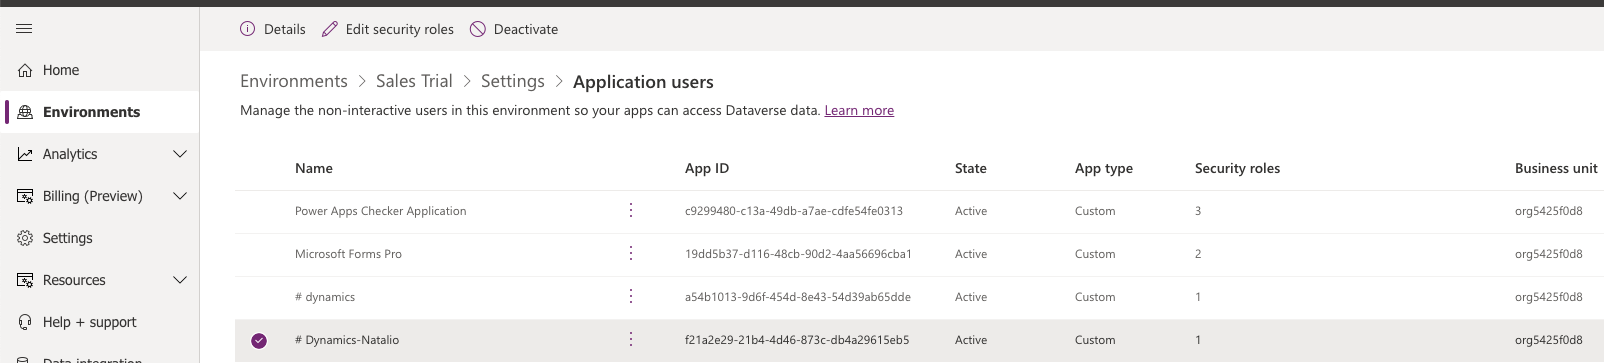
Verify that the Application user was added:
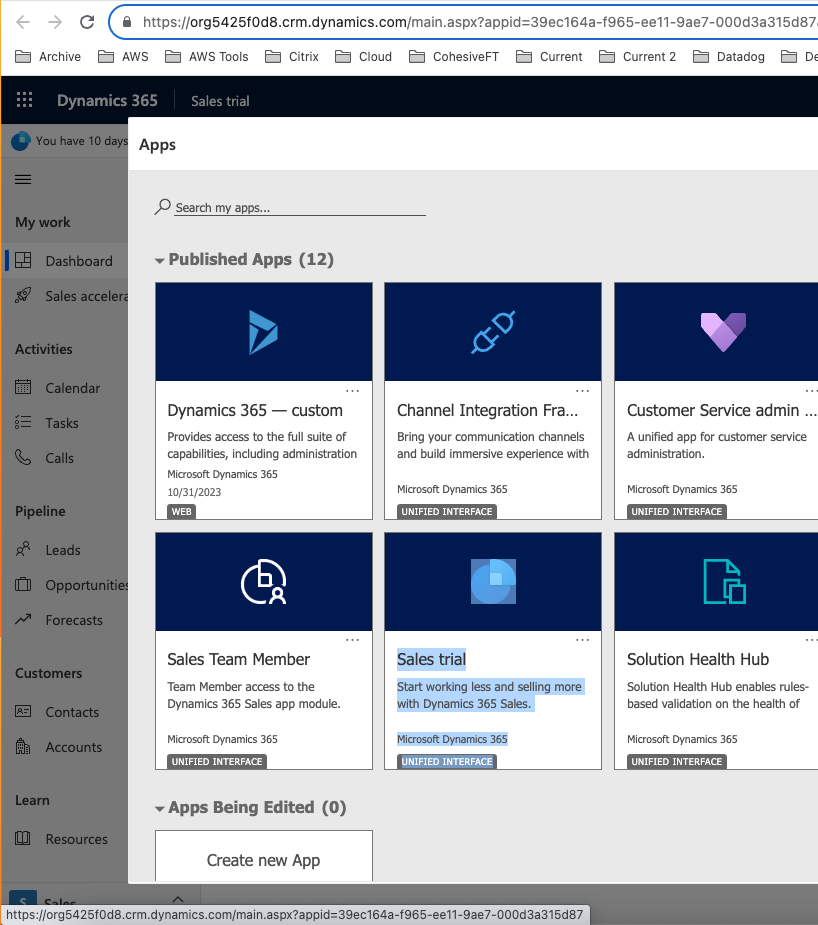
After you have completed that step, you will need to note the Dynamics App ID (not to be confused with the Azure App ID). To get the Dynamics App ID, log into Dynamics and use the App Switcher to find the Dynamics App that you wish to integrate with ConnectPath. Place your cursor over that App to get the App ID:
This completes the application of the correct permissions to the Azure AD Application ID within Dynamics.
Configuration of the Integration within ConnectPath.
After the application of the correct permissions to the Azure AD Application ID within Dynamics you may proceed with configuration of integration within ConnectPath by following these steps:
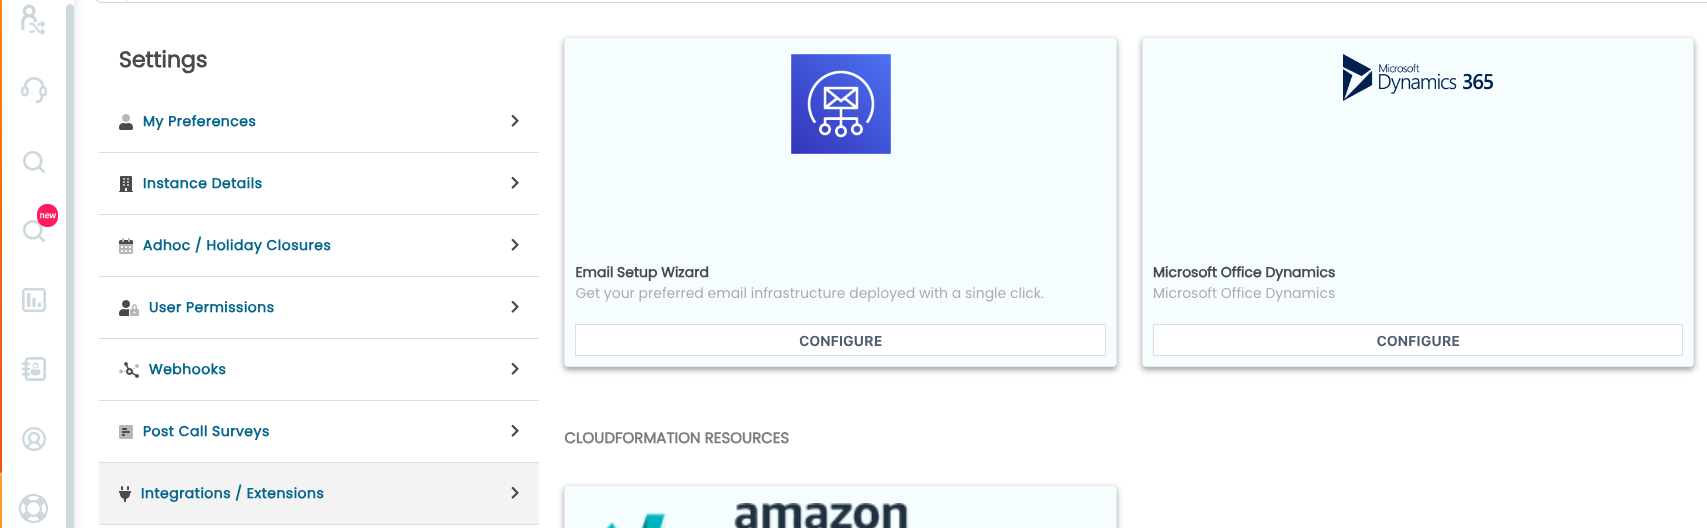
Go to Settings, then Integrations, scroll down until you see Microsoft Dynamics and click Configure:
This will initiate the multi-step setup Wizard.
On Step 1 you’ll provide the Dynamics environment details:
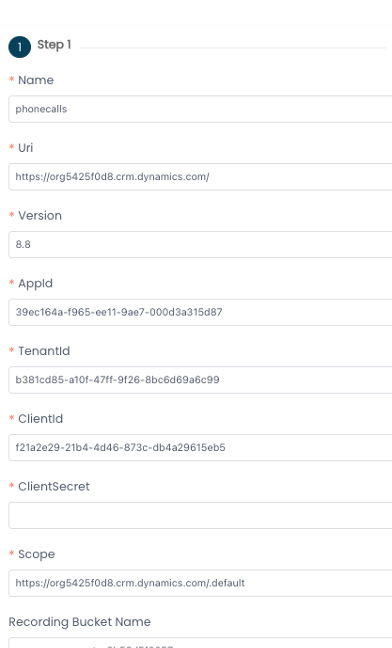
This includes the name of the integration, the Uri for the Dynamics environment, the version of the Dynamics API that you wish to use, the Dynamics App ID that you noted previously, the Azure AD Tenant ID, Client ID and Client Secret that you noted previously and the Scope, which tis the Uri with .default appended to the end. The Recording Bucket Name is the S3 bucket that Amazon Connect stores Recordings and Analysis (Transcripts) in.
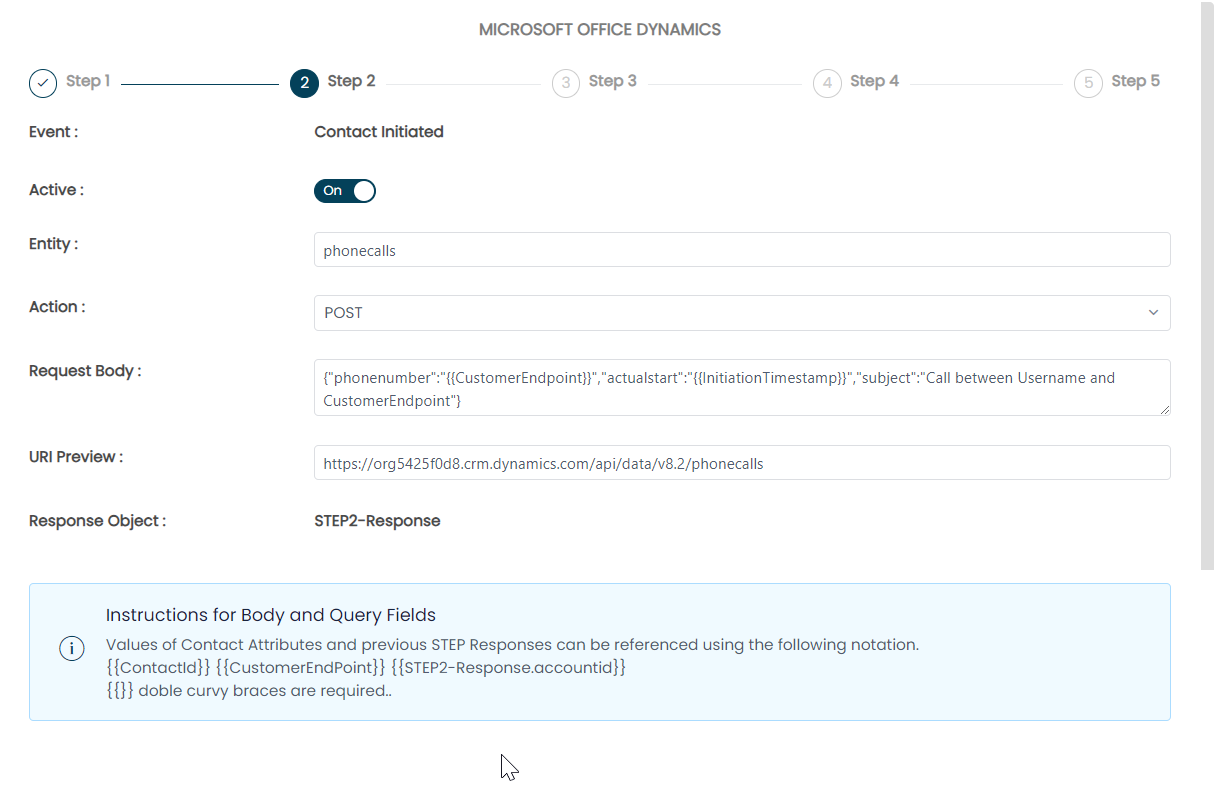
On Step 2, you will provide the details that will be passed to Dynamics when the contact is created. This creates the record in Dynamics, passing the CTR attributes to the Dynamics API at the creation of the contact. In this example we are creating a record in the phonecalls entity that contains the customer’s phone number in the phonenumber field, the time the contact started in the actualstart field and the subject of the phone call.
Attributes as they come from Amazon Connect must be quoted and wrapped in double curly braces like this “”, whereas Dynamics fields and static values only need quoted. The entire body needs to be formatted as JSON in that multiple key value pairs are separated by commas, a key and a value are separated by a colon and the entire body is wrapped in curly braces.
The example below can be copied from here:
{"phonenumber":"","actualstart":"","subject":"Call between Username and CustomerEndpoint"}
Based on your specific implementation, you may select Get, Post or Patch methods.
Microsoft documentation around Dynamics entities can be found here: https://learn.microsoft.com/en-us/power-apps/developer/data-platform/webapi/reference/phonecall?view=dataverse-latest and documentation around OData, which is how ConnectPath integrations to Dynamics via APIs can be found here: https://learn.microsoft.com/en-us/dynamics365/fin-ops-core/dev-itpro/data-entities/odata
You will also note that there is a preview of the URI to be called as well as a Response Object. The Response Object can be requested in the steps following this step and an application of this object will be explained in Step 3.
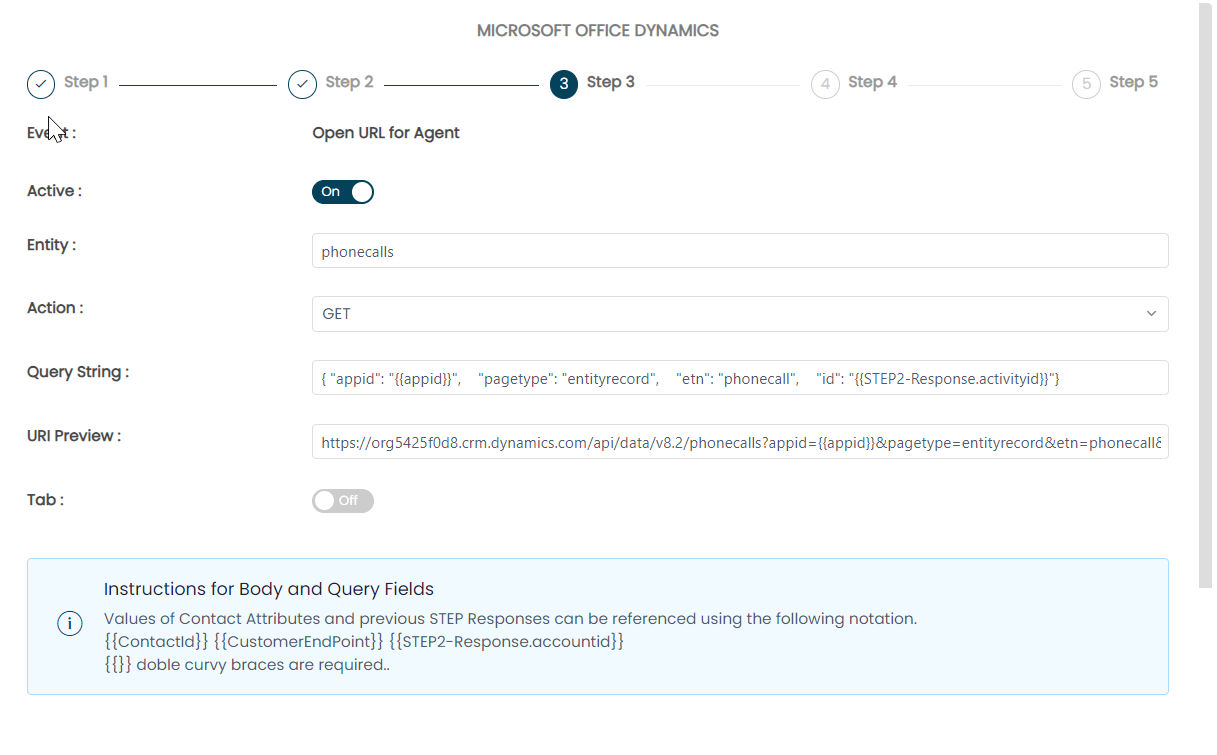
On Step 3, you will provide the details that will be passed to Dynamics when the call is answered (or made) by the agent. This opens the record in Dynamics, in the browser, passing the CTR attributes or attributes from the previous step to the Dynamics API when the record is opened. You may opt to embed Dynamics within the Engage page in ConnectPath or open Dynamics in a new tab using the Tab toggle.
The remaining sections in Step 3 reflect that in Step 2, but here you can see we use the STEP2-Response Response Object to reference a value received from the previous API request to Dynamics.
In this specific example we are opening the record created in Step 2, which is based on the phonecalls entity, within ConnectPath. This step is different as the action is occurring within the ConnectPath user interface whereas the other actions are occurring within the backend of ConnectPath to the Dynamics API.
If you are unsure how to format the URI, you may open the corresponding record within Dynamics and inspect the URL in the Address bar.
The example below can be copied from here:
Query String: { "appid": "", "pagetype": "entityrecord", "etn": "phonecall", "id": ""}
On Step 4, you will provide the details that will be passed to Dynamics when the call is ended by agent. This appends the record in Dynamics, passing the CTR attributes or attributes from the previous steps to the Dynamics API.
The remaining sections in Step 4 reflect that in Step 2 and 3, but here you can see we use the STEP2-Response Response Object to reference a value received from the previous API request to Dynamics.
In this specific example we are updating the record created in Step 2, which is based on the phonecalls entity to add the Connect Channel in the category field of the record using the PATCH action.
The PATCH action adds an additional field, Query String, which is appended to the URI of the record when updating the record and must be wrapped in parenthesis.
The example below can be copied from here:
Request Body: {"category": ""}
Query String: (STEP2-Response.activityid)

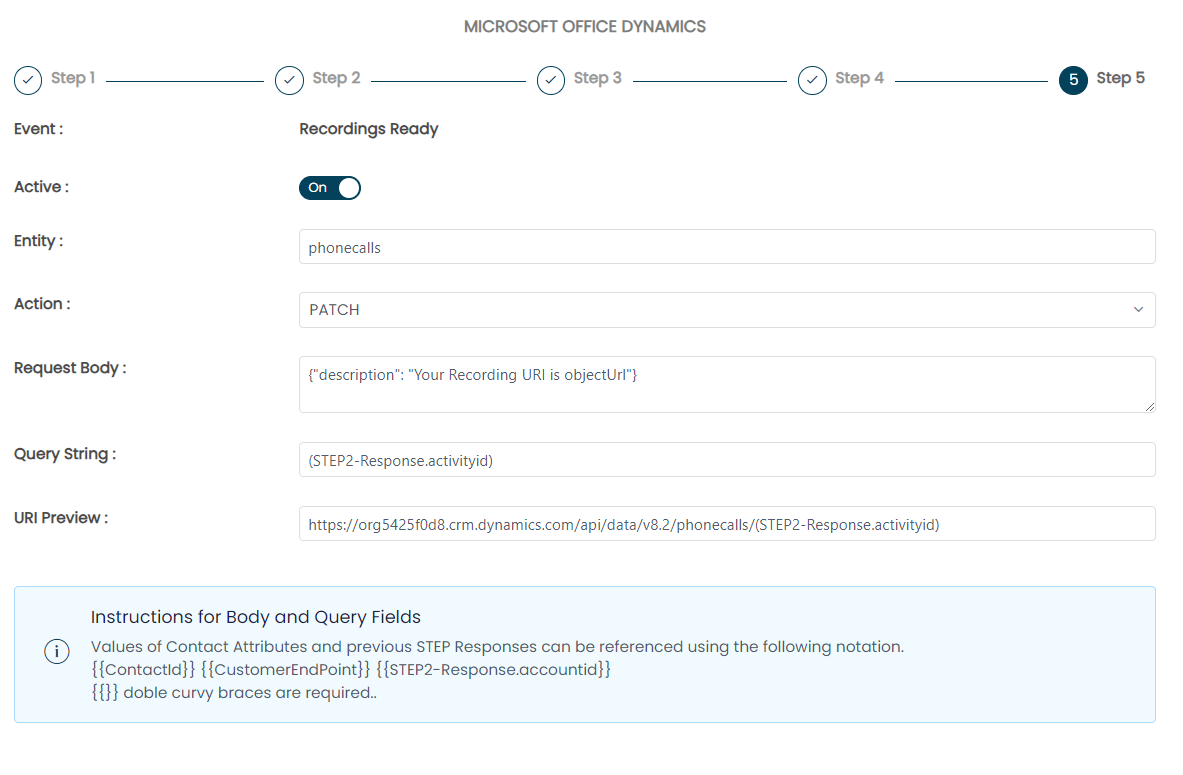
On Step 5, you will provide the details that will be passed to Dynamics when the recording and/or transcript is available – this further appends the record in Dynamics, passing the CTR attributes or attributes from the previous steps to the Dynamics API. This step utilizes a CloudFormation template to create an EventBridge rule on the S3 bucket previously specified that stores the recordings and transcripts. Note that in some cases the S3 bucket must be configured to send these events to EventBridge.
In this example, we are providing the path to the call recording under the description field of the phonecalls entity record.
The example below can be copied from here:
Request Body: {"description": "Your Recording URI is objectUrl"}
Query String: (STEP2-Response.activityid)
This concludes the configuration of the Integration within ConnectPath.
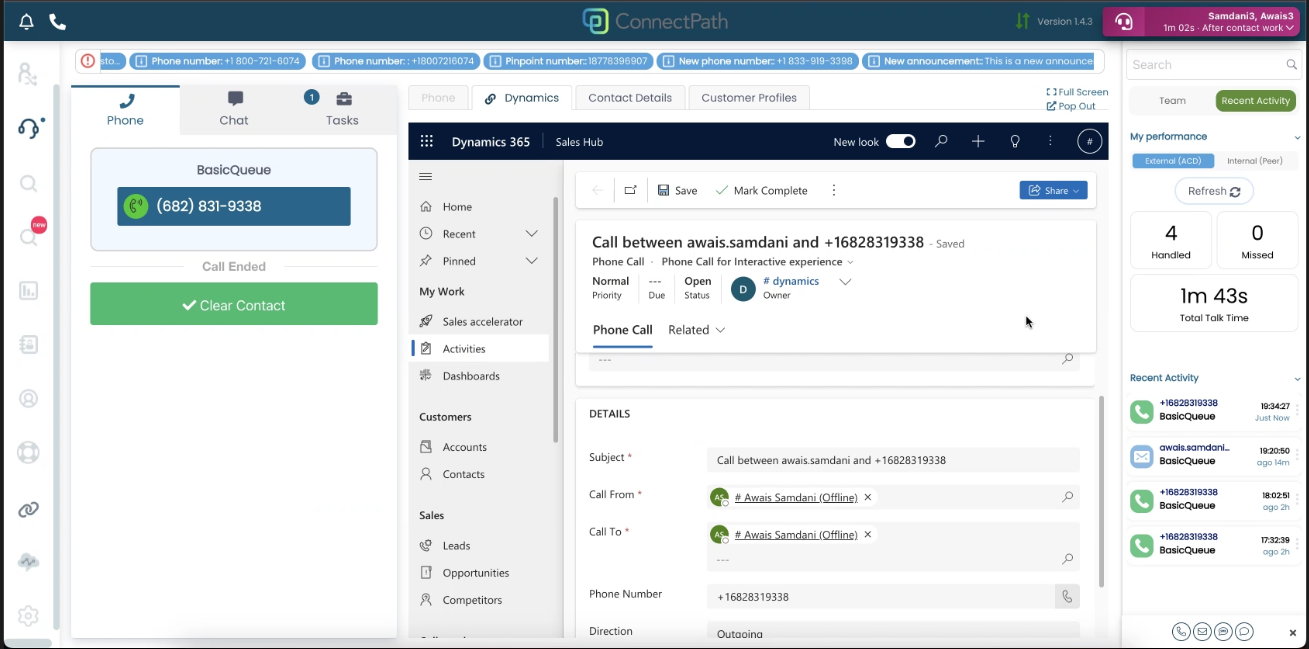
Usage of the integration by an agent is straightforward in that, based on the embedded or Popout option, when a contact is received by an agent or made by an agent, the Dynamics record will be opened within ConnectPath:
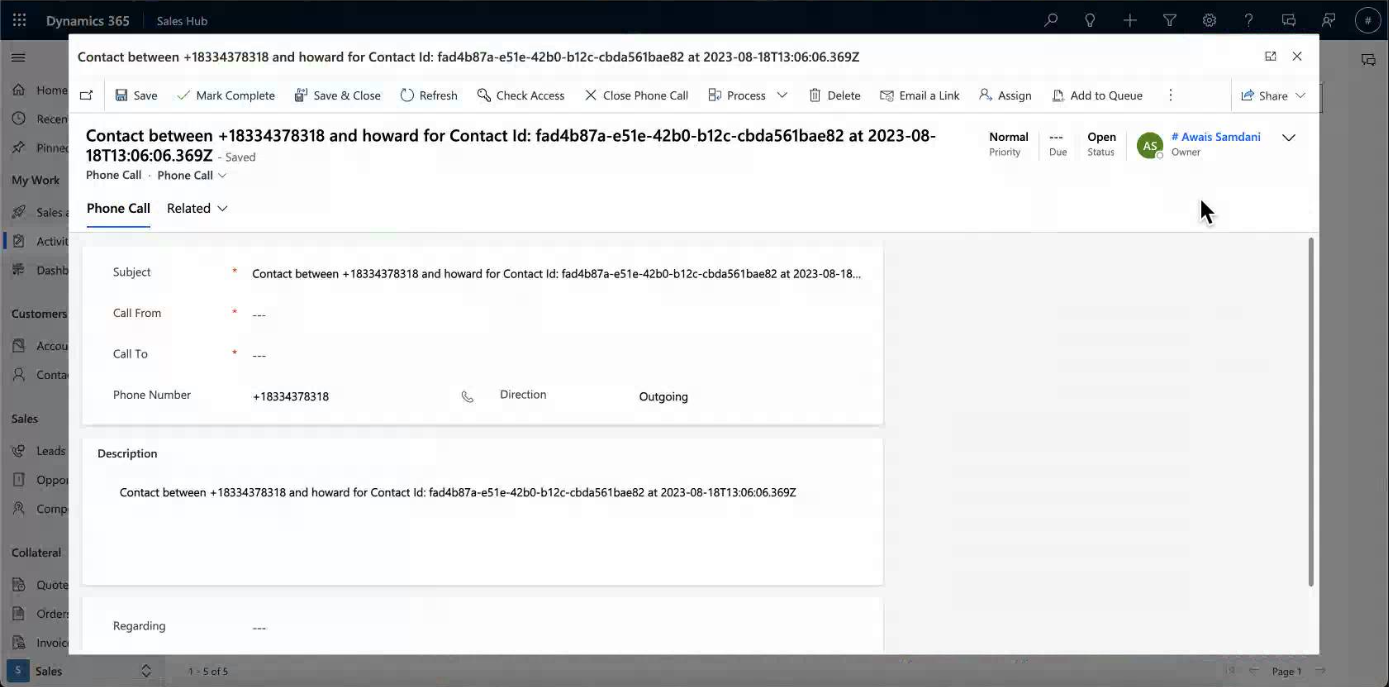
The record can also be viewed later, directly within Dynamics:
This concludes the setup and use of the Microsoft Dynamics Integration within ConnectPath.