Settings
The Settings TAB is composed of many sections where you’ll be able to change your profile picture, company logo, enable call dispositions, set up security options and webhooks.
My Preferences
This is the starting page and is composed of:
- Phone
- User info
- Sounds
Phone
This option enables either soft phone or desk phone. Click the pencil icon to change from softphone to desk phone and enter your direct dial telephone number. All calls that come to your dashboard will ring to your phone when desk phone is enabled, and it’s also possible to set this to a cell phone if you want to take calls while running around the globe. Be sure to set a Wrap time so your dashboard is not stuck in the Wrap up status, waiting to be made Available after the last call.
User Info
You can change your Avatar, First Name, Last Name and Email by editing the fields. The Email field is where you’ll receive the emails when engaging in an Email flow.
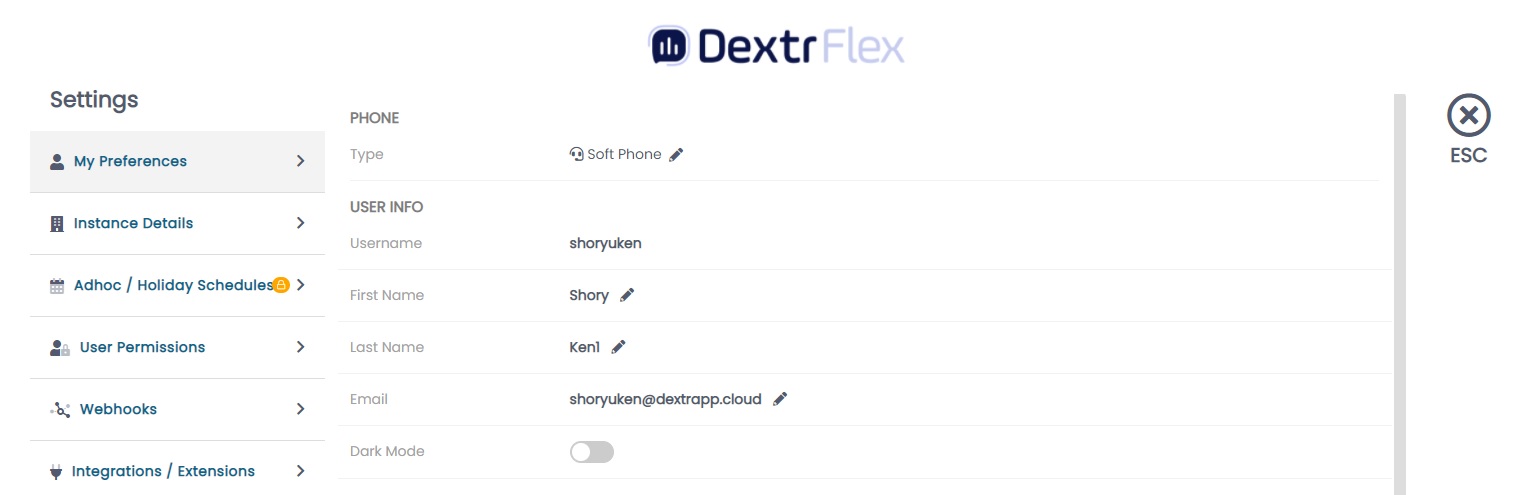
There is also the option to enable Dark mode. This will change ConnectPath default theme into a dark one for your eyes comfort.
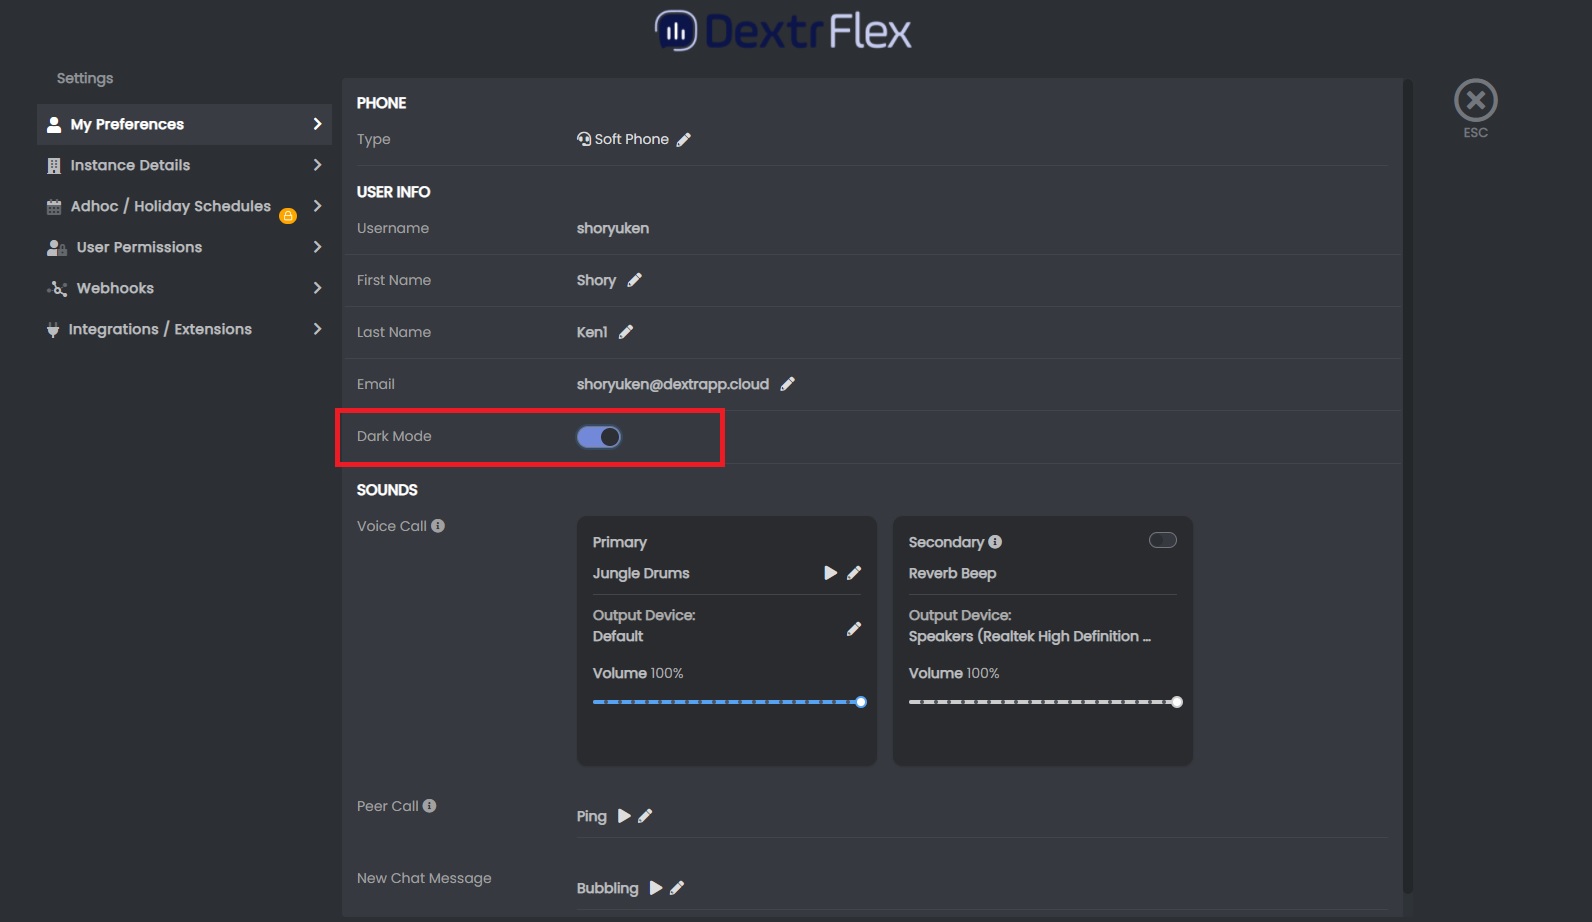
Sounds
For voice call, you have Primary and Secondary (by default Secondary is disabled). Primary will play the ringtone you choose when receiving either an incoming ACD call or an incoming request for email flow. You can also select which device will output the sound (Default, Speakers or Headphones).
If you enable Secondary, it will play the ringtone you choose with an Output device different than the one set in Primary. So if you have Primary set to Headphones, Secondary will play on Speakers. When you receive a call, both of them will play in their respective output device.
Peer call on the other hand is the ringtone that will play when receiving a call from one of your teammates (another agent), and New Chat message is the one that plays when you receive a chat message.

Instance Details
This is for users who have the security profile level of an admin. It has the following sections:
- Brand
- Account
- Configuration
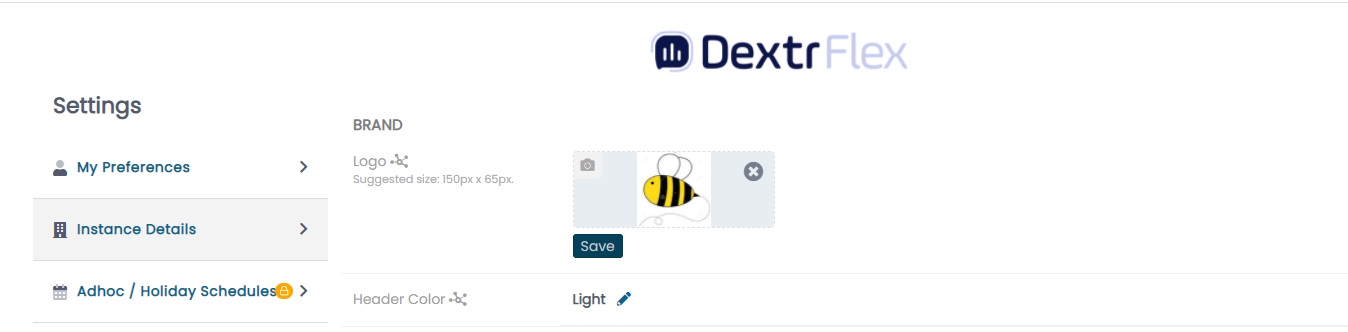
Brand
In this section you can change the logo. You can also change the header color to either default (blue) or a light one (white).
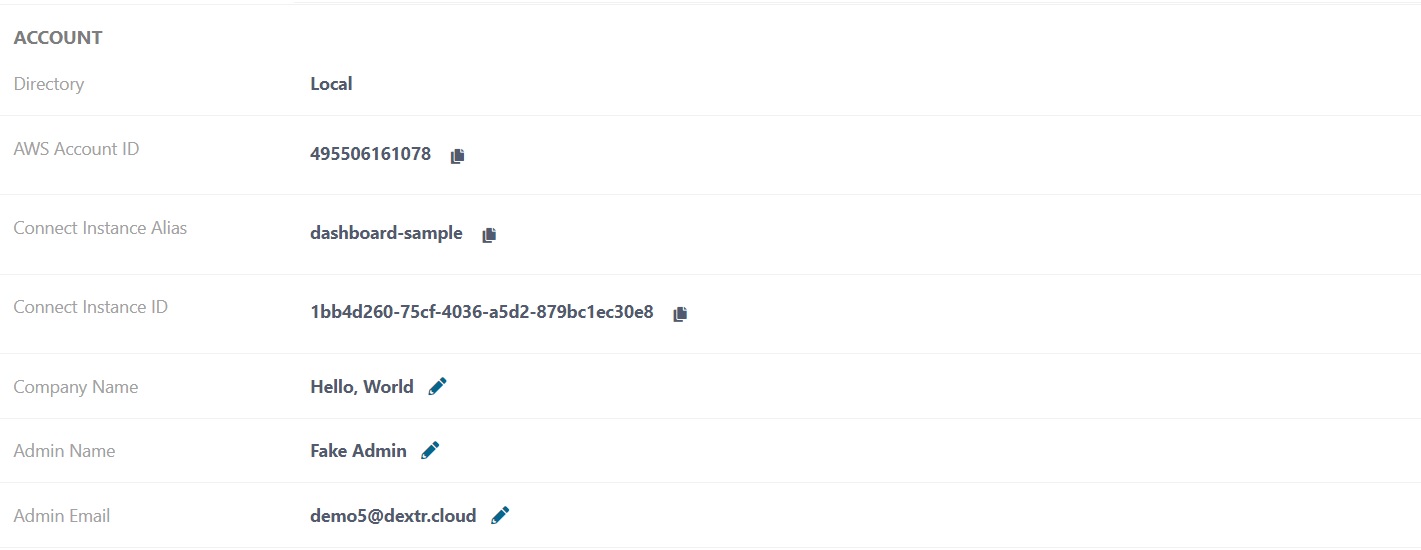
Account
This section displays the Admin Connect information, and it also gives you the option to edit Company Name, Admin Name and Email.
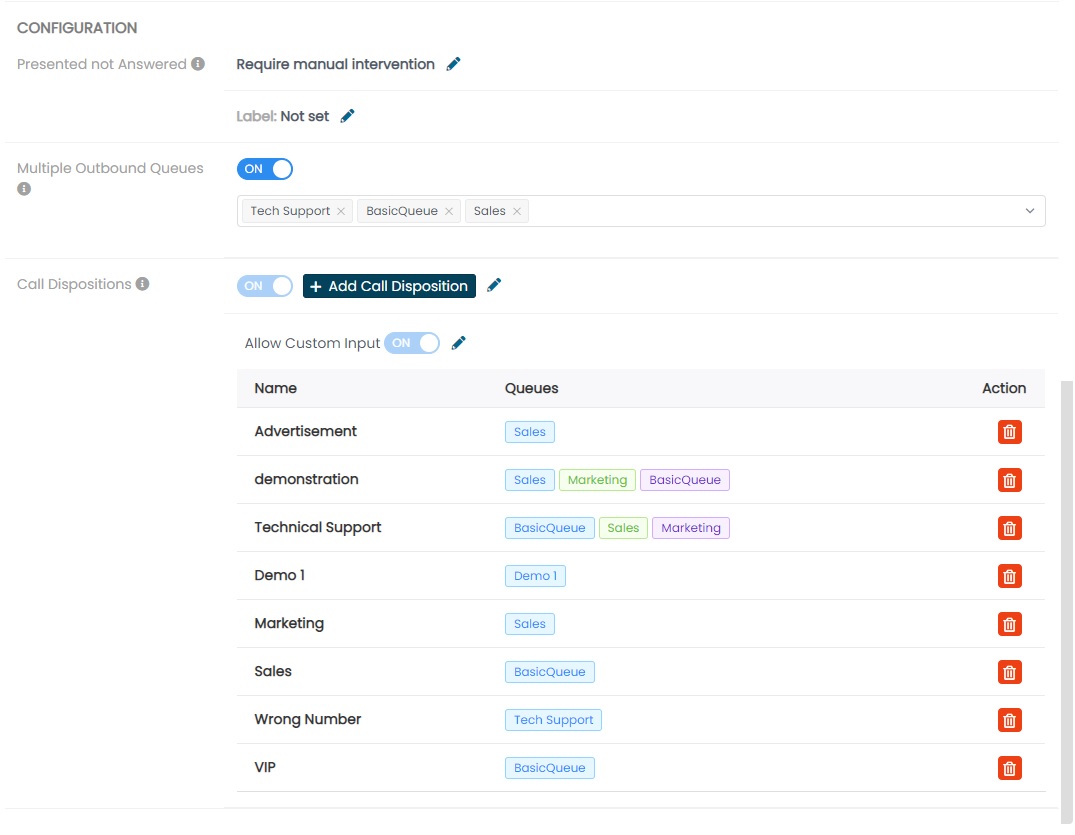
Configuration
Here you can configure Presented Not Answered behavior (when you miss a call), giving you 3 options:
- Forced Release - When you or another agent misses an ACD call, it will put you in a Forced Release Status (or the Configured label set by the admin) until you manually change it to another (e.g manually changing status to Available after being in the “missed call” label).
- Wrap Up - When you or another agent misses an ACD call a countdown will start. After the countdown from configured wrap up time (User Phone Configuration Wrap Time) finishes, your status will be automatically changed to Available.
- Custom - When you or another agent misses an ACD call a countdown from the Configuration Duration setting will start. after the countdown set from the Configuration Duration time finishes, your status will be automatically changed to Available.
There is also Call Dispositions. By default this is disabled, but by enabling it, you can add new call dispositions by clicking the +Add Call Disposition button, so that they’re shown in a dropdown when a call finishes. Allow Custom Input can also be turned on, allowing agents to manually write the disposition of the call.
Adhoc / Holiday Schedules
This TAB enables you to establish Holiday and “Ad Hoc” queue closings.
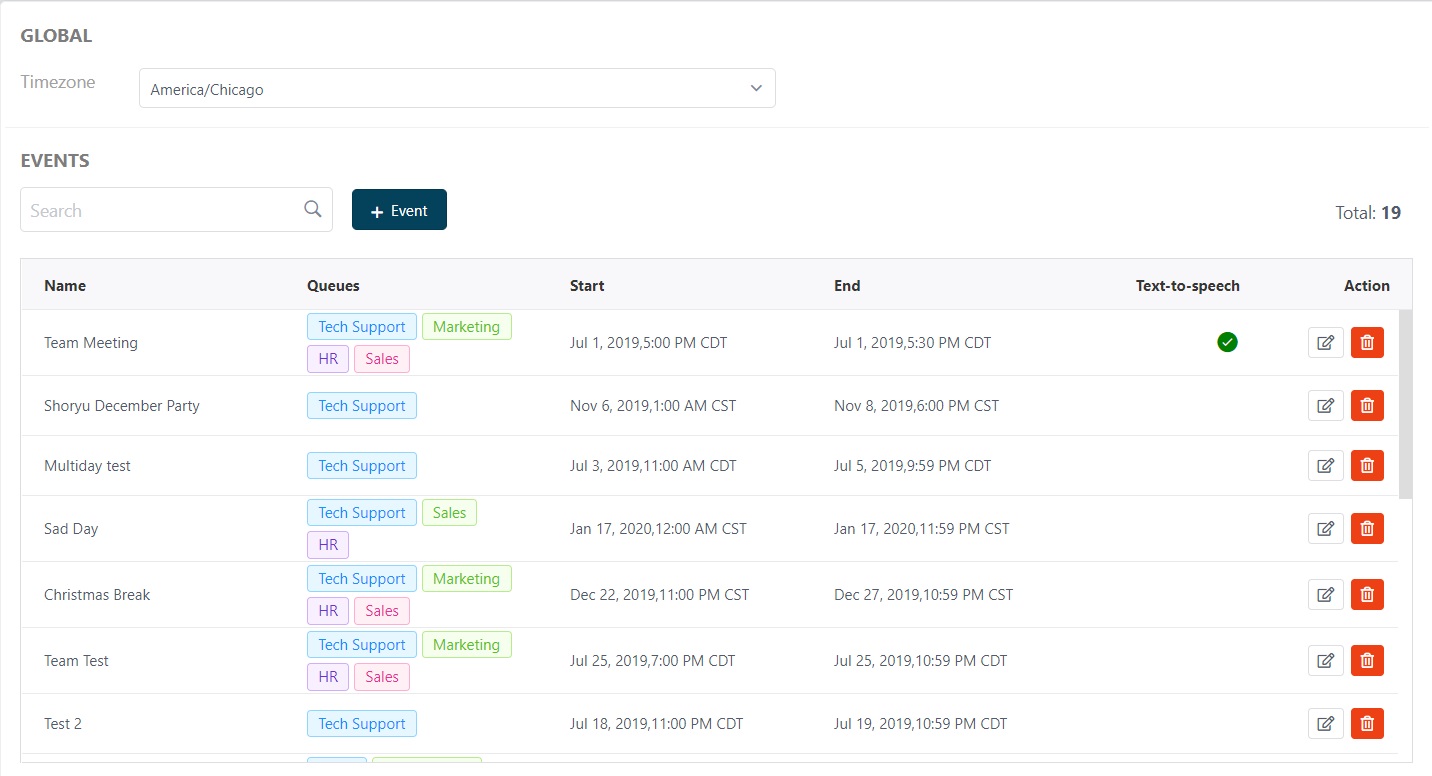
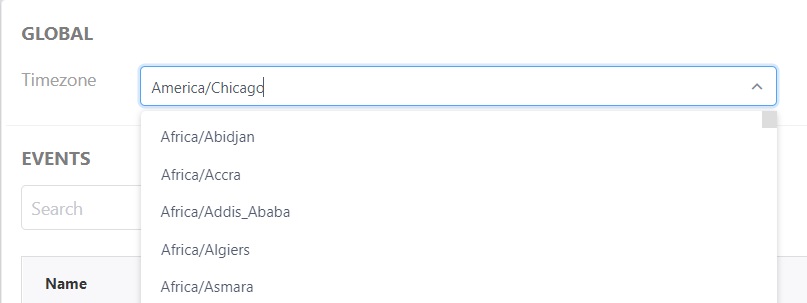
Global
This section is used to see the timezone set for the Instance.
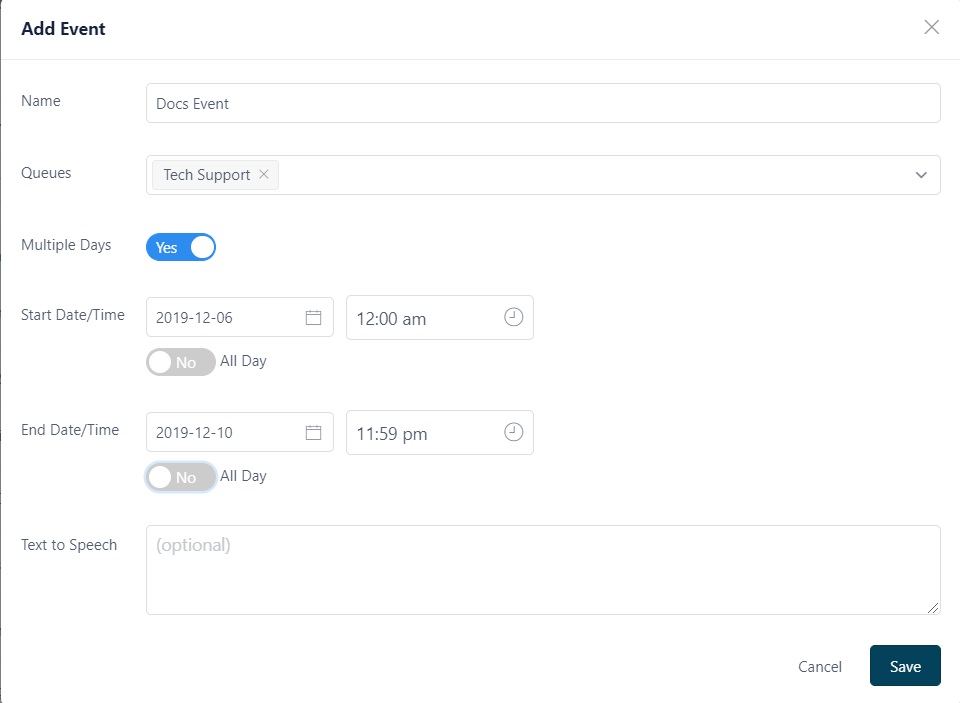
Events
You can add an event by clicking the +EVENT button. Choose a Name, select a Queue, and then select if this is a single day or multiple day event by clicking the All day switch below the calendar, which is also used to determine the date, and start/end time.
You will also have the opportunity to enter a TEXT to SPEECH prompt which will be played to the caller during the closed period. This is very useful if you want to close a single queue for a team meeting, or if you want to list out your Holiday closings for the year.
User Permissions
This TAB is used to create security profiles and edit / delete permissions within the profiles.
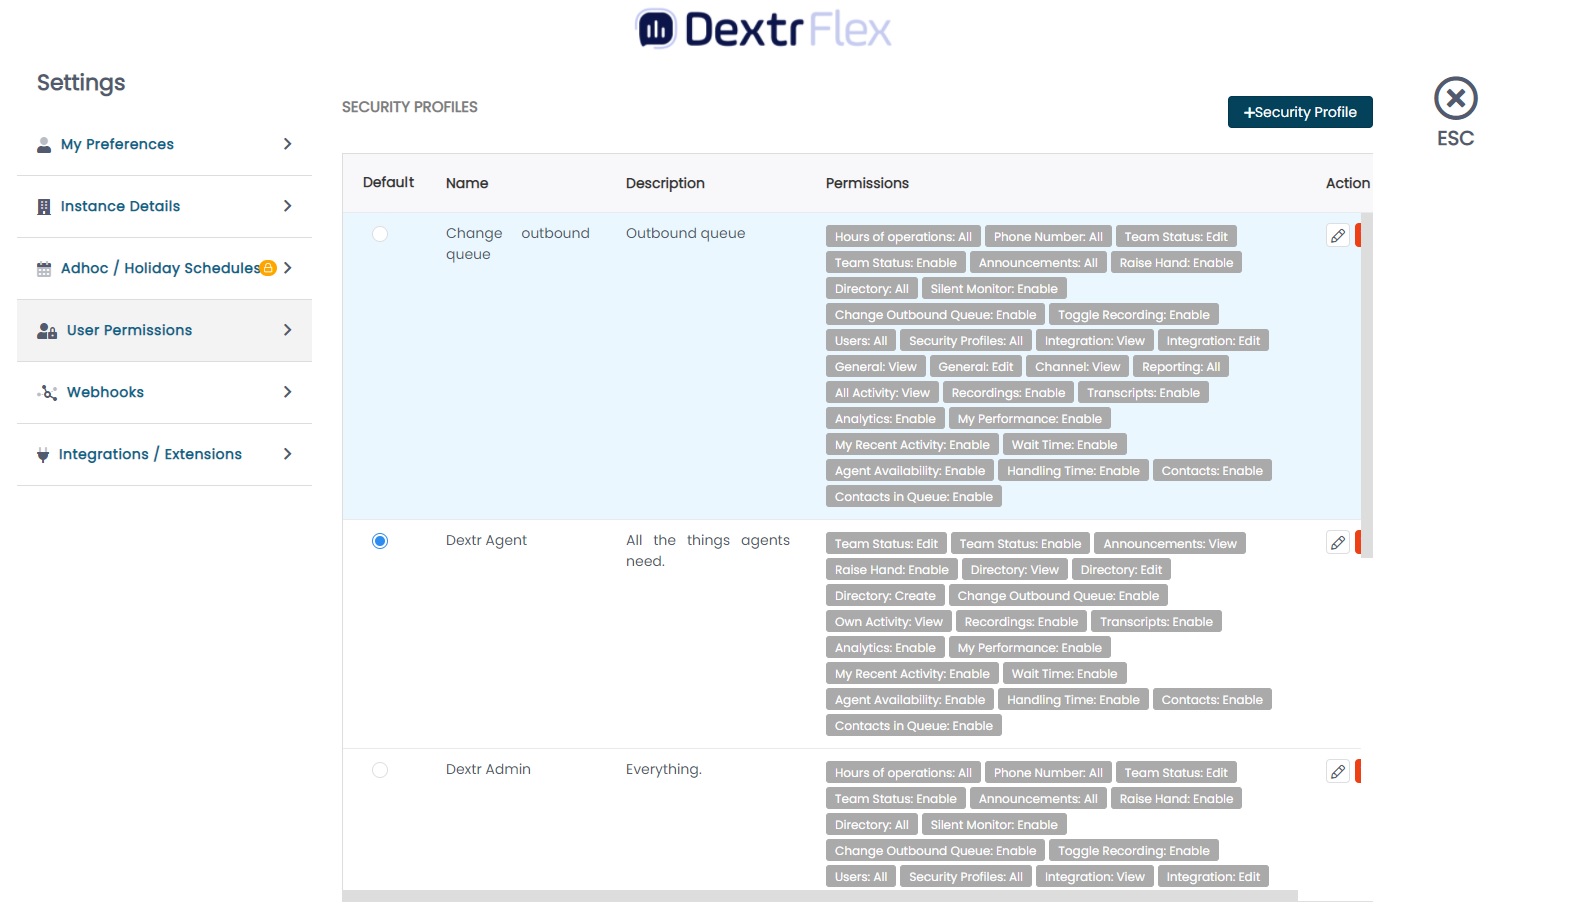
Security profiles
You can create Custom Security profiles by clicking the +Security Profile button and then add permissions.

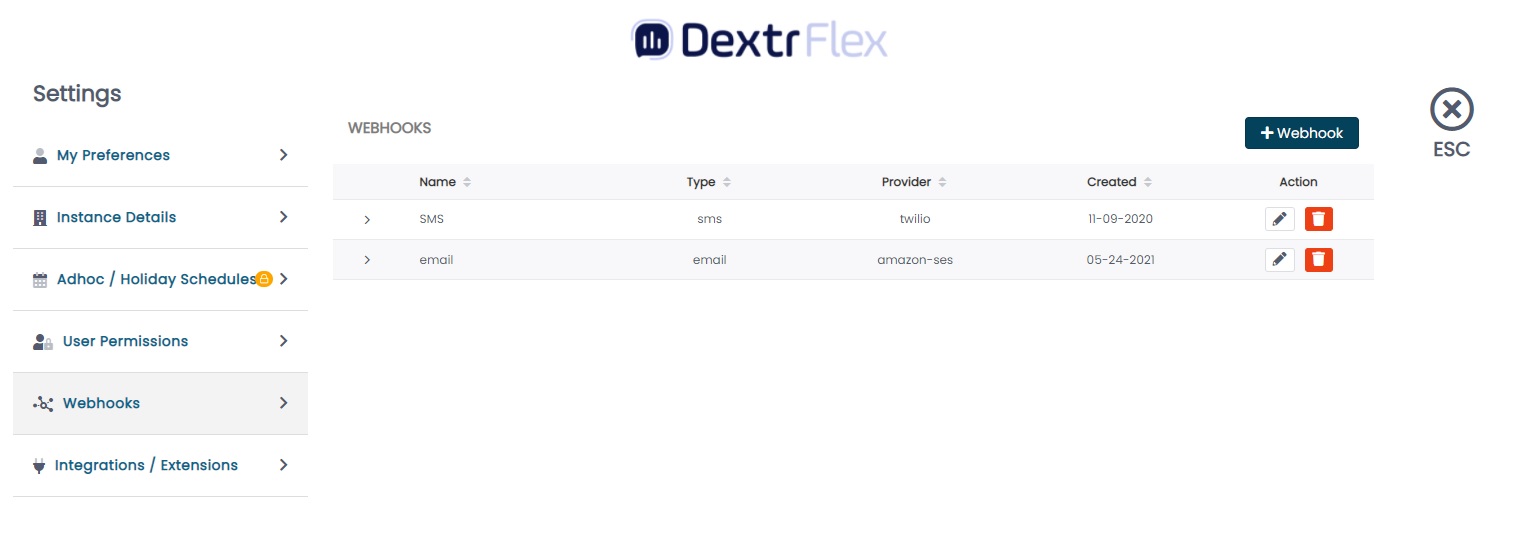
Webhooks
Webhooks enables you to select SMS, FAX or EMAIL to create unique routing rules for each type of channel. Each configuration enables you to select a Queue to receive either the SMS or the Email.
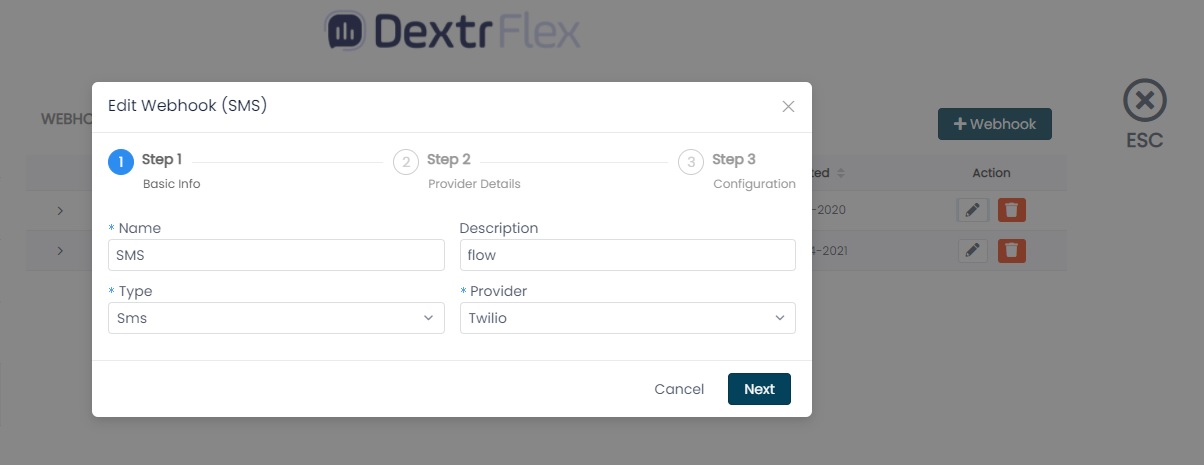
Step 1 - Basic Info
You need to provide a name, description, type (SMS, Fax or Emai) and a provider. Provider differs between SMS and Email.
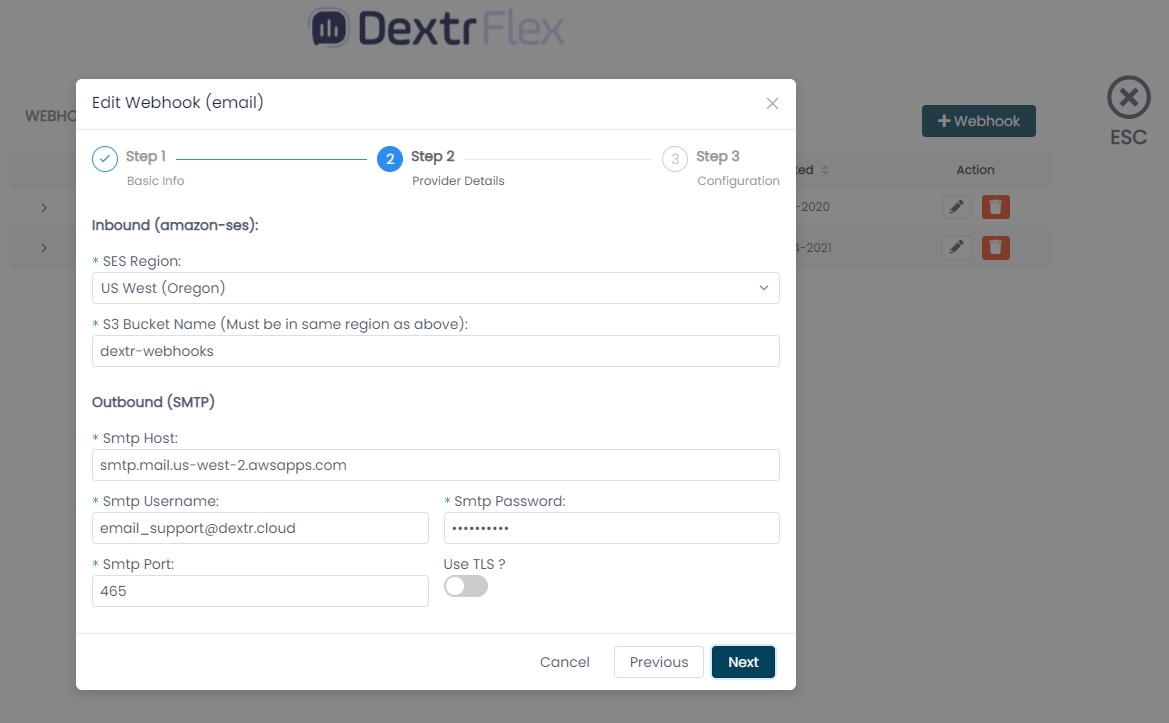
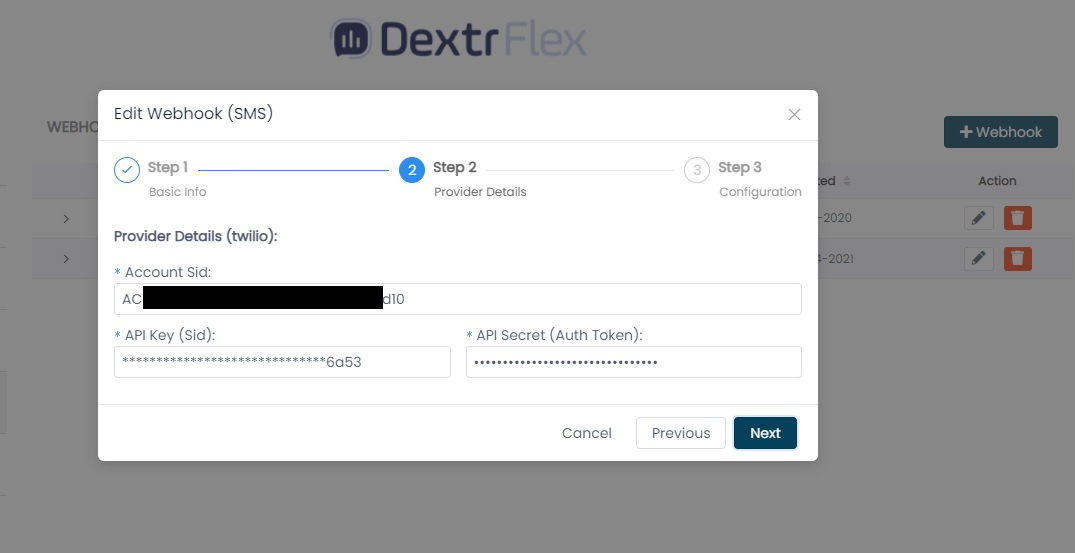
Step 2 - Provider Details
Depending on the type of Webhook (Email or SMS) you’re creating you need to provide different credentials in this step:
For inbound you need to select the amazon region in which your email is located, and your S3 Bucket name, which can be created from AWS or retrieve an existing one from your Instance Detail - Account section. Afterwards you’re required to input the following SMTP credentials: Host, Username, Port and Password.
SMS
You’re required to input Account SID, API Key and API Secret provided by Twilio.
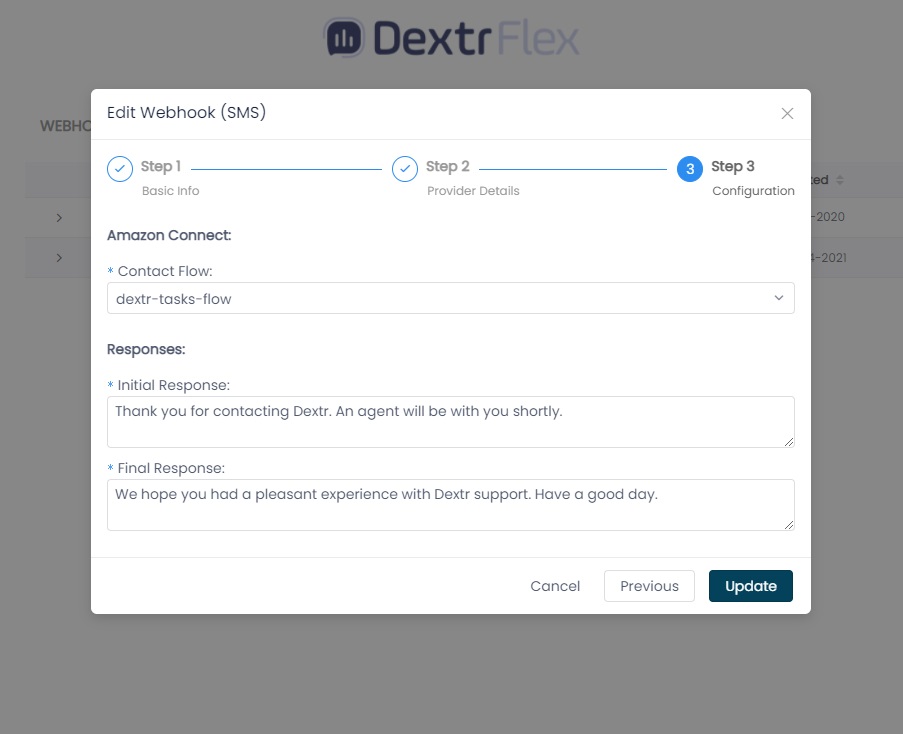
Step 3 - Configuration
Lastly, you need to select a contact flow created from the Amazon Connect Portal and type Initial Response and Final Response.
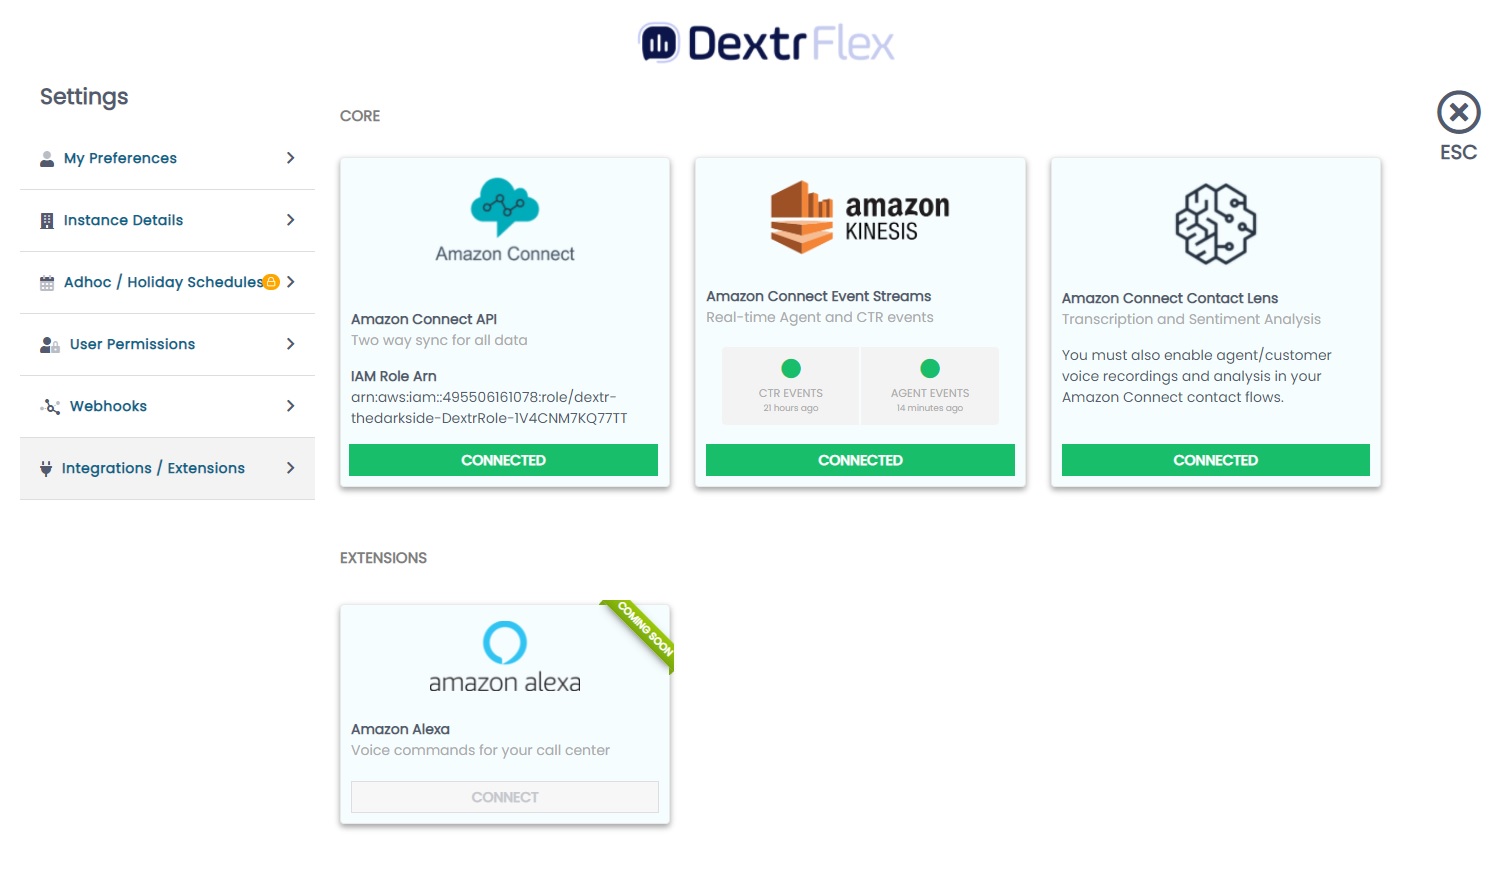
Integrations / Extensions
General information about integrations within the application.
Core & Extensions
You can see the already integrated core functionalities within ConnectPath (Amazon Connect and Kinesis) and the things that are being worked on (Alexa).