Email Task Configuration
October 2023 Update
With the October 2023 release we now have an E-Mail Wizard that can assist first time users in setting up E-Mail Channels. Please see the docs site for more details.
Pre-Requisites
- DNS
- Subdomain MX record. (i.e., emaiHandler.companyname.com, production.ConnectPath.cx)
- SMTP host information for your email server
- Amazon SES Ruleset
- Amazon Connect Contact Flow
- Report Bucket name
Setting up Pre-Requisites
With the exception of Amazon SES, Contact flow and Report Bucket name, all other prerequisites can be fulfilled through external providers (i.e., GoDaddy, eNom, Gmail, Outlook). For this guide the email task configuration will be set up with all of the services provided by AWS. If you already possess a DNS, a subdomain and know the SMTP host information of your email server, you can go ahead and skip to Redirecting Email.
1 - DNS
If you don’t already have a DNS you’re required to create one:
- Head over to Route 53 dashboard inside of AWS console manager, check your desired domain name availability and register it. The registered domain name for this example will be “ConnectPath.cx”.

2 - Subdomain
As soon as your DNS has been checked you will be needing a subdomain record of type MX, which can be created inside of Route 53:
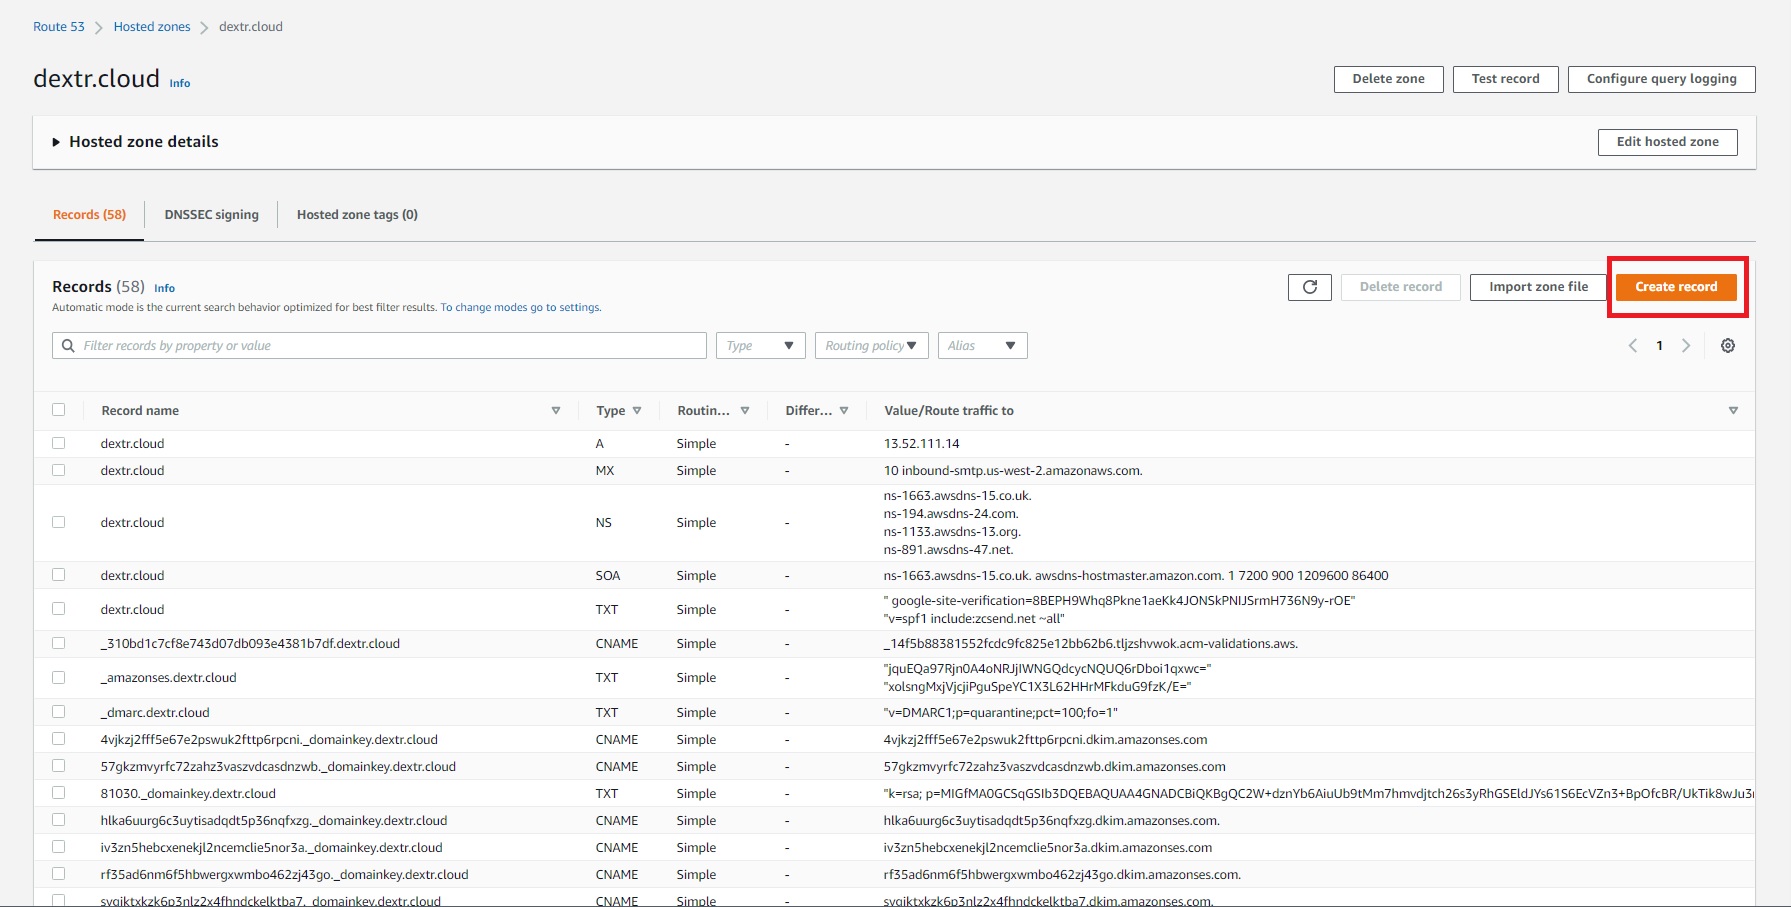
- Head over to the Hosted zones section.
- Click the registered domain name you will be using. In this case we’re interested in working with “ConnectPath.cx” so we’re doing follow up.

- You’ll enter the Hosted Zone details. Click “Create Record” to start creating your subdomain.
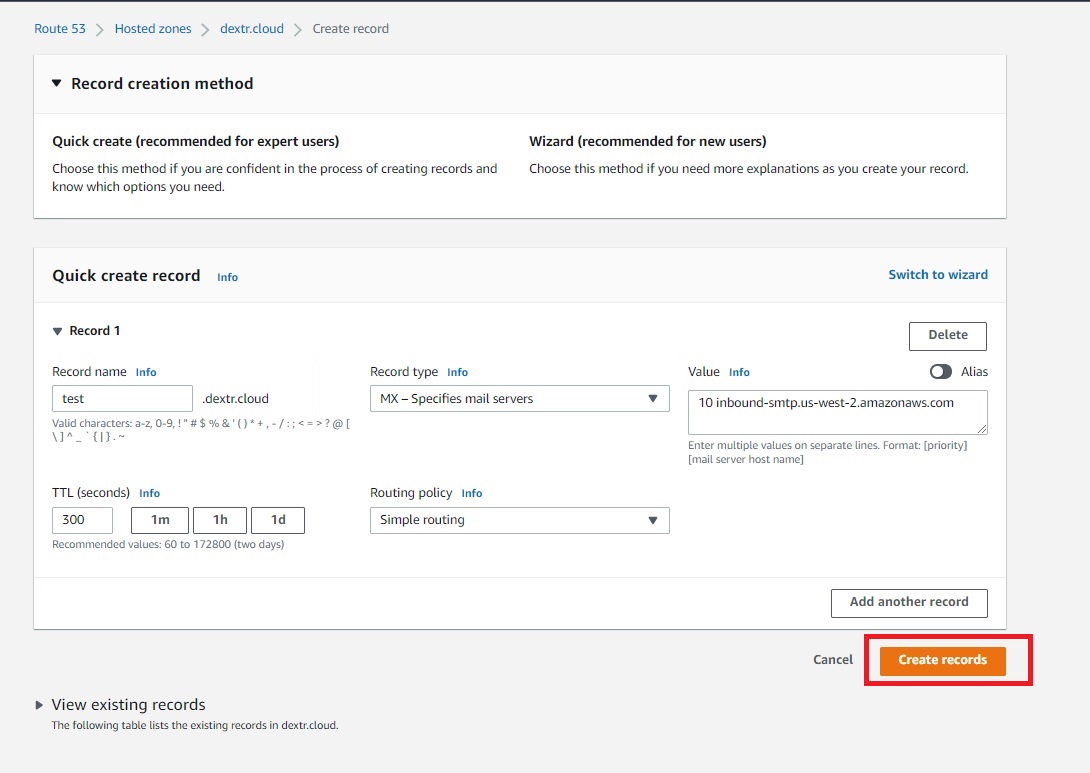
- The record name is going to be the prefix of your subdomain. In this example we will be using test, which will be followed by ConnectPath.cx for a subdomain of test.ConnectPath.cx.
- The required record type is going to be MX which specifies mail servers.
- The recommended value is going to be “10 inbound” followed by your email provider SMTP (Simple Mail Transfer Protocol) endpoint. If you’re using Workmail then your SMTP is region dependent, so you can check it in this page: https://docs.aws.amazon.com/workmail/latest/userguide/using_IMAP.html. Because “ConnectPath.cx” lives in us-west-2 (Oregon),the final value would be: “10 inbound-smtp.us-west-2.amazonaws.com.”.
- The recommended TTL (seconds) is going to be 300 - 1m - 1h -1h.
- And the Routing policy will be Simple routing.
- Click on create records and make sure that you can find it inside of the Hosted zone details in your Domain Name.
3 - Verification of domain and subdomain ownership.
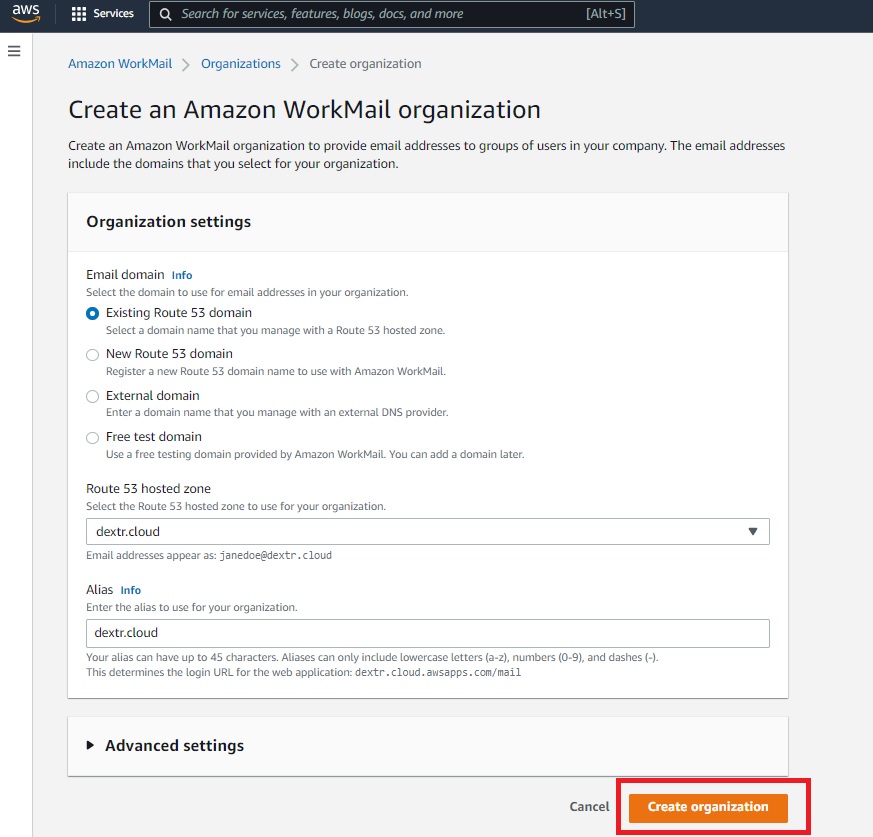
You’re required to create both an email with the domain and one with the subdomain. You can skip this step if you have a working subdomain with another email provider (Gmail, Outlook). For this, we’ll be using AWS Workmail and create an organization, for Configured settings in this example we’ll be using:
- Existing Route 53 domain.
- Route 53 hosted zone is going to be the purchased DNS. In this case ConnectPath.cx.
- Enter an alias and save.
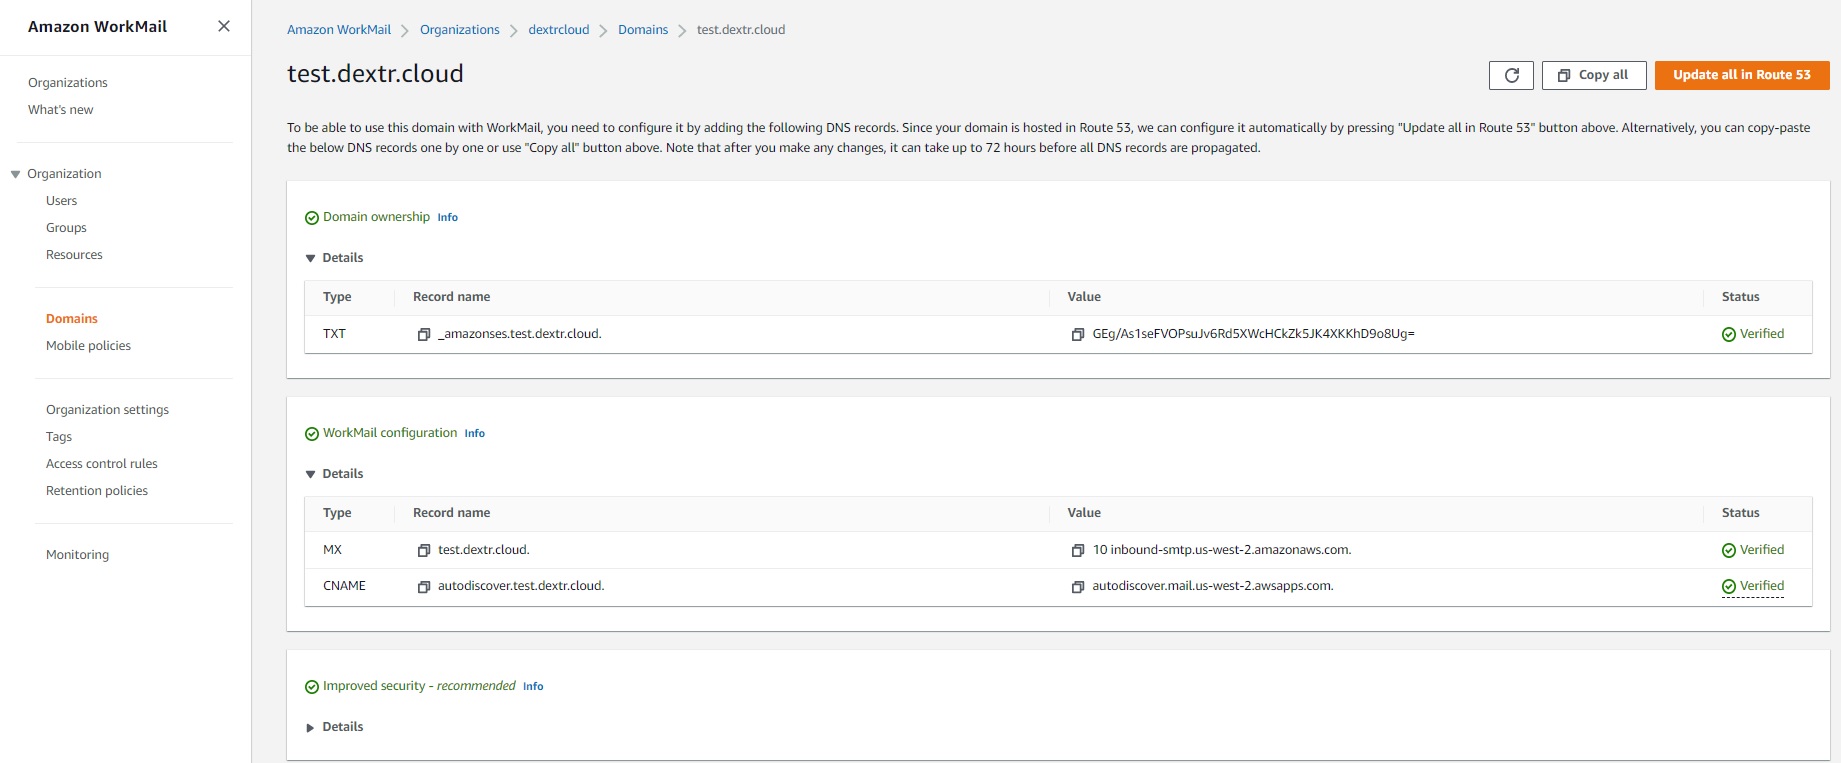
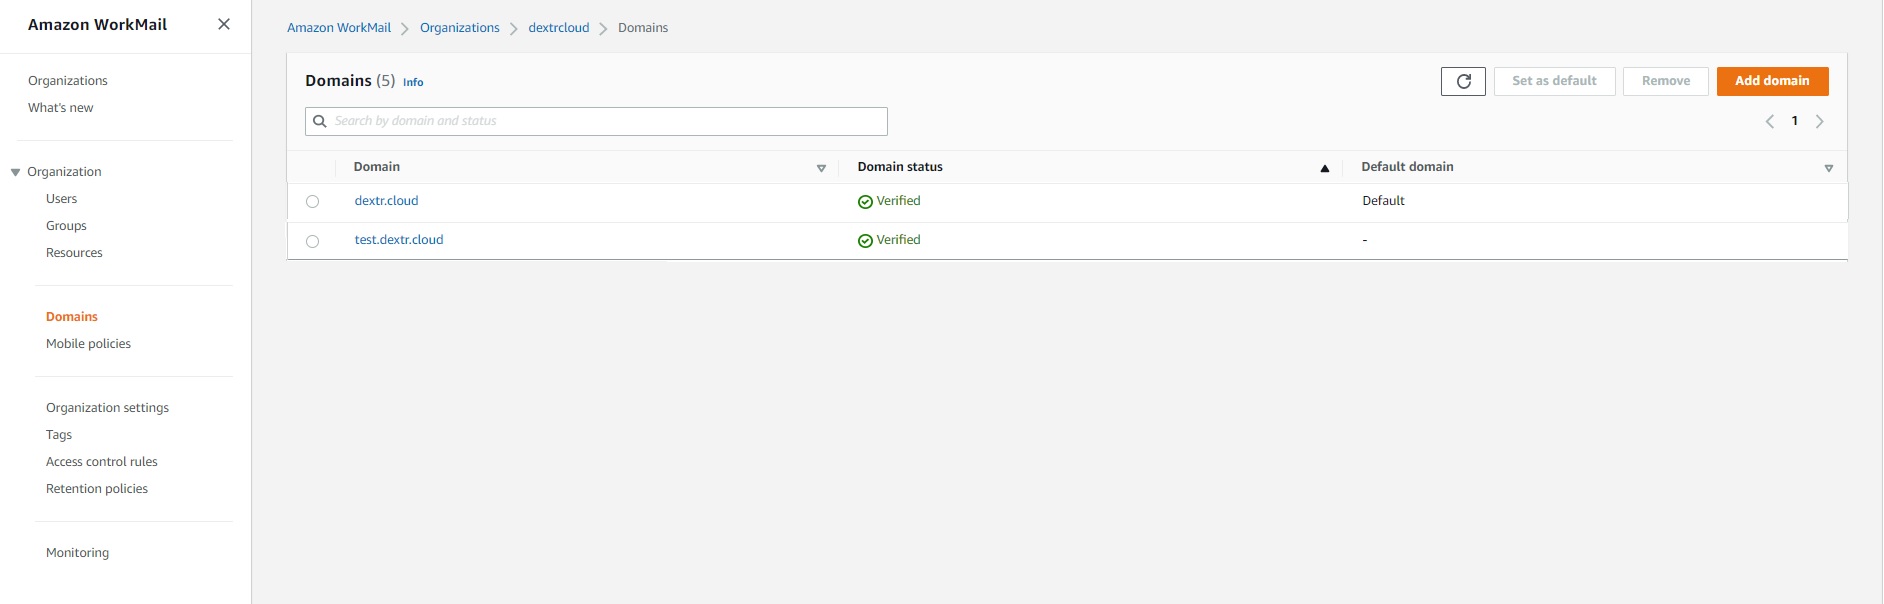
Once the organization has been created, you’re required to verify ownership of domain and WorkMail configuration:
- Head to the Domains tab and click the Add domain button.
- If the domain has already been verified (in our example: ConnectPath.cx), then enter the name of your subdomain. In our case is going to be “test.ConnectPath.cx”
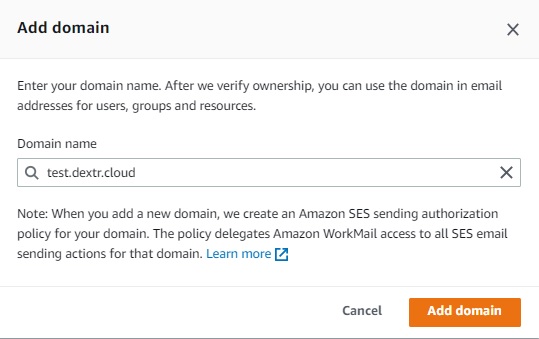
- We’re required to create more records (they provide the type, record name and required value). Since we’re using Route 53 to host our main domain, this can be automatically updated by clicking “Update all in Route 53”. If not, you’re required to create these records inside of Route 53 Hosted zones (Refer to step 2). Since we already created the MX type, we only need to create two more records, a “TXT” and another one of type “CNAME” using the values they provide (Type, Record name, Value). The verification step can take a while.
Now that domains are verified, you need to create an email with your subdomain.
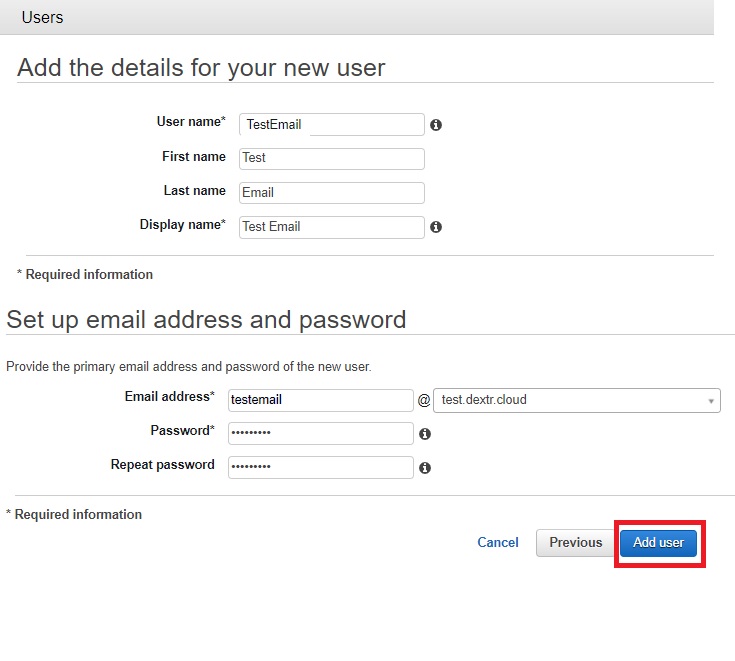
- Head over to “Users” and create a new one:
- Add details for user (Username, First Name, Last Name, Display name).
- In the next step, set up email address and password. For domain remember to choose the subdomain (test.ConnectPath.cx), so at the end we will be having “testemail@test.ConnectPath.cx”.
- You’re required to create or have another email for your company contact, which will be the one to receive emails from the customers side. Remember to set up it up this time with your original domain, which following our example would be “ConnectPath.cx”. For this example we created customertestsupport@ConnectPath.cx

4 - Redirecting email
Now that you have both an email for your company contact and another email with the subdomain, you’re required to add a rule set to the main address where customers will be contacting you:
- Enter Amazon WorkMail main portal or your corresponding email provider.
- Enter your main address credentials. Following our example it would be for customertestsupport@ConnectPath.cx
- Click on Settings -> Email rules.
- Add a new rule where Condition is “is sent to…” and recipient is our main address “customertestsupport@ConnectPath.cx”. Then in Actions we add Redirect the message to and we add as a recipient our email with the subdomain, which is testemail@test.ConnectPath.cx.
- Save and make sure that the status for this rule is Active.

5 - Amazon Connect Contact Flow
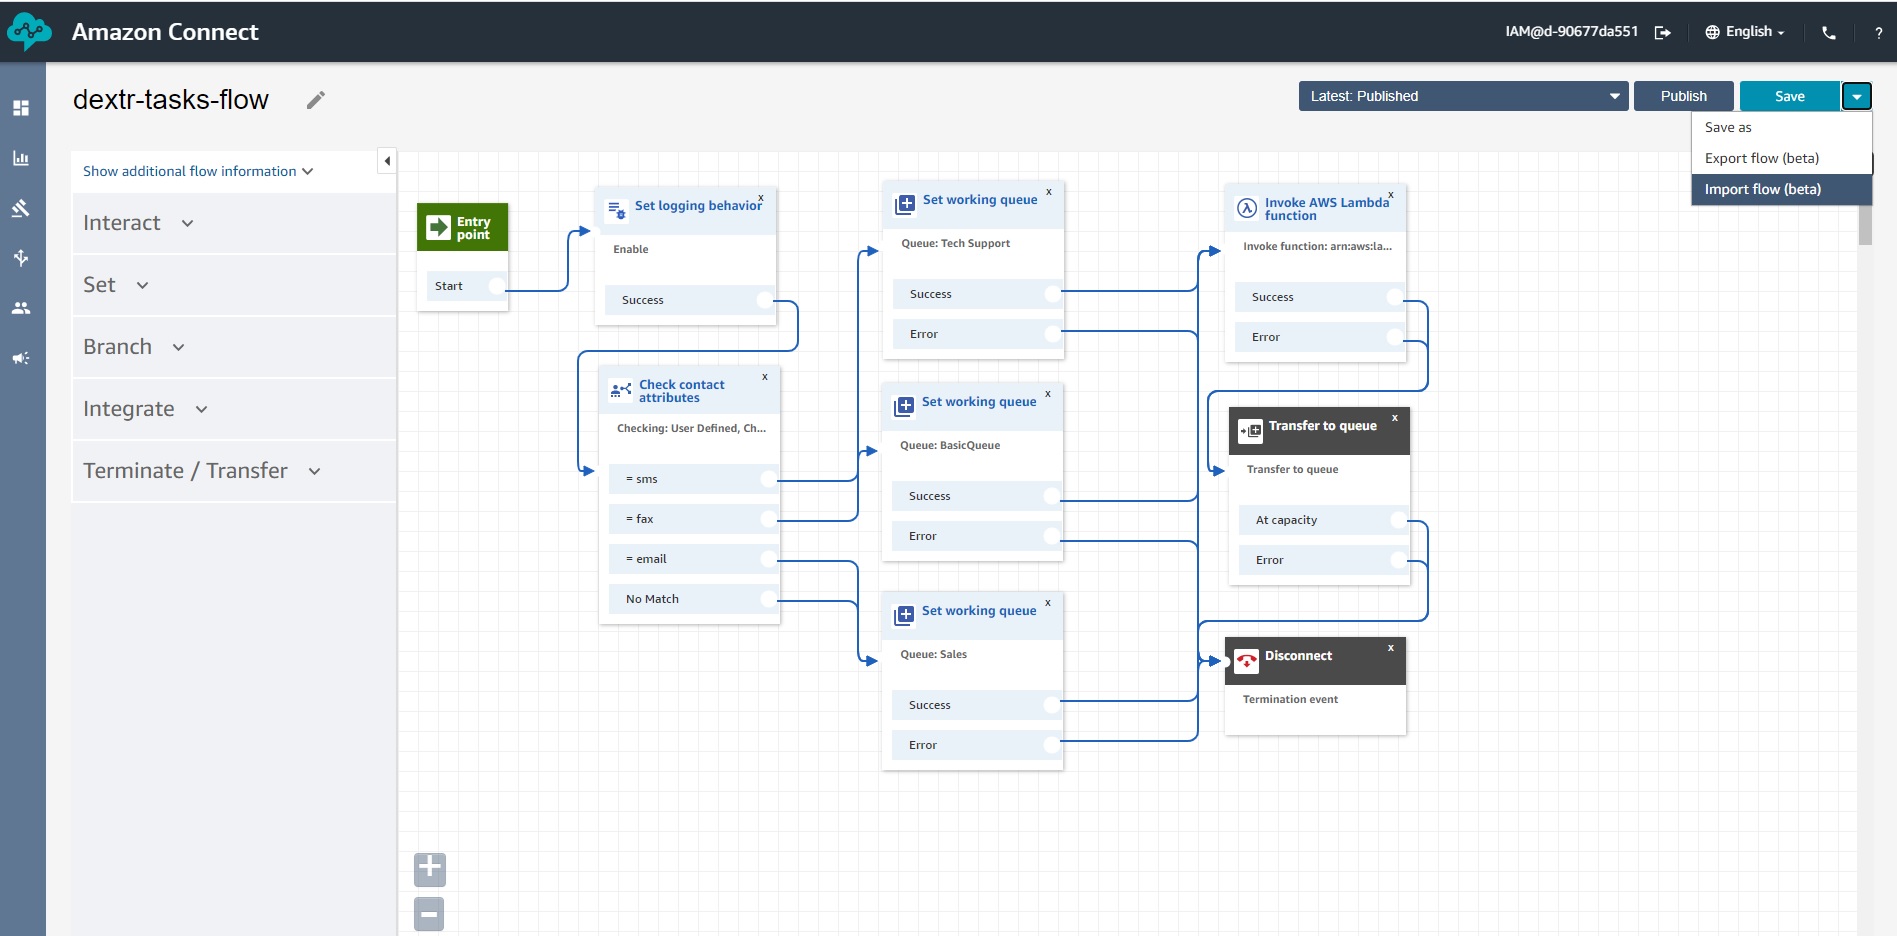
For email tasks to work you need to provide a Contact Flow to Amazon Connect. You can use the Contact Flow that ConnectPath provides as a model and import it into your call center and modify it to suit your needs:
- Enter Amazon Connect -> Routing-> Contact flows.
- Click the button to create a new contact flow.
- Choose the option to import an existing flow from the top right corner dropdown.
- Publish the contact flow once you’ve modified the queues to suit your call center.
- Once published, per queue you also need to confirm that the number of tasks that an agent can handle is set to 1.
6 - Webhook creation. ConnectPath
Now that you have email and contact flow set up, you’re ready to configure the webhooks inside of ConnectPath:
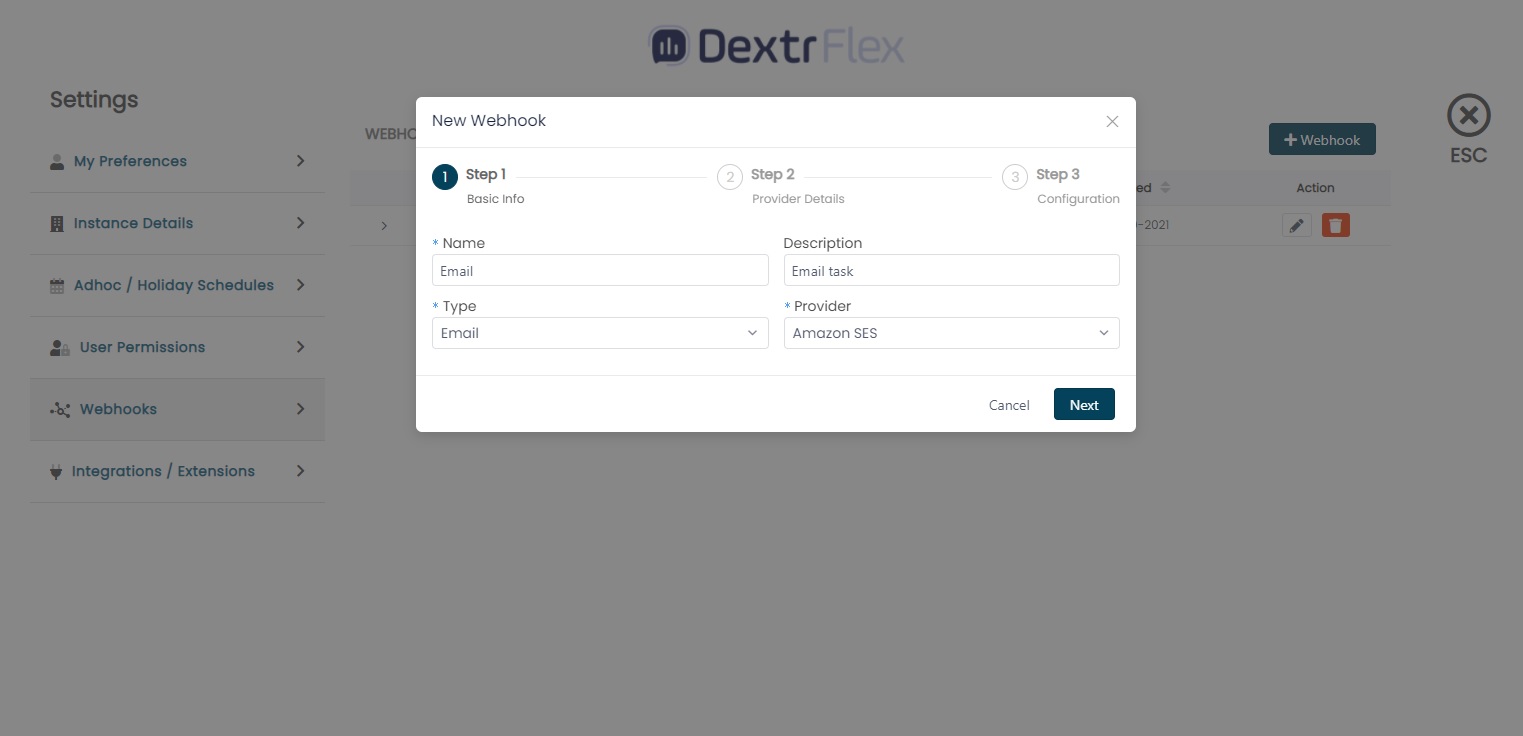
- Sign into ConnectPath and go to Settings, Webhooks and click on +Webhooks and fill in the form, hitting NEXT to move you through the steps:
- Set Name and Description
- Set EMAIL as Type
- SET SES as provider
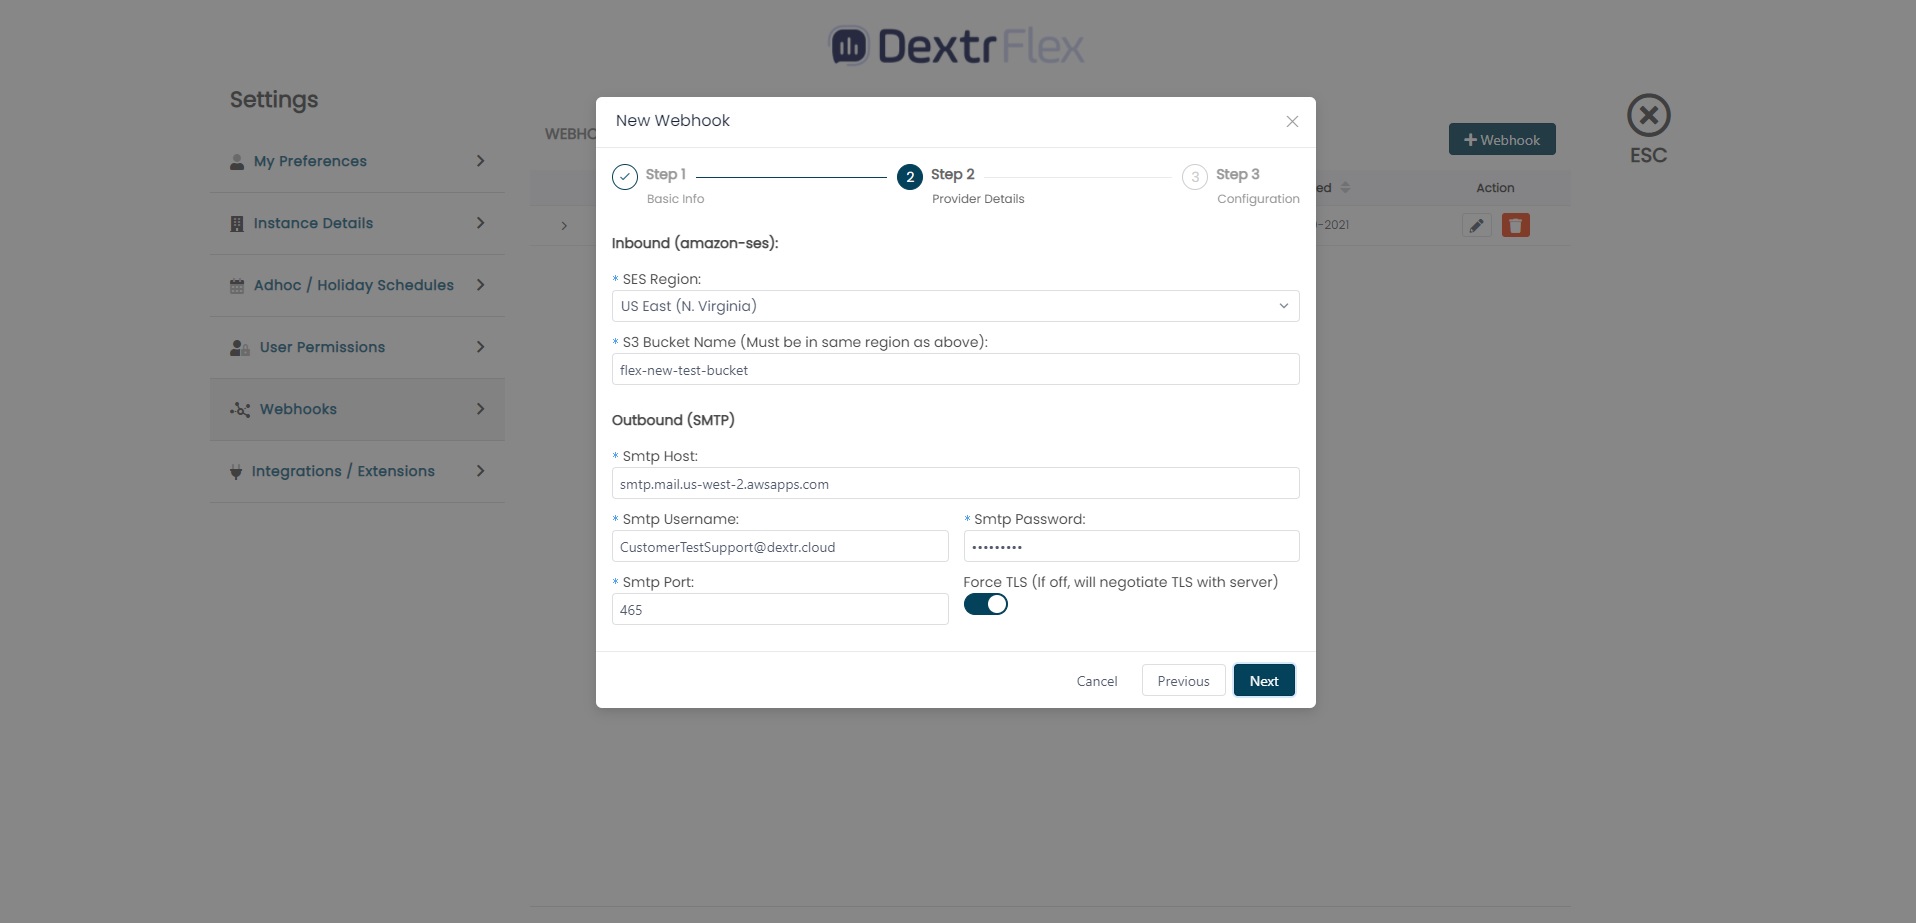
- Set Region your instance is IN
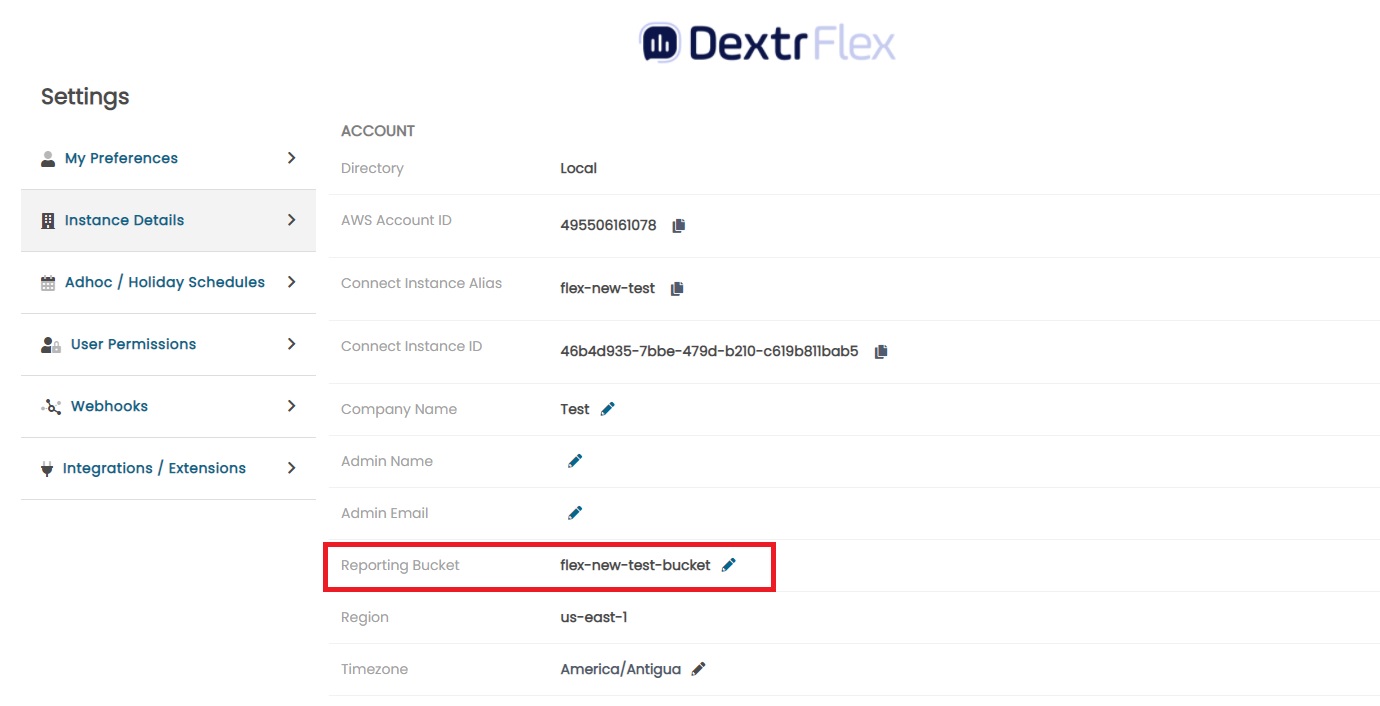
- Set S3 bucket name (pre-requisites). This can be retrieved in Settings -> Instance Details
- Set SMTP configuration
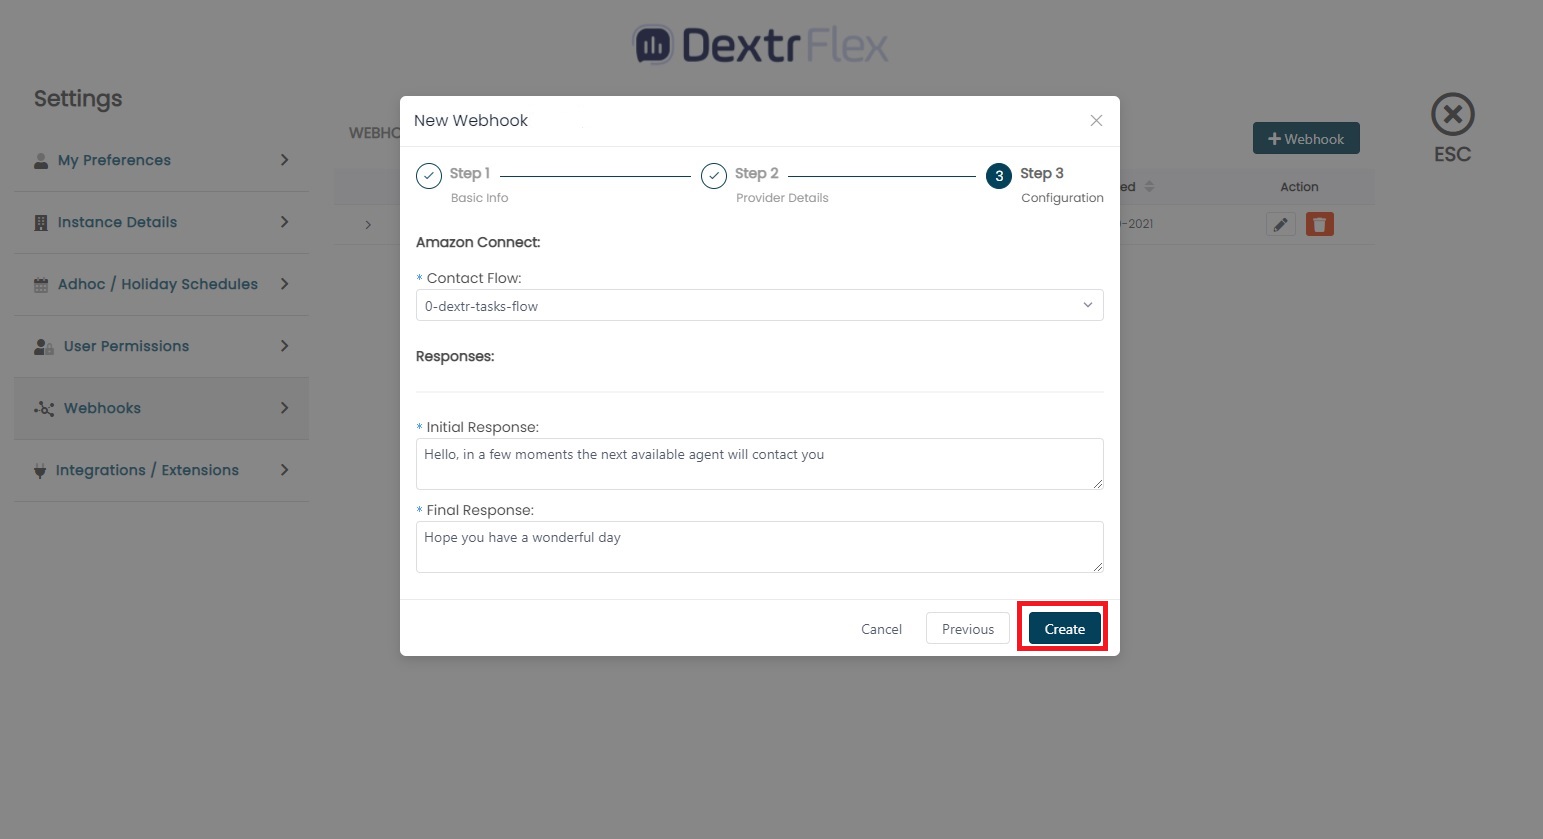
- Select the Contact flow
- Setup Auto Responders
- Create
7 - Amazon SES (Simple Email Service)
Now you’re required to create a rule receipt condition inside of SES from the AWS console:
- Head over to “Email receiving” from the “Configuration” panel.
- Once inside, create a rule set by clicking the “Create rule set” button.
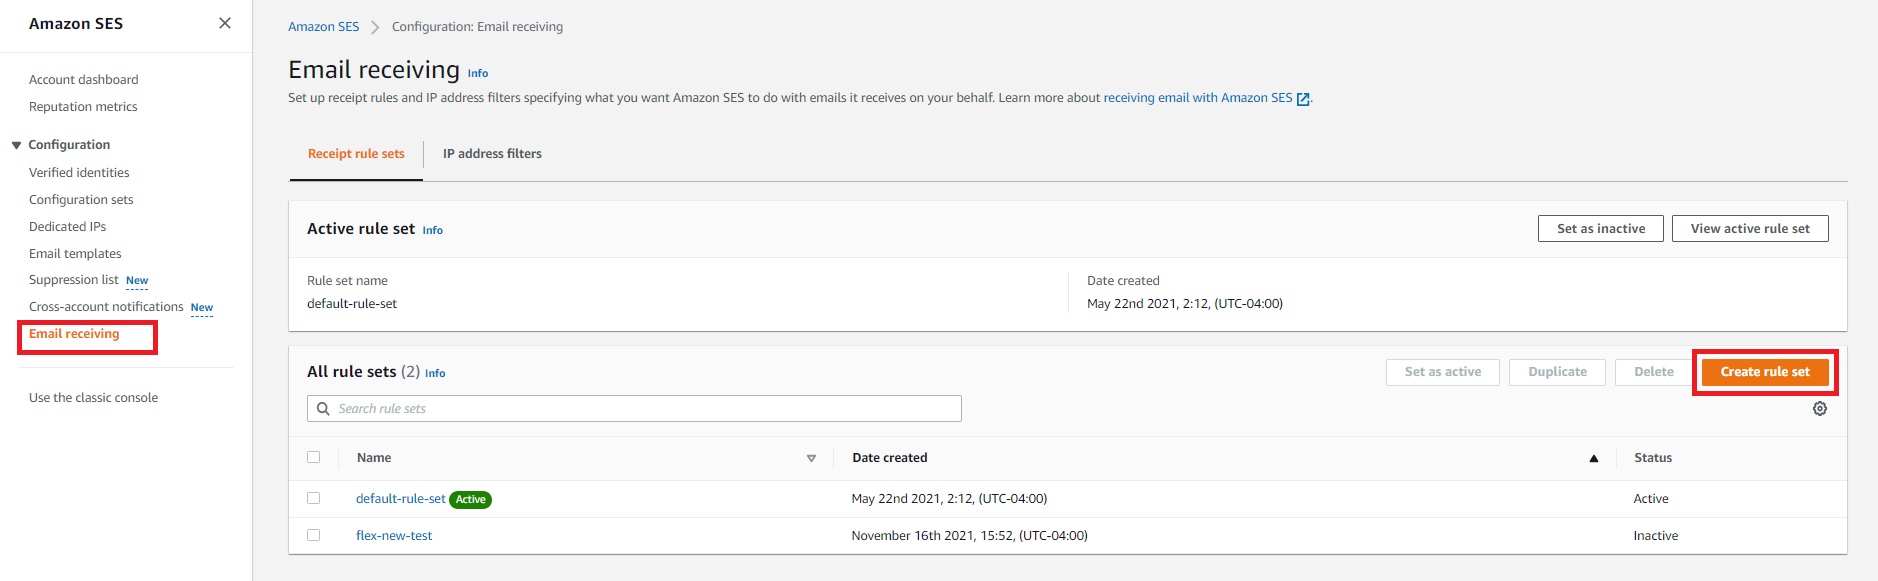
- Once the rule set has been created, you can start creating rules by clicking on the respective button.
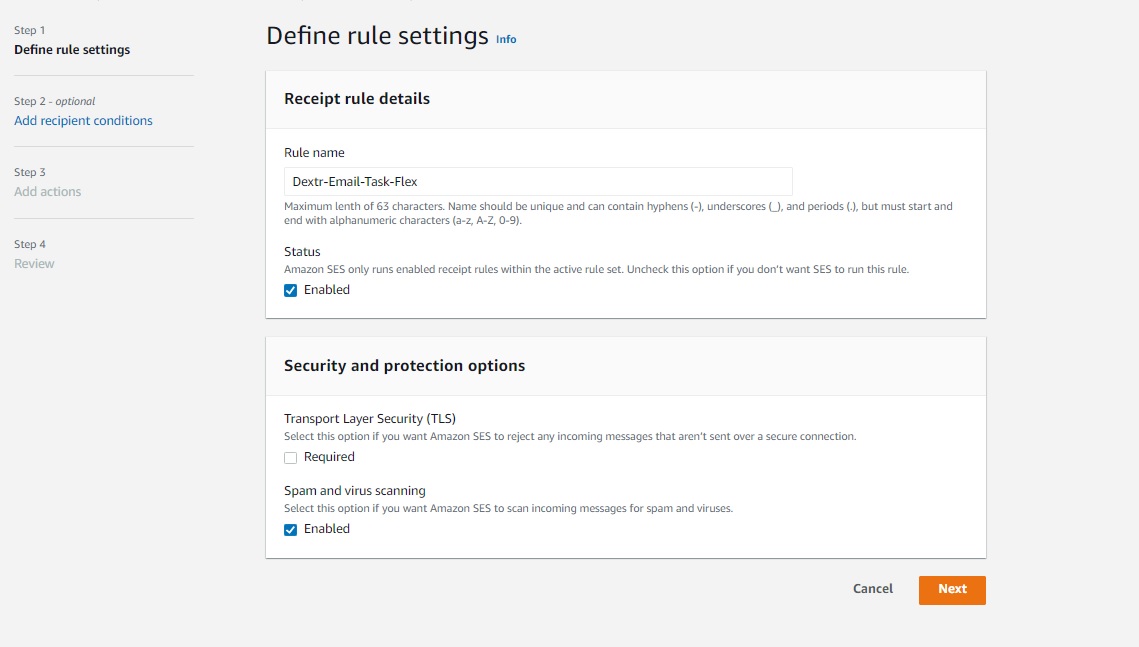
- You will be asked for a Rule name (enter one). For the first step you can leave both “Status” and “Spam and virus scanning” Enabled. Click Next.
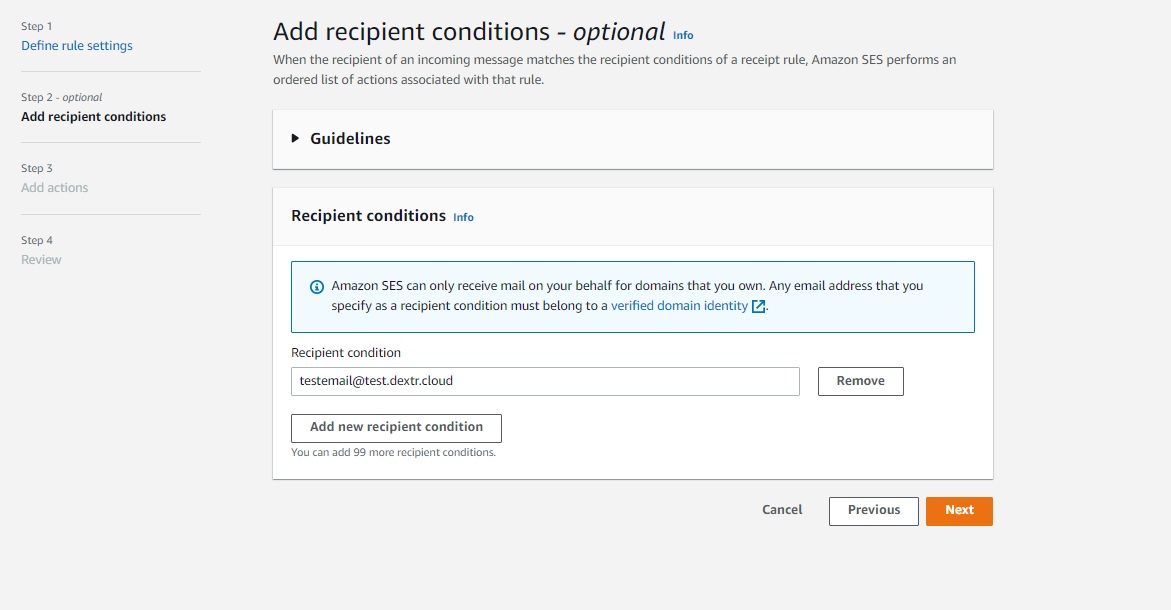
- Click “Add new recipient condition” and enter the email with the subdomain you created. Following the example the resulting condition: “testemail@test.ConnectPath.cx”.
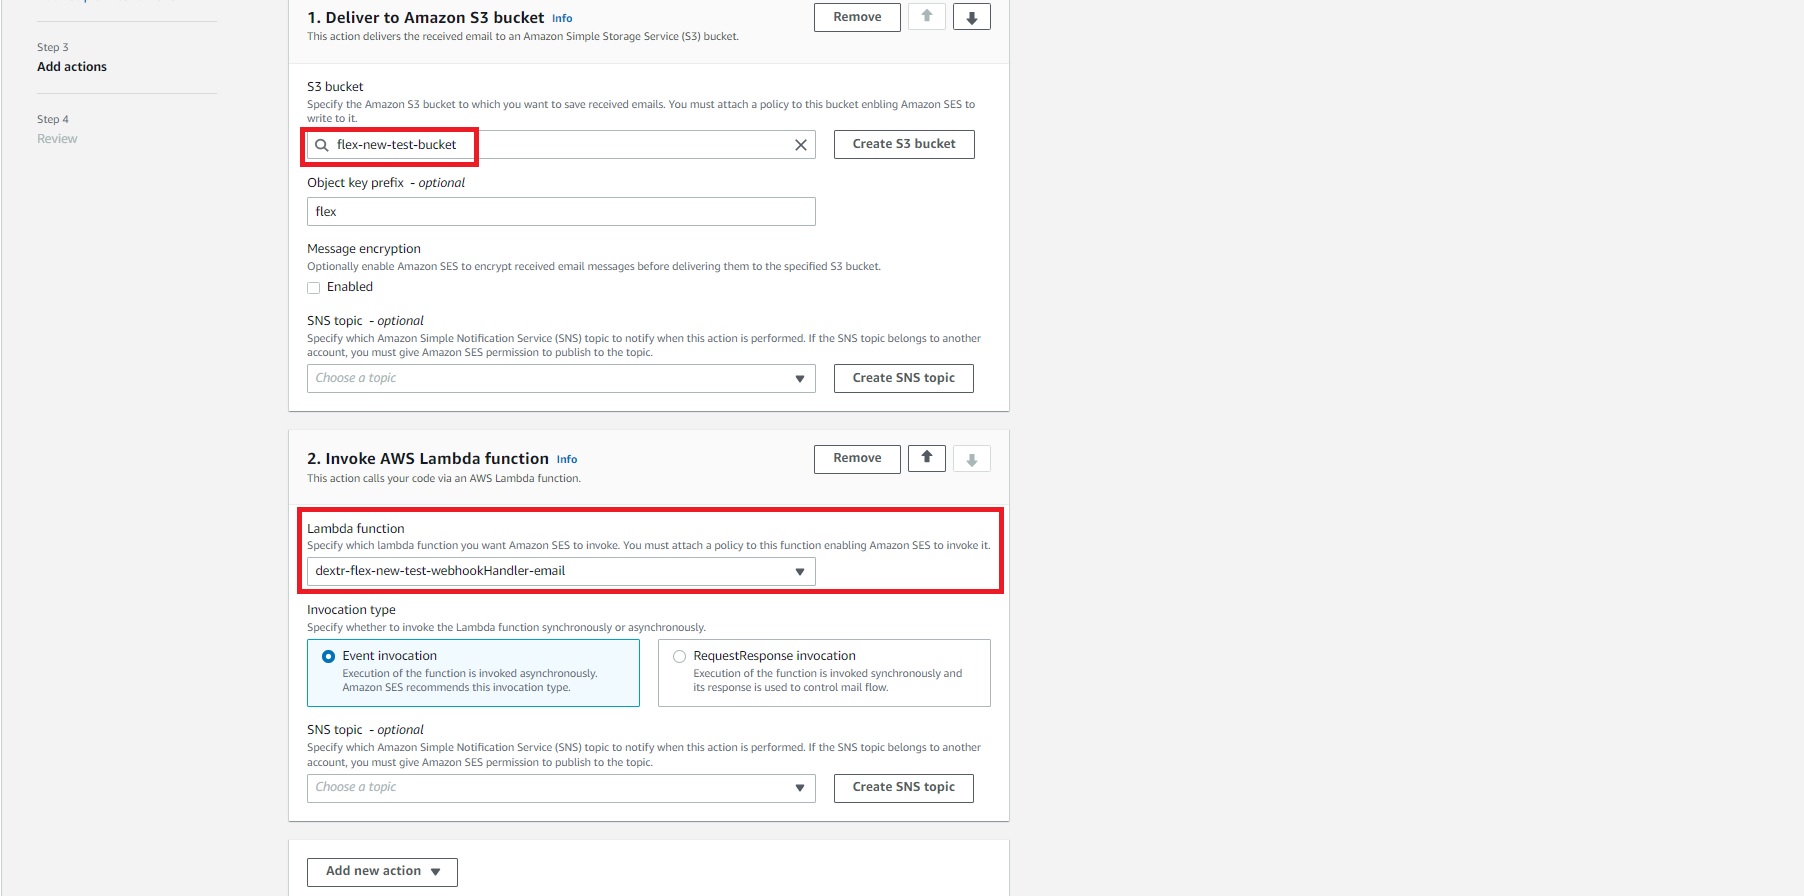
- For Step 3 “Add actions” you’ll want two actions:
- Deliver to Amazon S3 bucket (you can create another one or use the existing one from your Connect Instance, which you can check by going to ConnectPath Settings -> Instance Details -> Reporting Bucket) where emails will be stored, and for “Object key prefix” you need to write “dextr/email”.
- Add another action, which is going to be Invoke AWS Lambda function and the chosen function will have the following format: ConnectPath-instanceAlias-webhookHandler-email. The invocation type should be “Event invocation”.
- Last step is review, so review the information and save the changes.
8 - S3 bucket
- The S3 bucket used by SES to store incoming E-Mail needs to have CORS permissions assigned to it:
[ { “AllowedHeaders”: [], “AllowedMethods”: [ “GET” ], “AllowedOrigins”: [ “https://go.dextrflex.com”, “https://go.connectpath.cx” ], “ExposeHeaders”: [] } ]
9 - SMTP (Outgoing E-Mail) configuration
- If you find issues in validating your E-Mail sending setup, there is likely a mismatch in either the port or TLS Toggle. TCP/587 does not need the TLS Toggle set whereas TCP/465 does. TCP/25 is generally filtered by providers and will likely fail with the TLS Toggle set in either position.
- If you are using Microsoft Office 365 to send E-Mail, you will need to use OAUTH (not Basic) Authentication instead. Please see the relevant documentation at https://docs.dextr.cloud/emailTask/
And that’s it! You’re now set up to start receiving emails in your instance.