Onboarding
AWS Marketplace
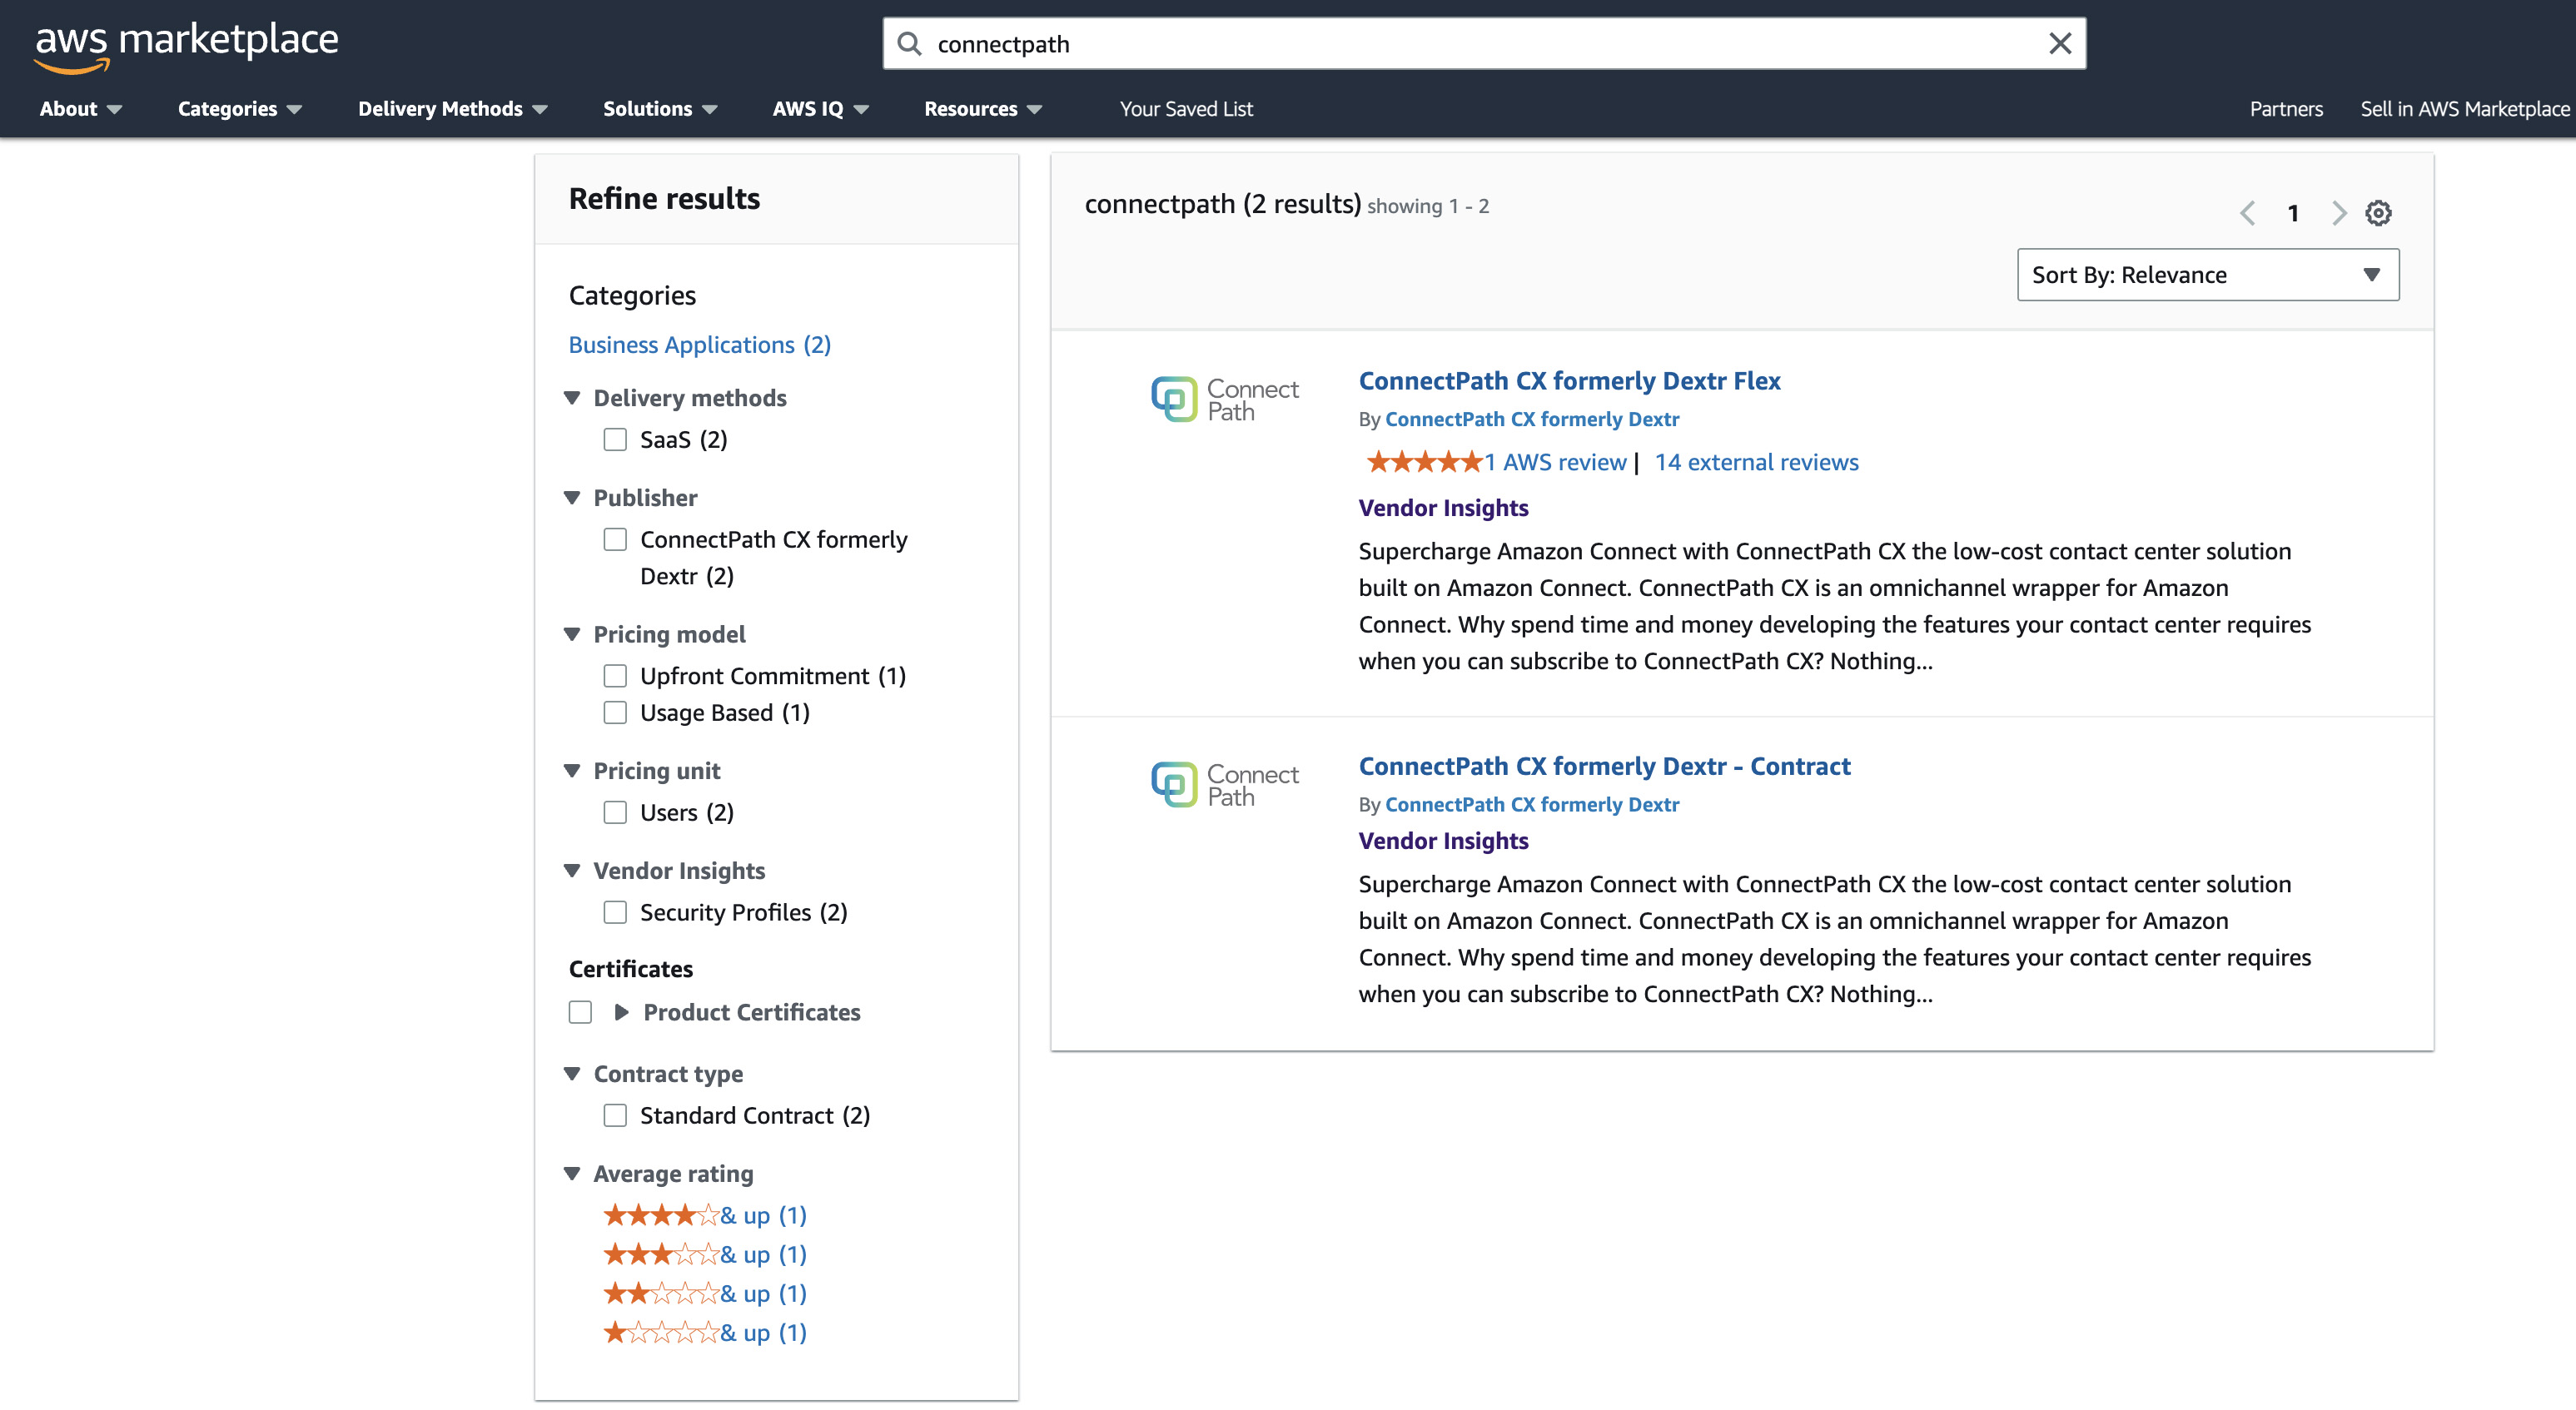
You can discover ConnectPath now since it is available in all regions via the AWS Marketplace. We offer subscription (Pay-as-you-go) and contract (Fixed price) products.
Subscription
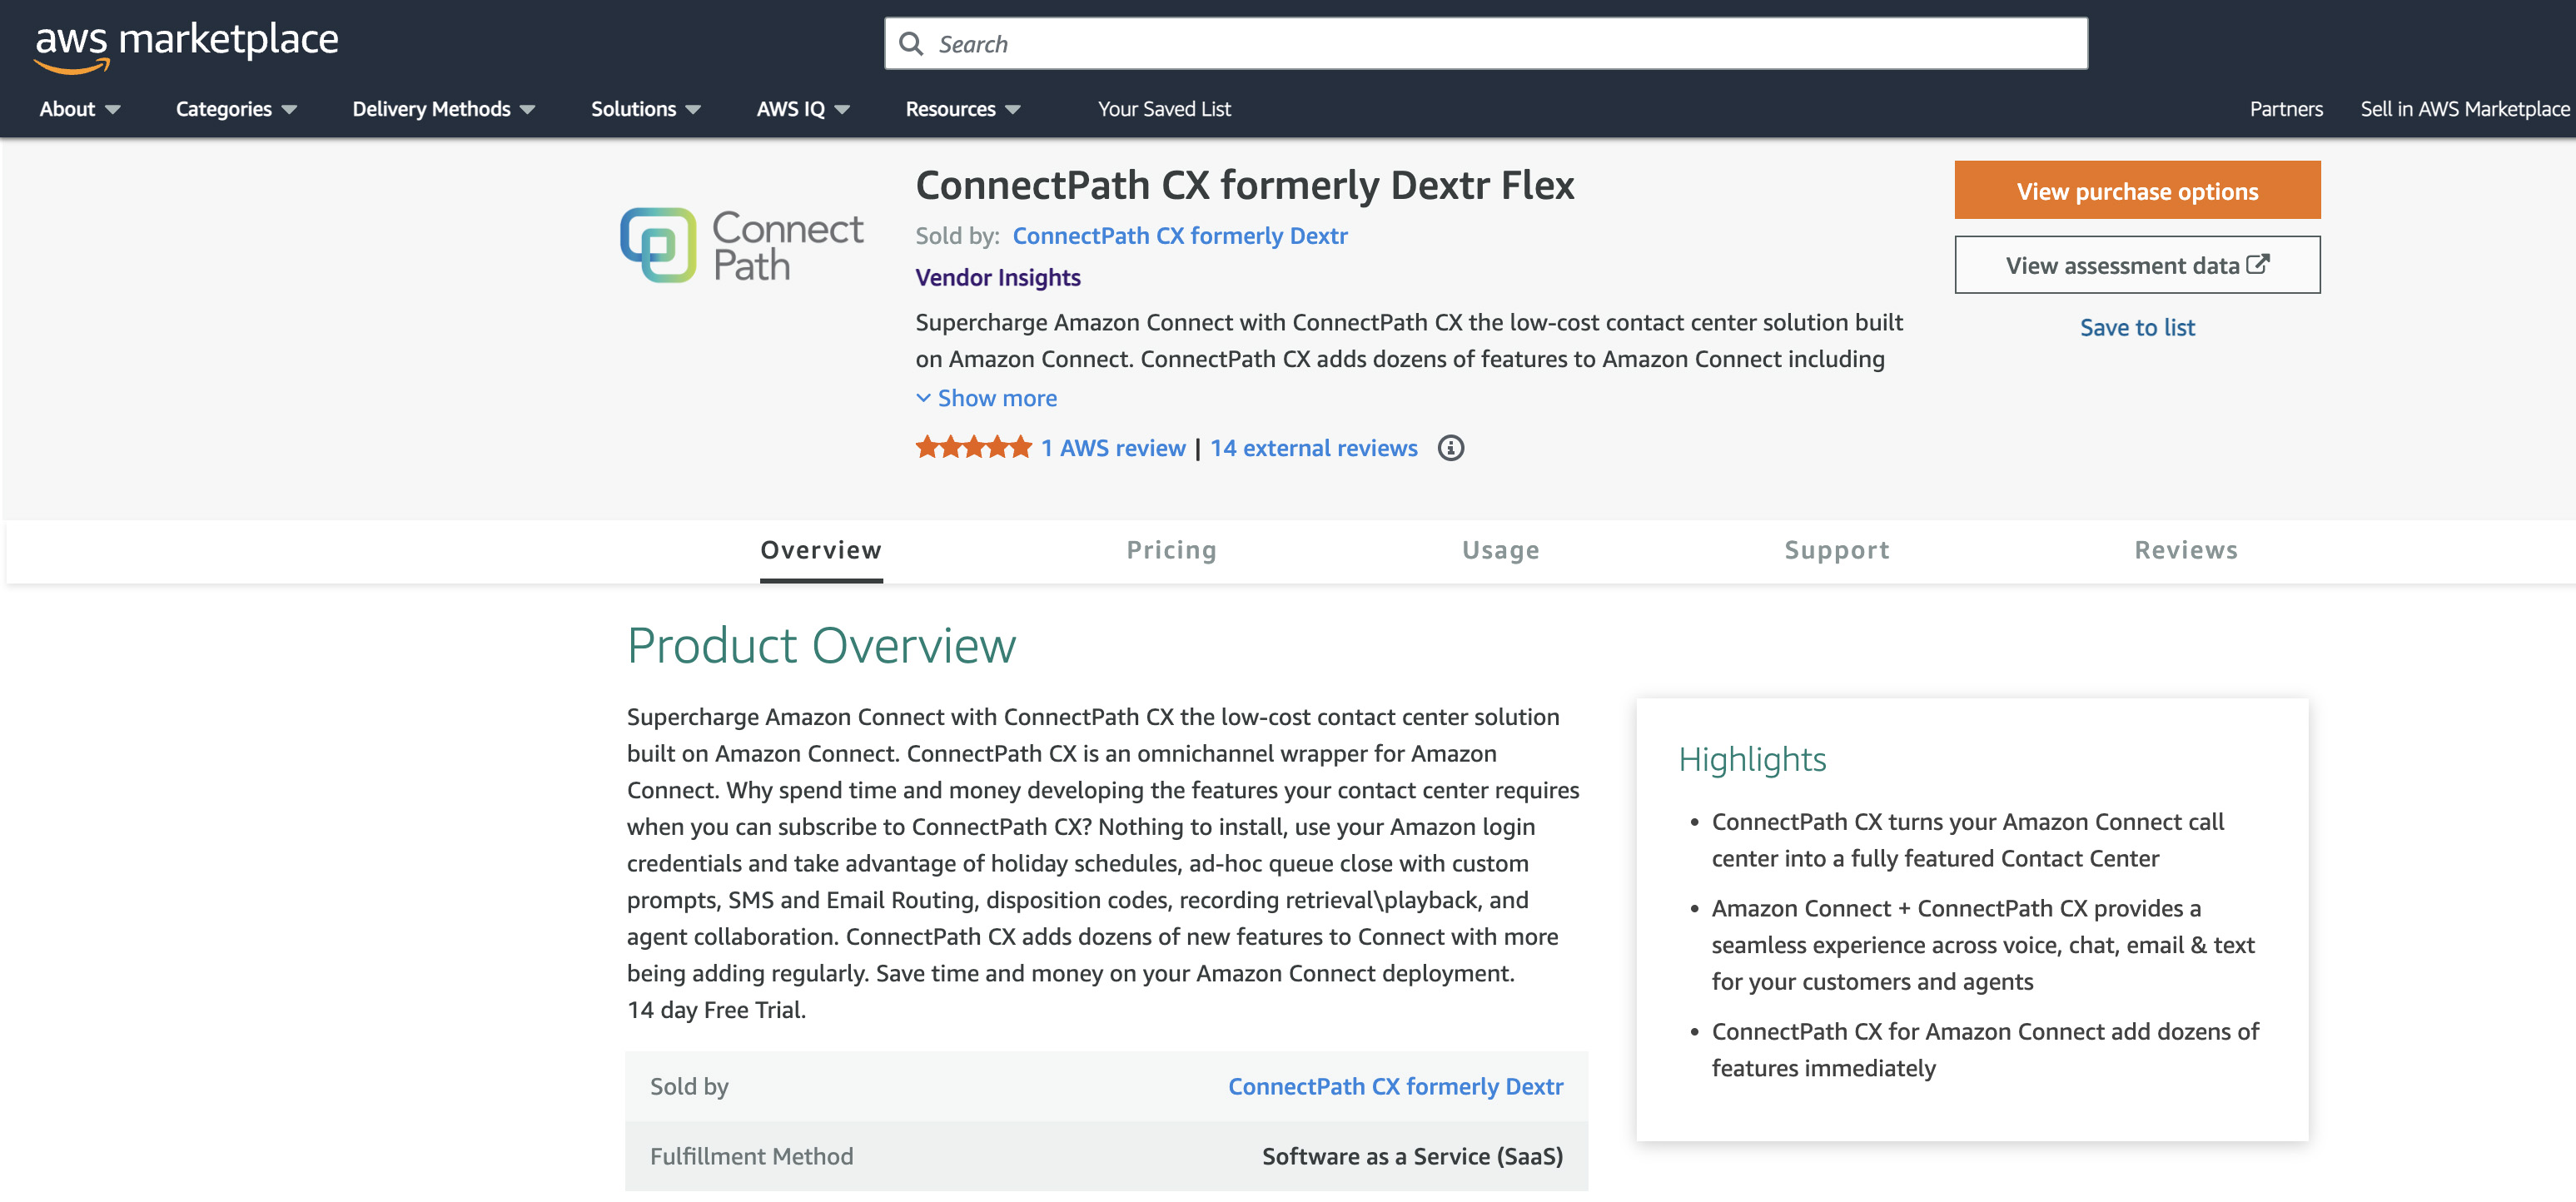
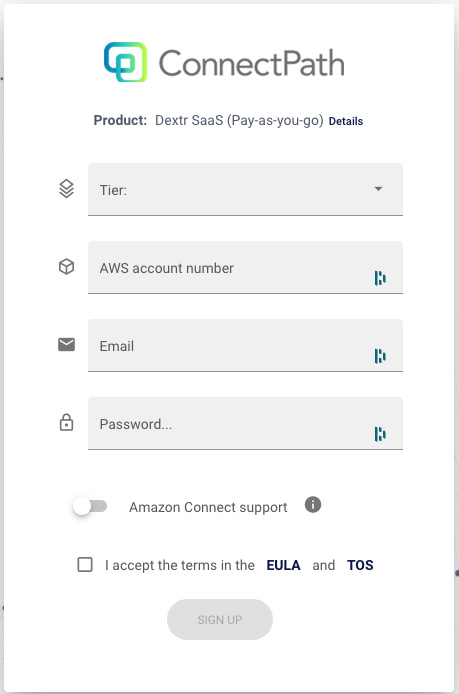
From AWS Marketplace, you can start your subscription process by clicking View Purchase Options.
Set up your account
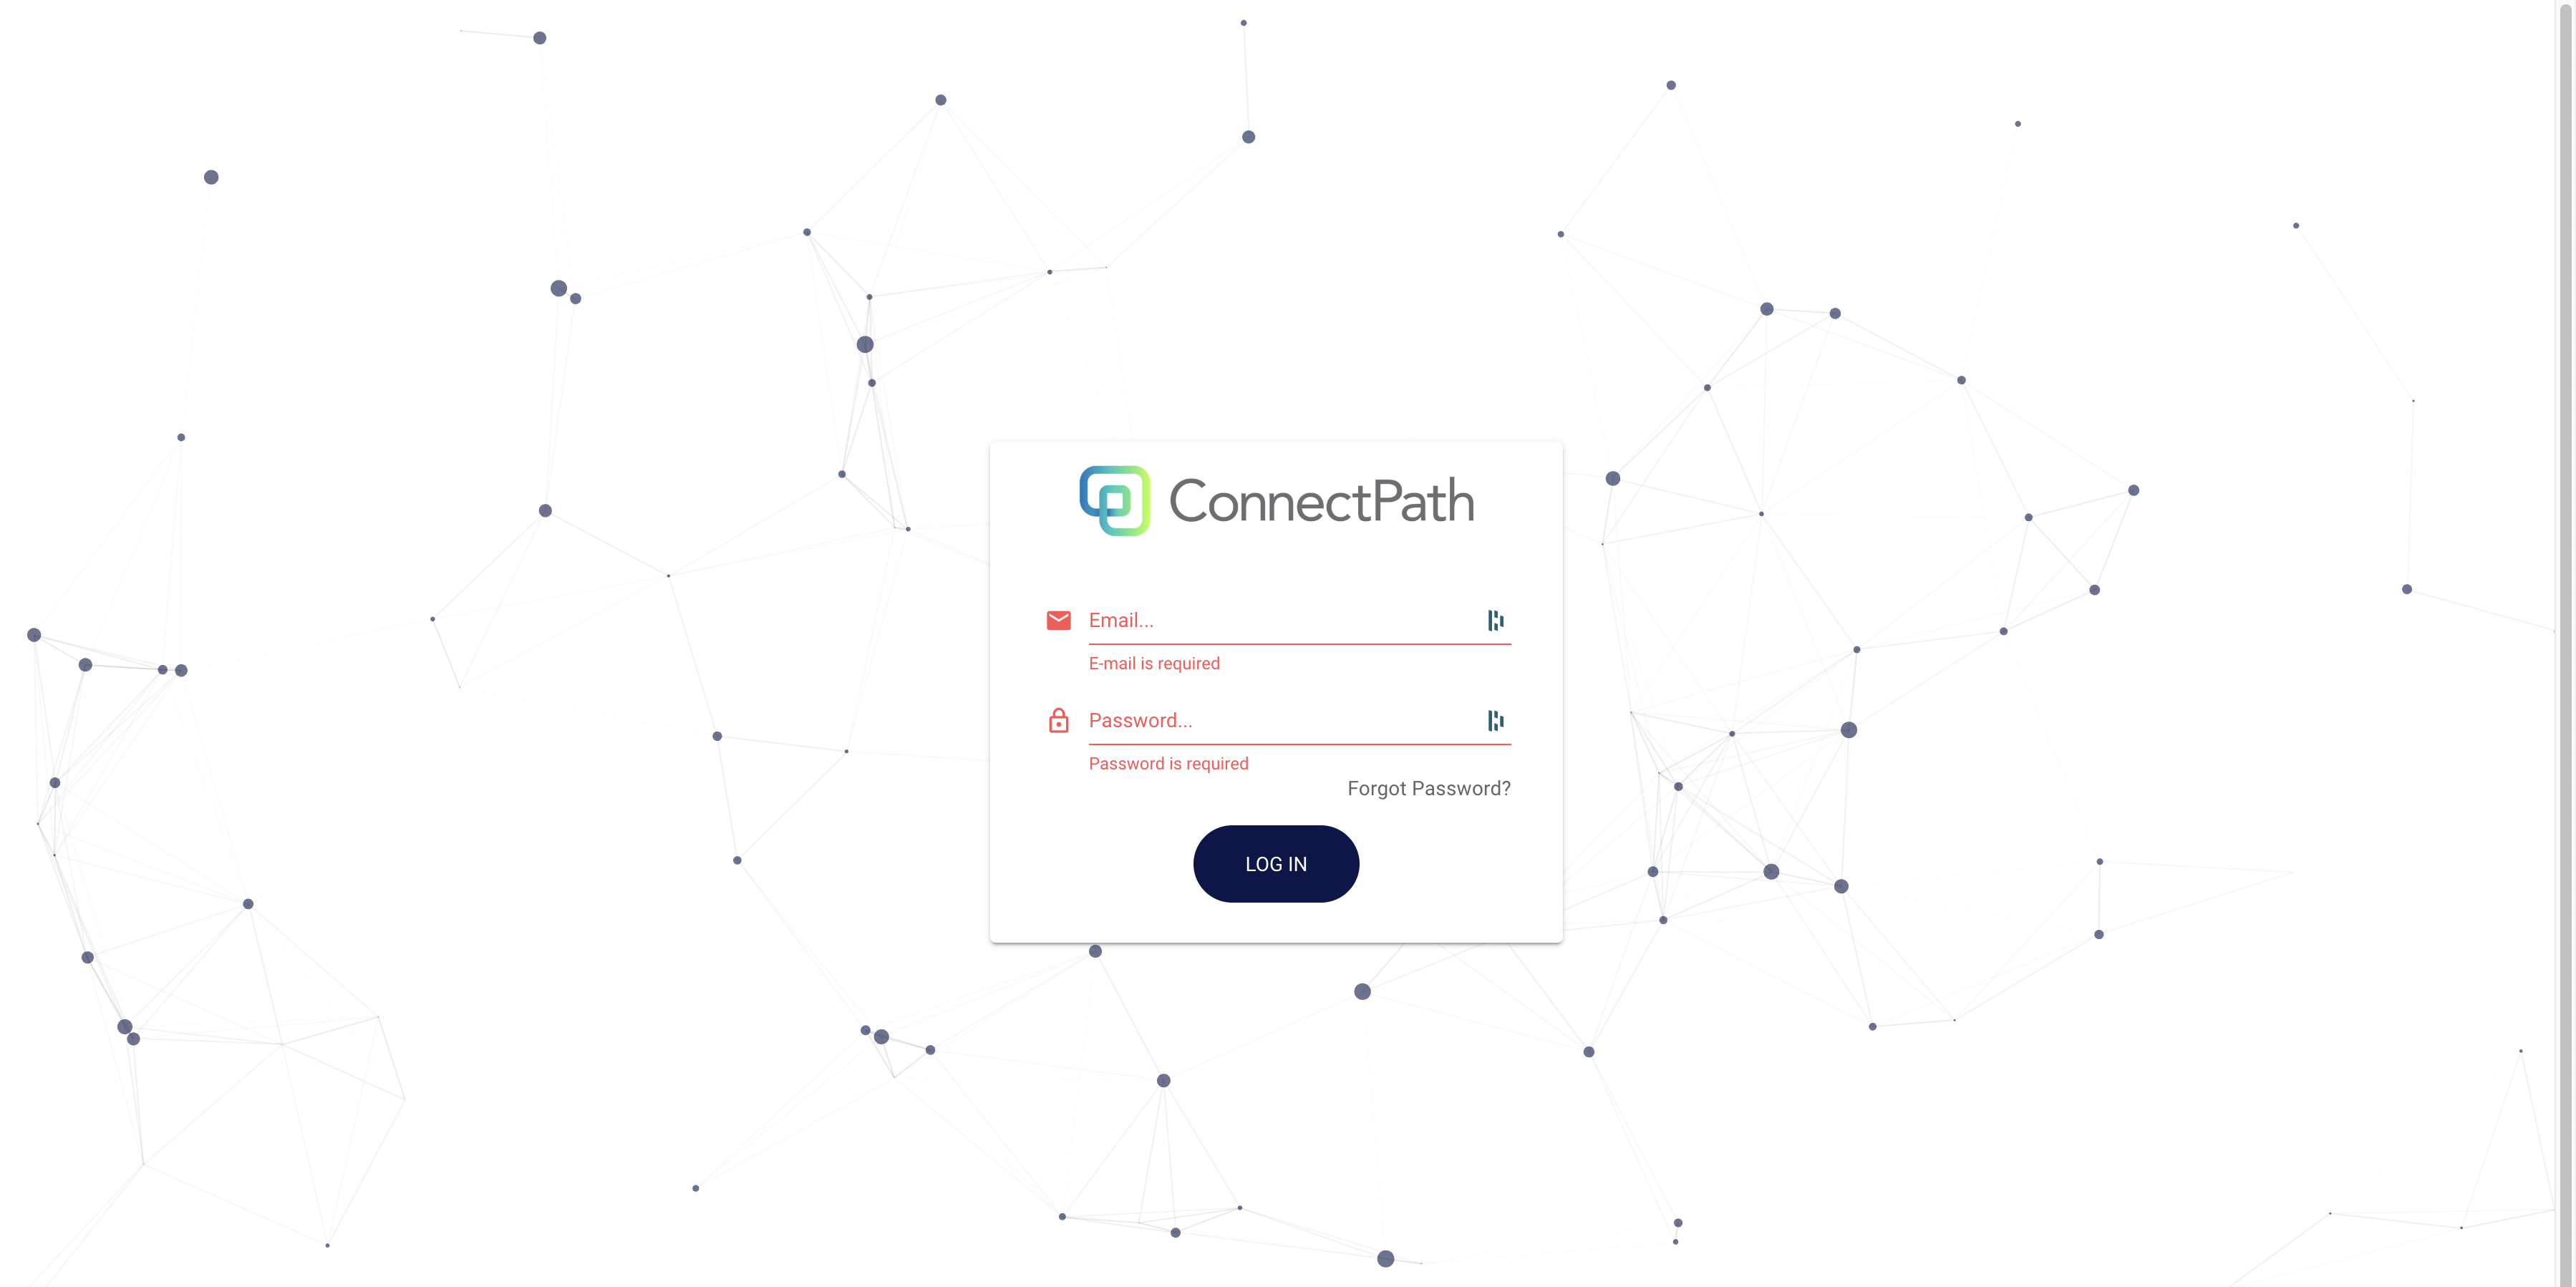
After subscribing, you will be redirected to ConnectPath Admin portal, where you’ll set up your account.
After your subscription to ConnectPath and setting up your account, you’ll be redirected to the Onboarding portal in order to claim your instance.
Note that for the addition of subsequent instances, you may use the same username and password previously setup to access the ConnectPath Instance Admin Portal (separate from the ConnectPath Portal) and if those instances are in the same AWS account, you may skip the preceding three steps.
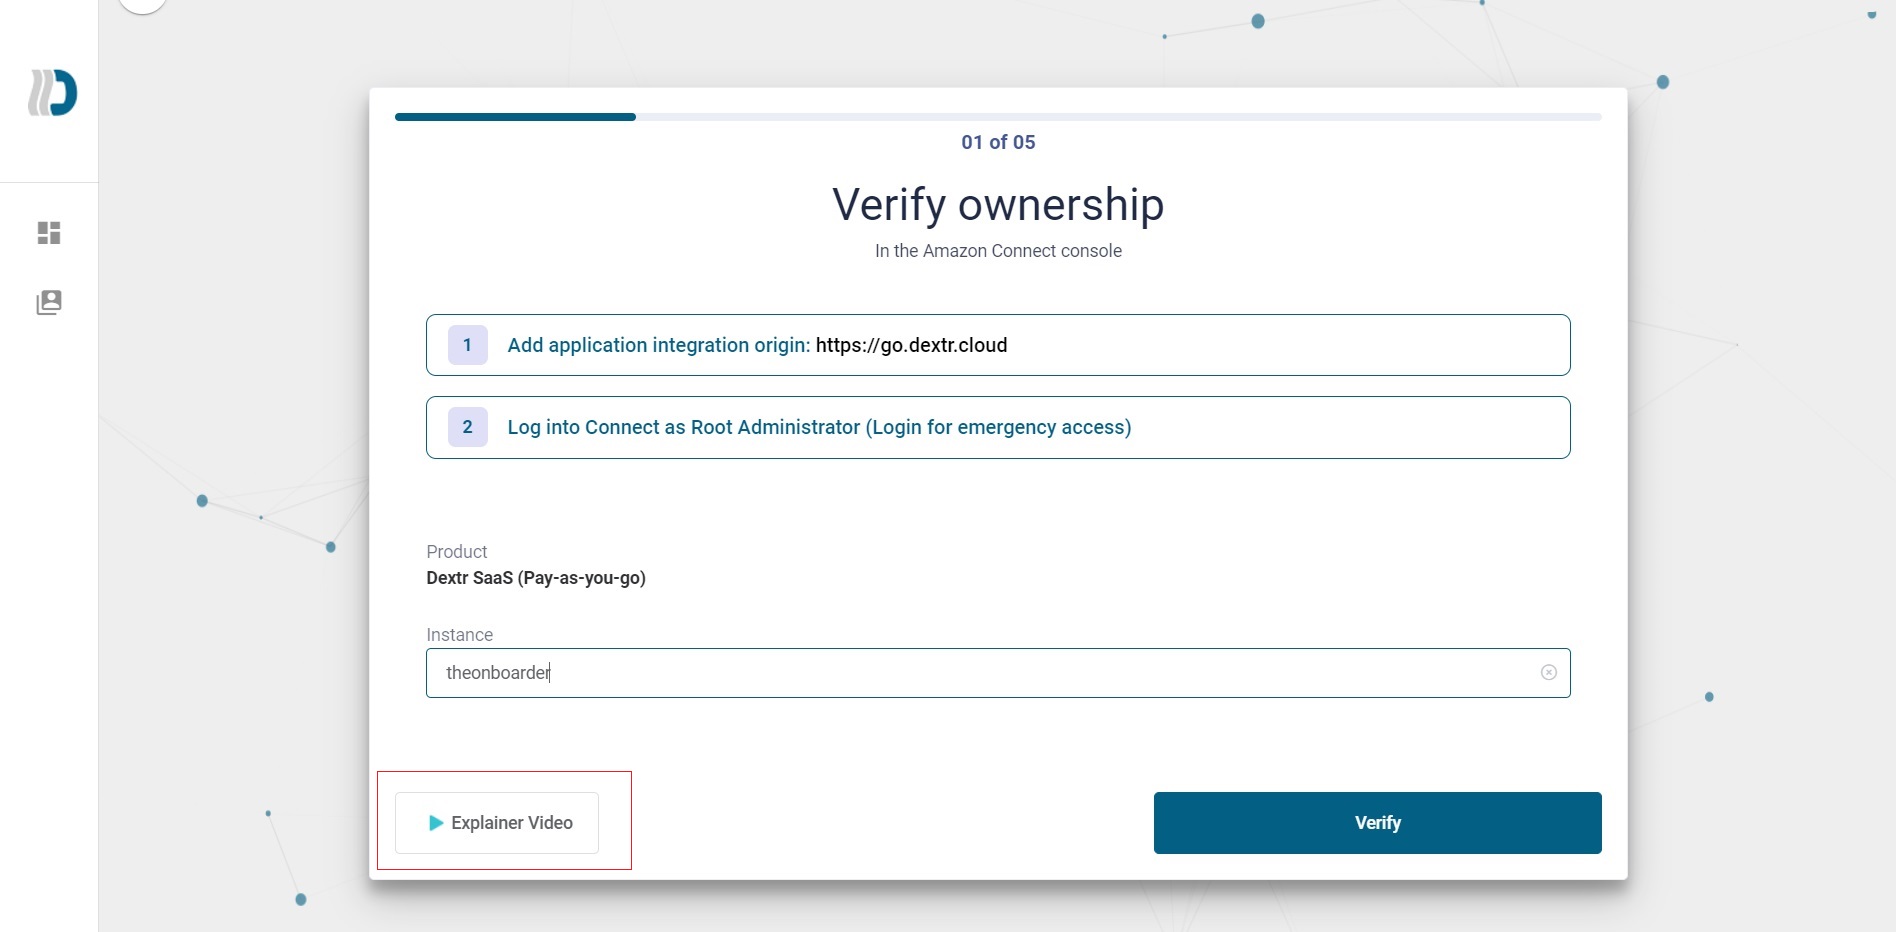
Onboarding
The Onboarding process consists of 5 steps, and the first 3 steps have an Explainer video that you can watch for guidance.
Step 1. Verify Ownership
Verify ownership requires you to add Application integration origin and Login into Connect as Root Administrator. Remember to also whitelist https://go.connectpath.cx to allow incoming popups.
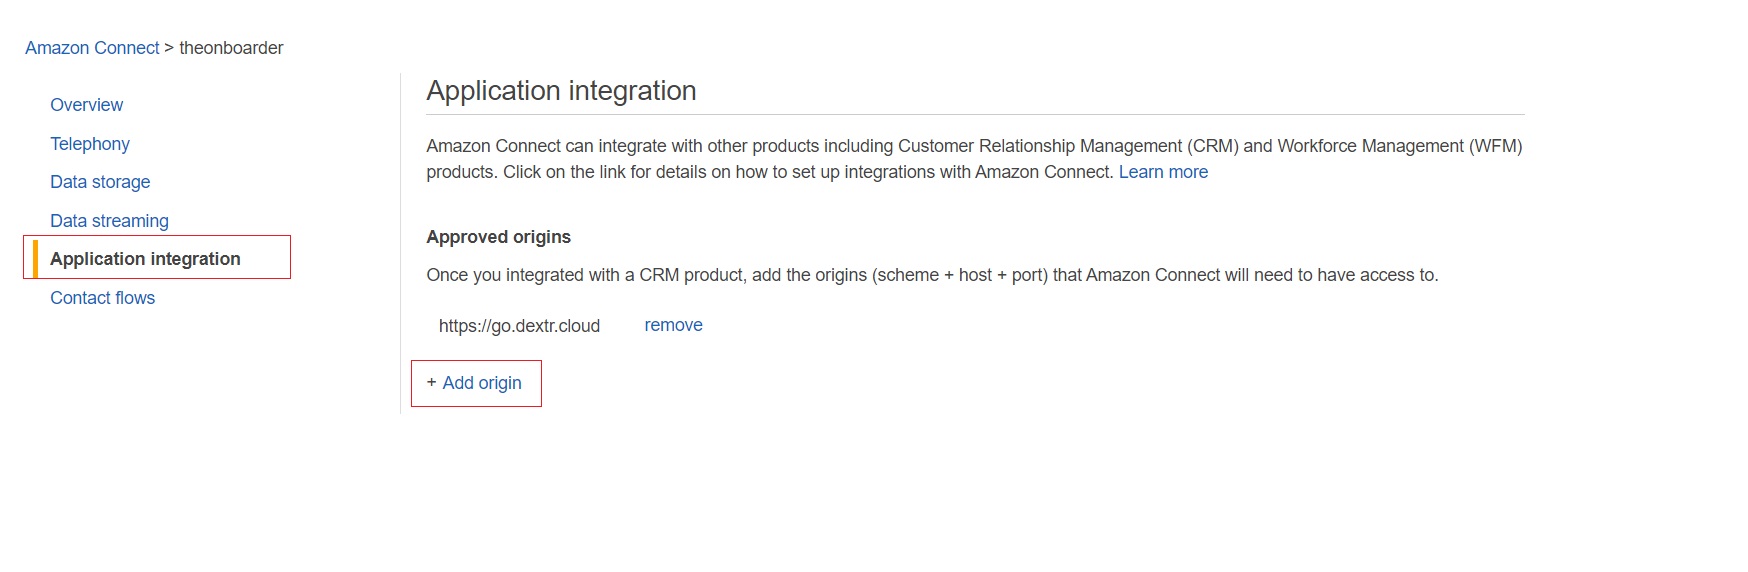
Step 1.1 - Application integration
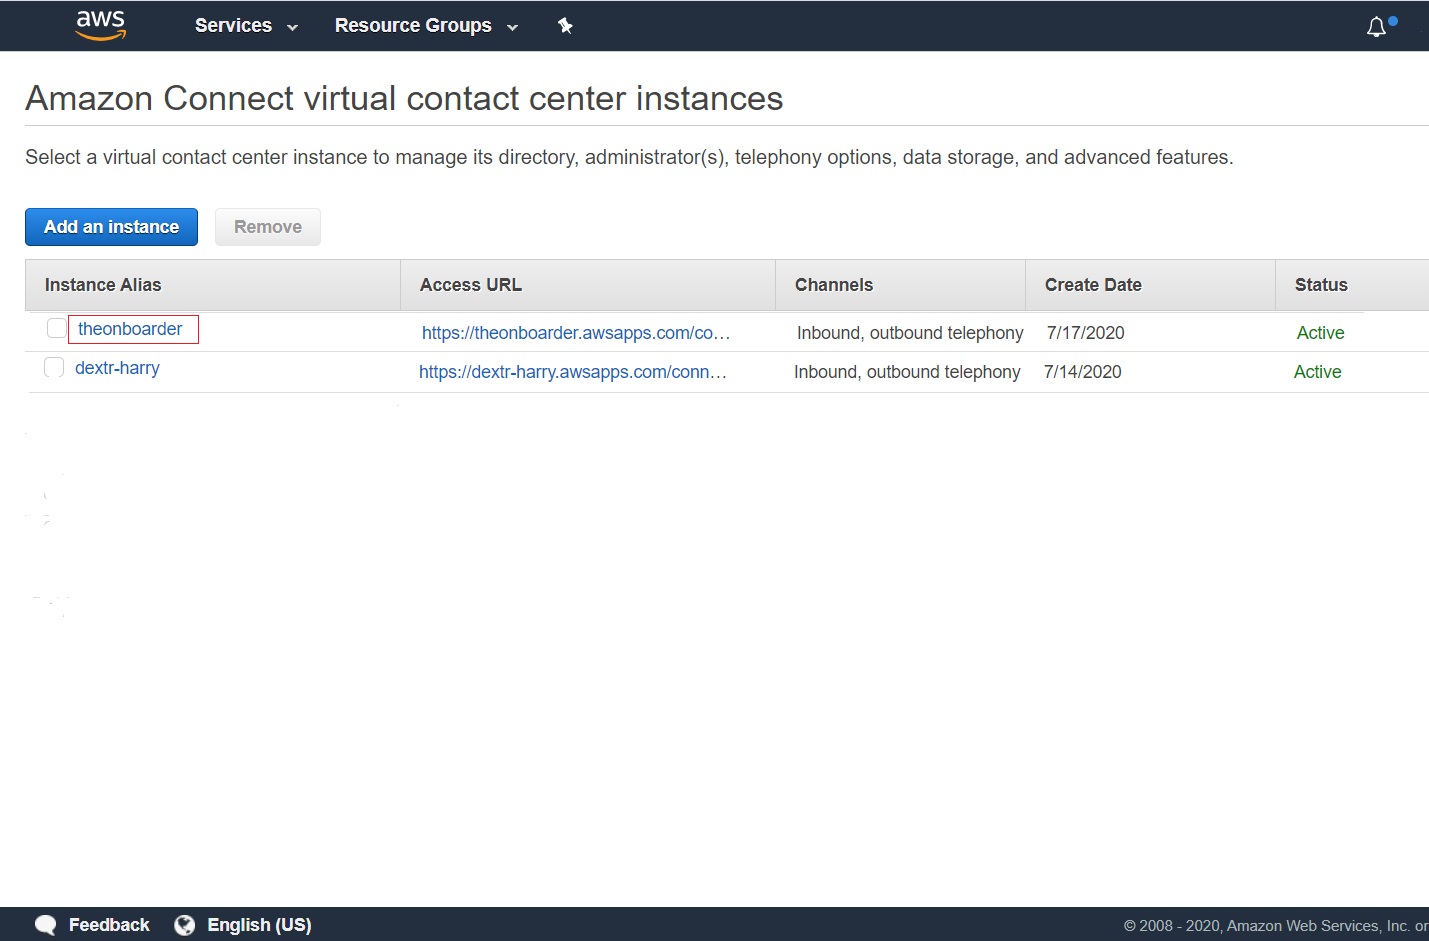
You require an Approved origin in Amazon Connect. Through the Amazon Web Service console:
-
Go to Amazon Connect and click the name of your instance.
-
Go to the Application Integration tab and click Add origin. Input https://go.connectpath.cx and add it.
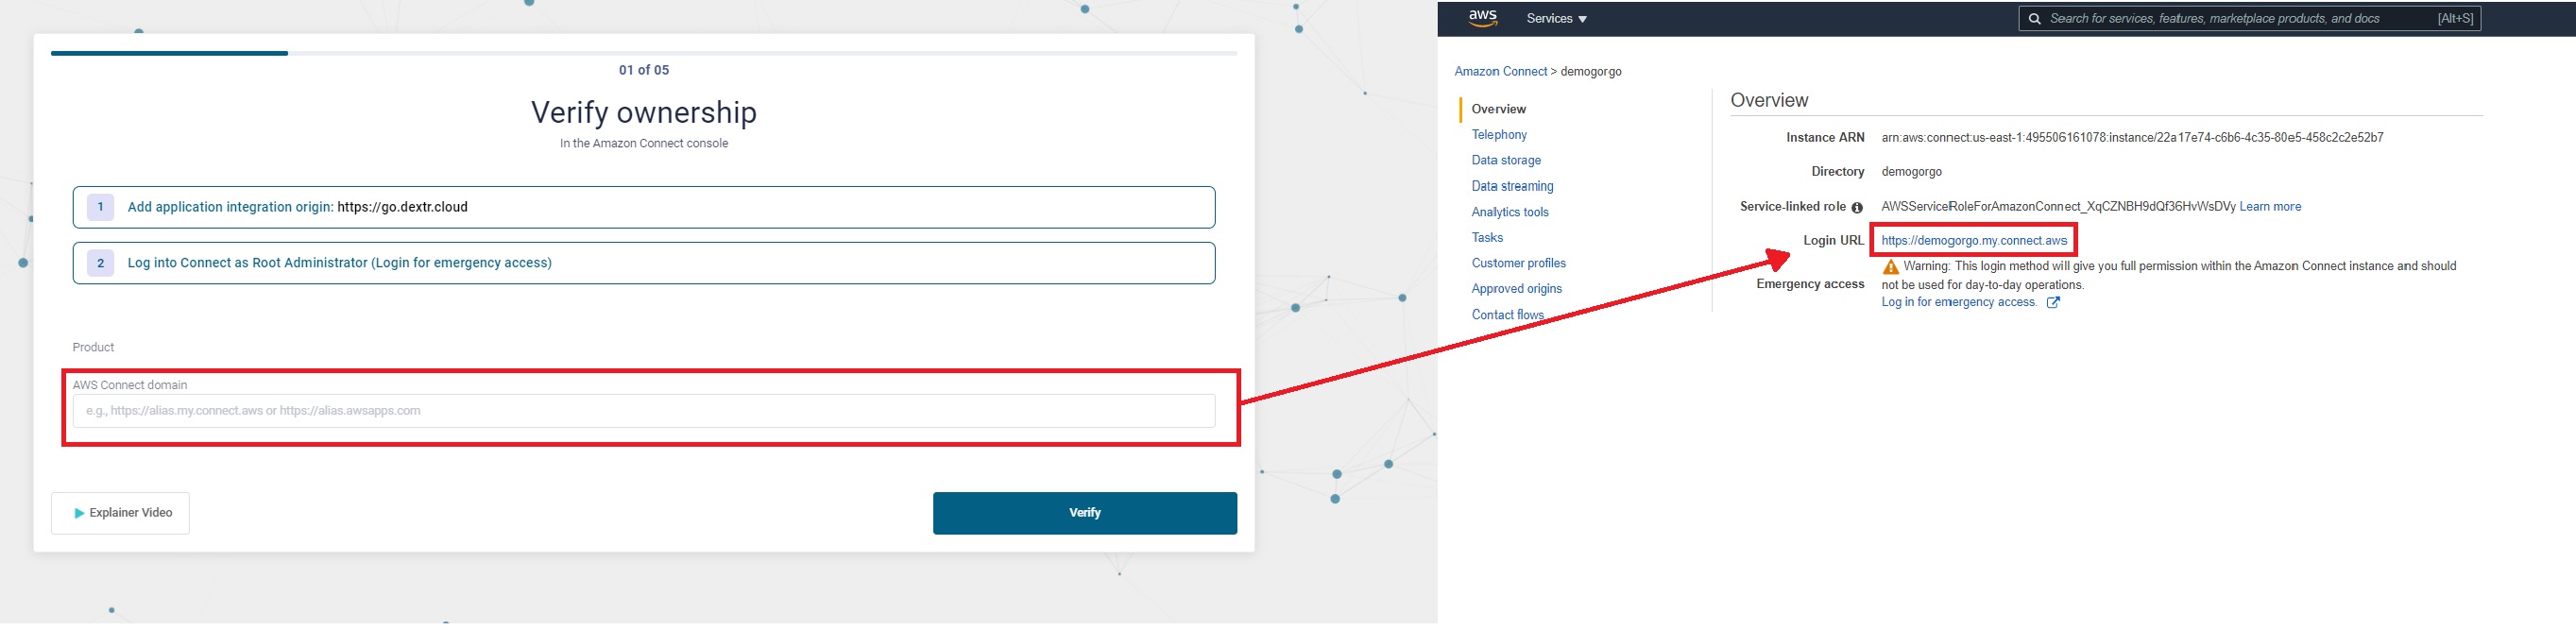
Step 1.2 - Login into Amazon Connect as Root Administrator
- In the Overview tab, click Log in for emergency access.
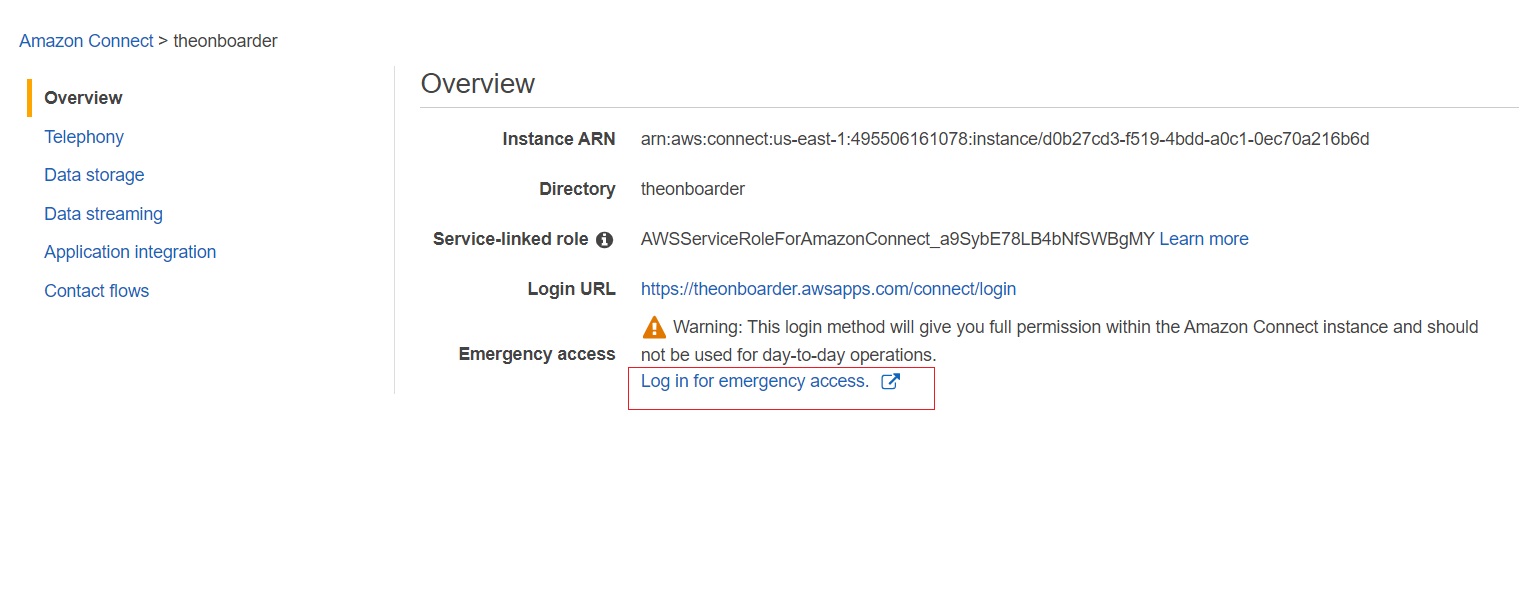
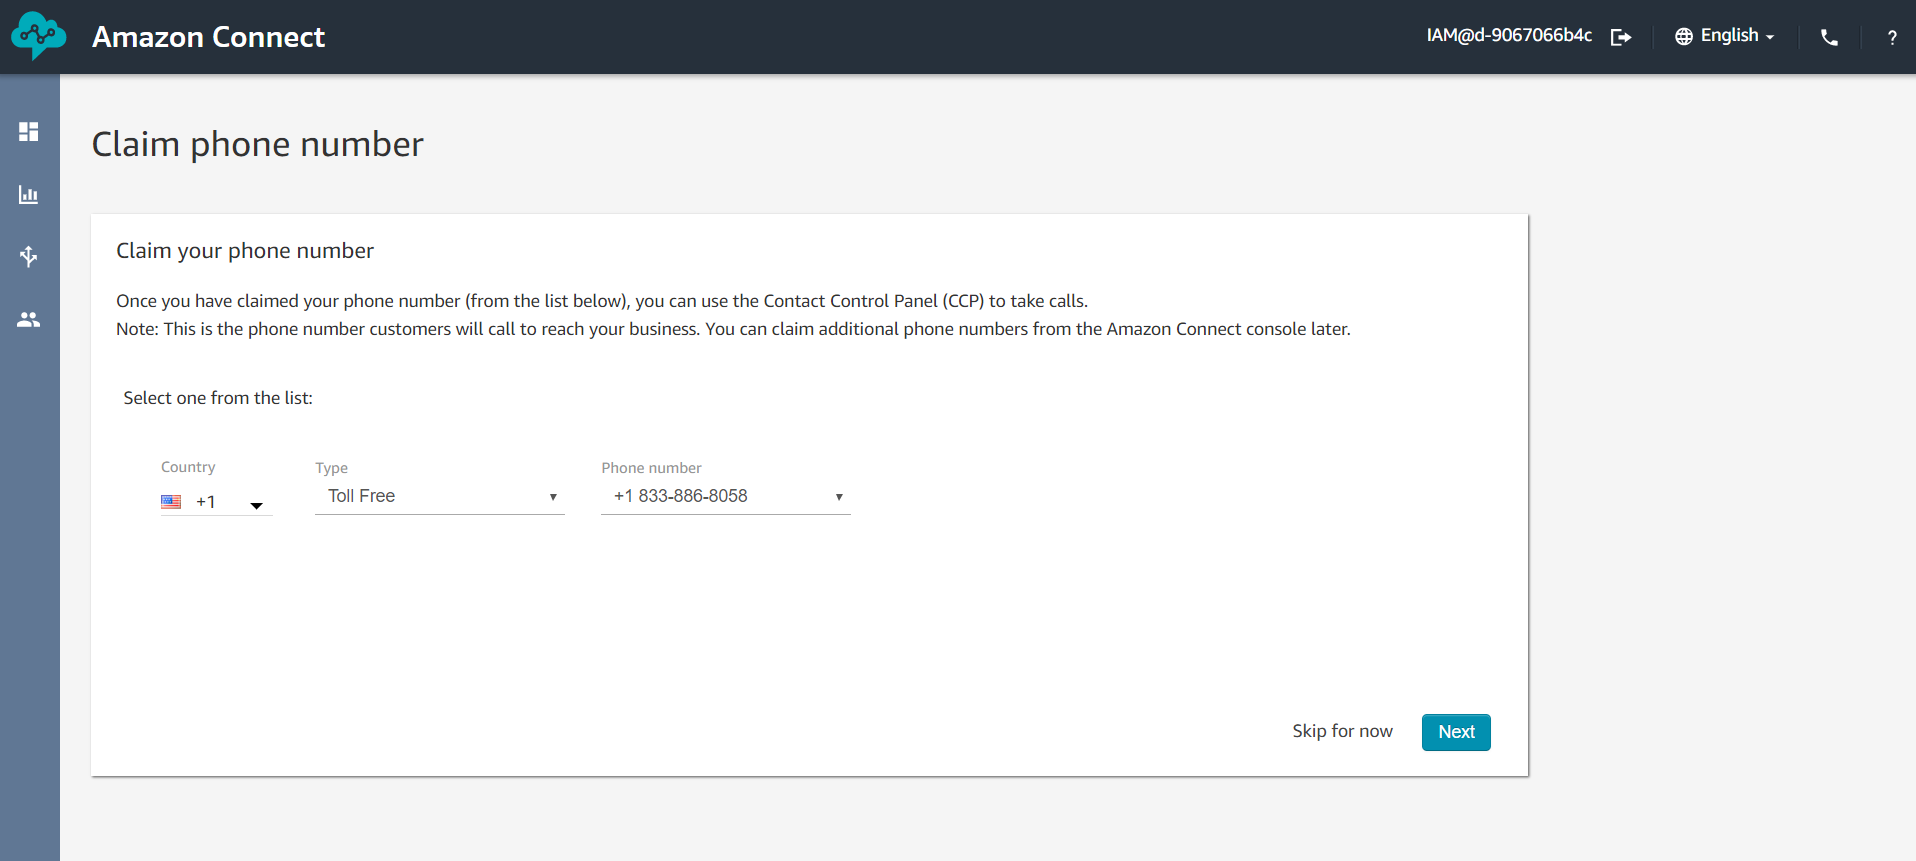
- This will bring you to the Amazon Connect Dashboard. If you still haven’t claimed a number remember to do so in the Claim Phone Number section, where you’ll need to select a country, type and phone number. This allows you to set Data Streaming later.
- After adding Application origin and being logged as Root Administrator , type the Login URL of your connect instance and click the Verify button, granting you the Verified status which allows you to proceed to the next step.
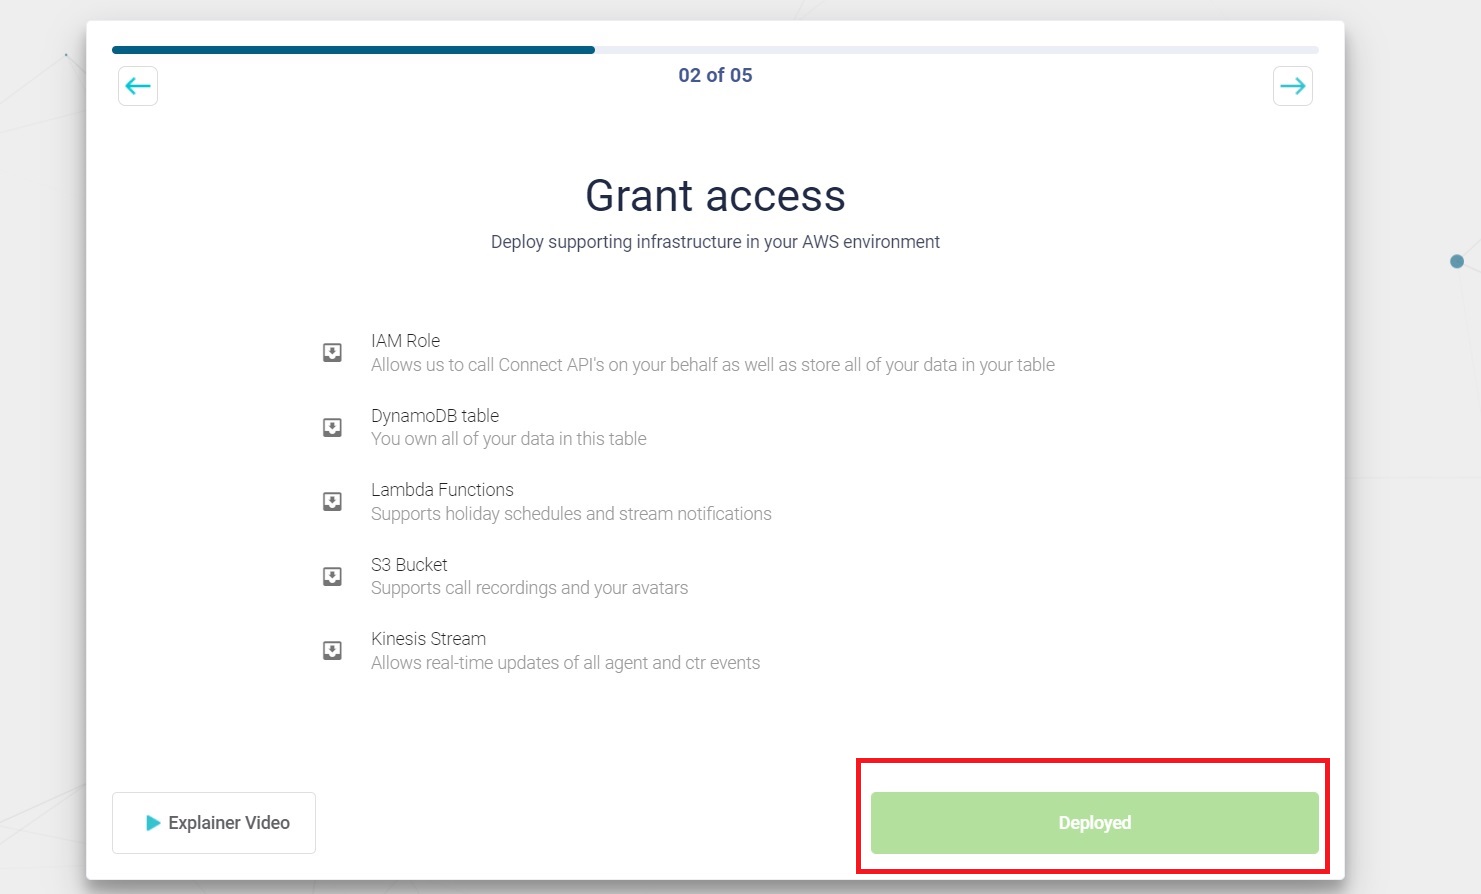
Step 2. Grant Access
The second step is granting access by deploying support resources.

- Click Deploy Resources.
- You’ll be redirected to AWS console to create a stack. Create it by scrolling down, check I acknowledge that AWS CloudFormation might create IAM resources with custom names and click Create stack.
- After waiting a few moments the option to Validate will be unlocked. Click to proceed and get the Deployed status.
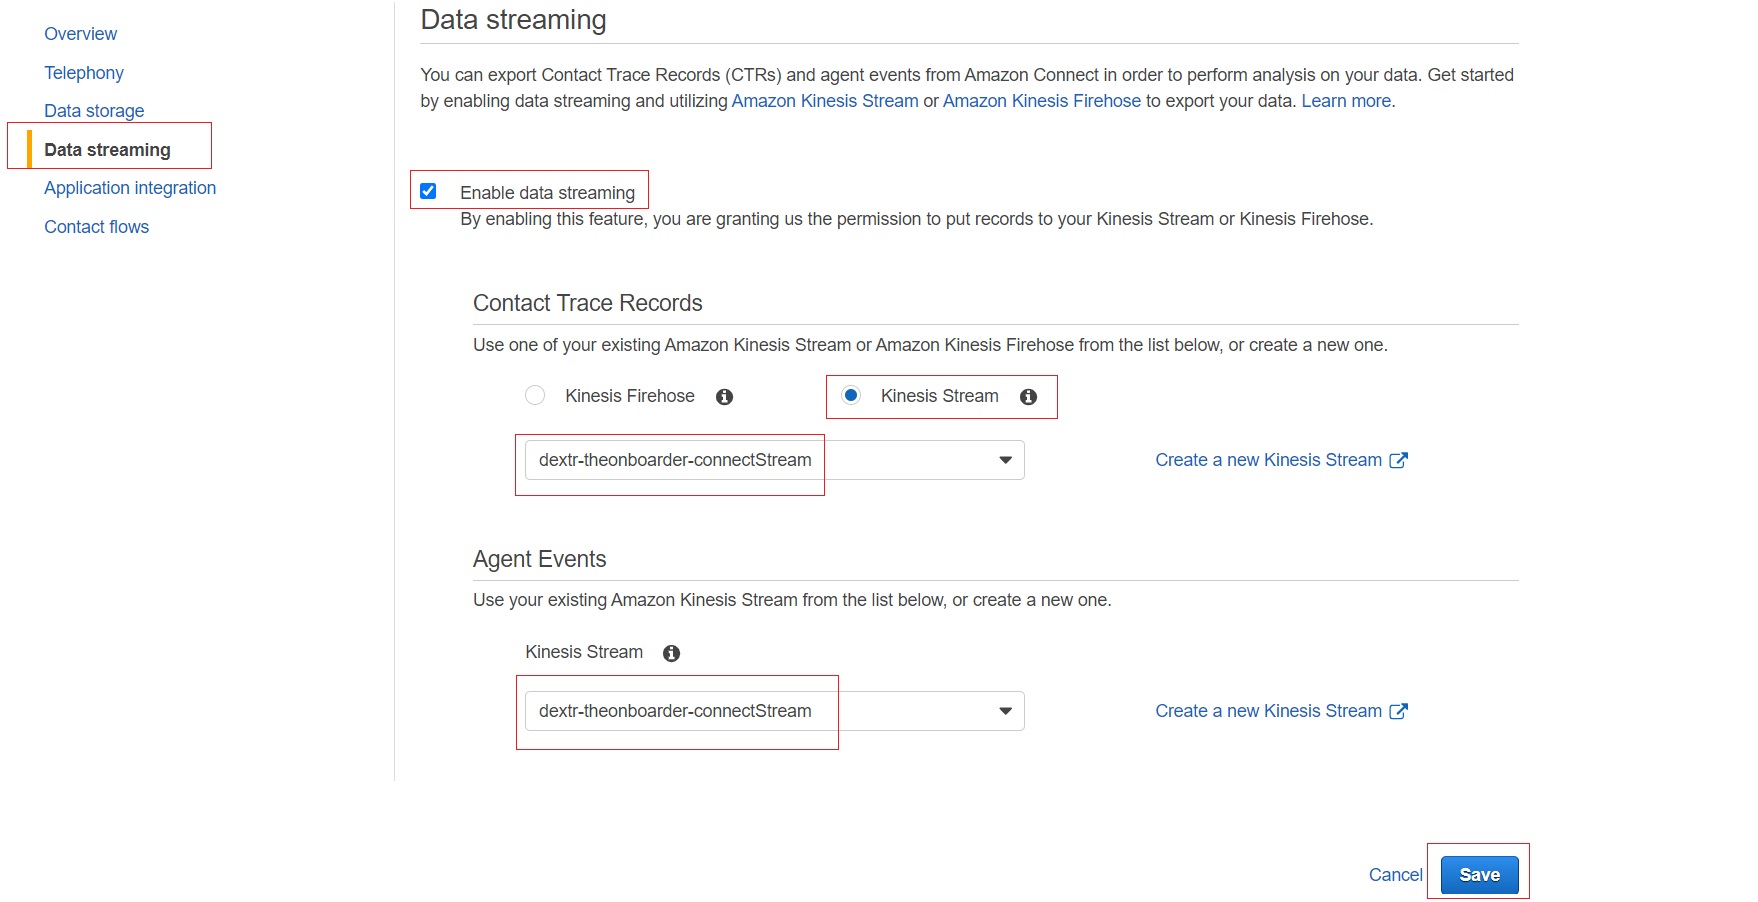
Step 3. Data Streaming
In this step you can export Contact Tracer Records (CTRs) and Agent Events to perform analysis on your data. You can do so by enabling data streaming in the Data Streaming tab in Amazon Connect for both CTR and Agent Events. From Amazon Connect:
- Click Data Streaming TAB.
- Check Enable Data Streaming.
- Mark Kinesis Stream.
- In the dropdown choose: “dextr-yourInstanceAlias-connectStream” both for Contact Trace Records and Agent Events.
- Click Save.
The connection will be set automatically as soon as you start making calls and interacting with other Agents (e.g. Agent chat).
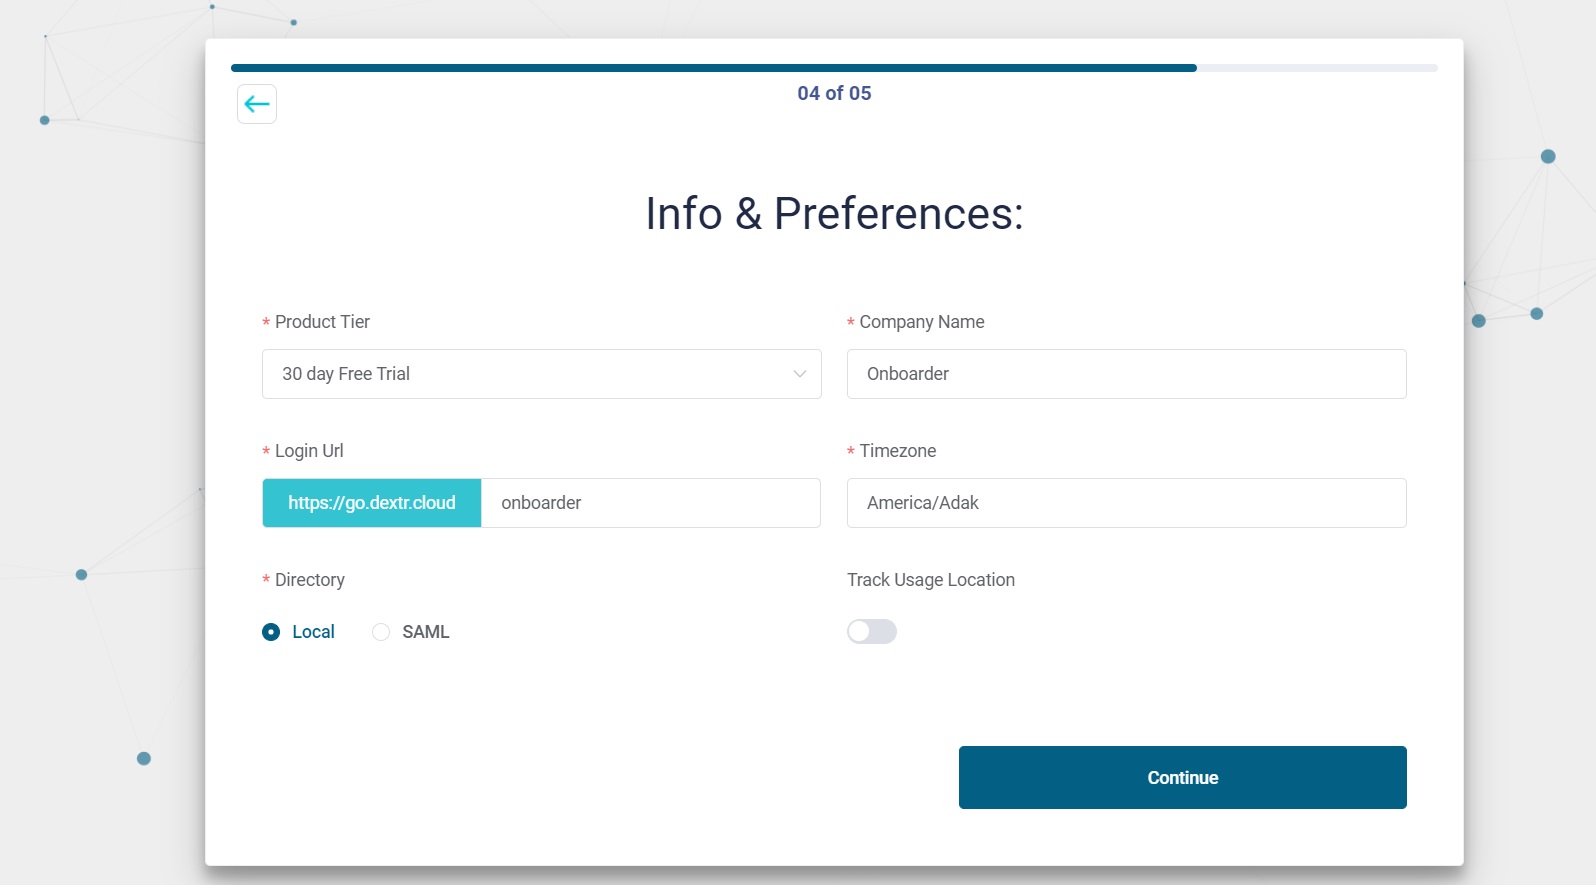
Step 4. Info & Preferences
In this step you’re required to fill 5 obligatory fields in order to proceed to the next step. These are:
- Choose a product tier (if you want to select 30 day Free trial, Dextr Voice Only or Dextr OmniChannel plan).
- Write the name of your Company.
- Write the Login URL.
- Choose a Timezone.
- Choose directory (If Local or SAML).
You also have the option to set Track Usage location.
Step 5 - Review and Confirm
- You’ll be shown a summary of all the data that was chosen in the Onboarding process. You can always go back to a previous step to confirm and change the data you chose in Step 4.
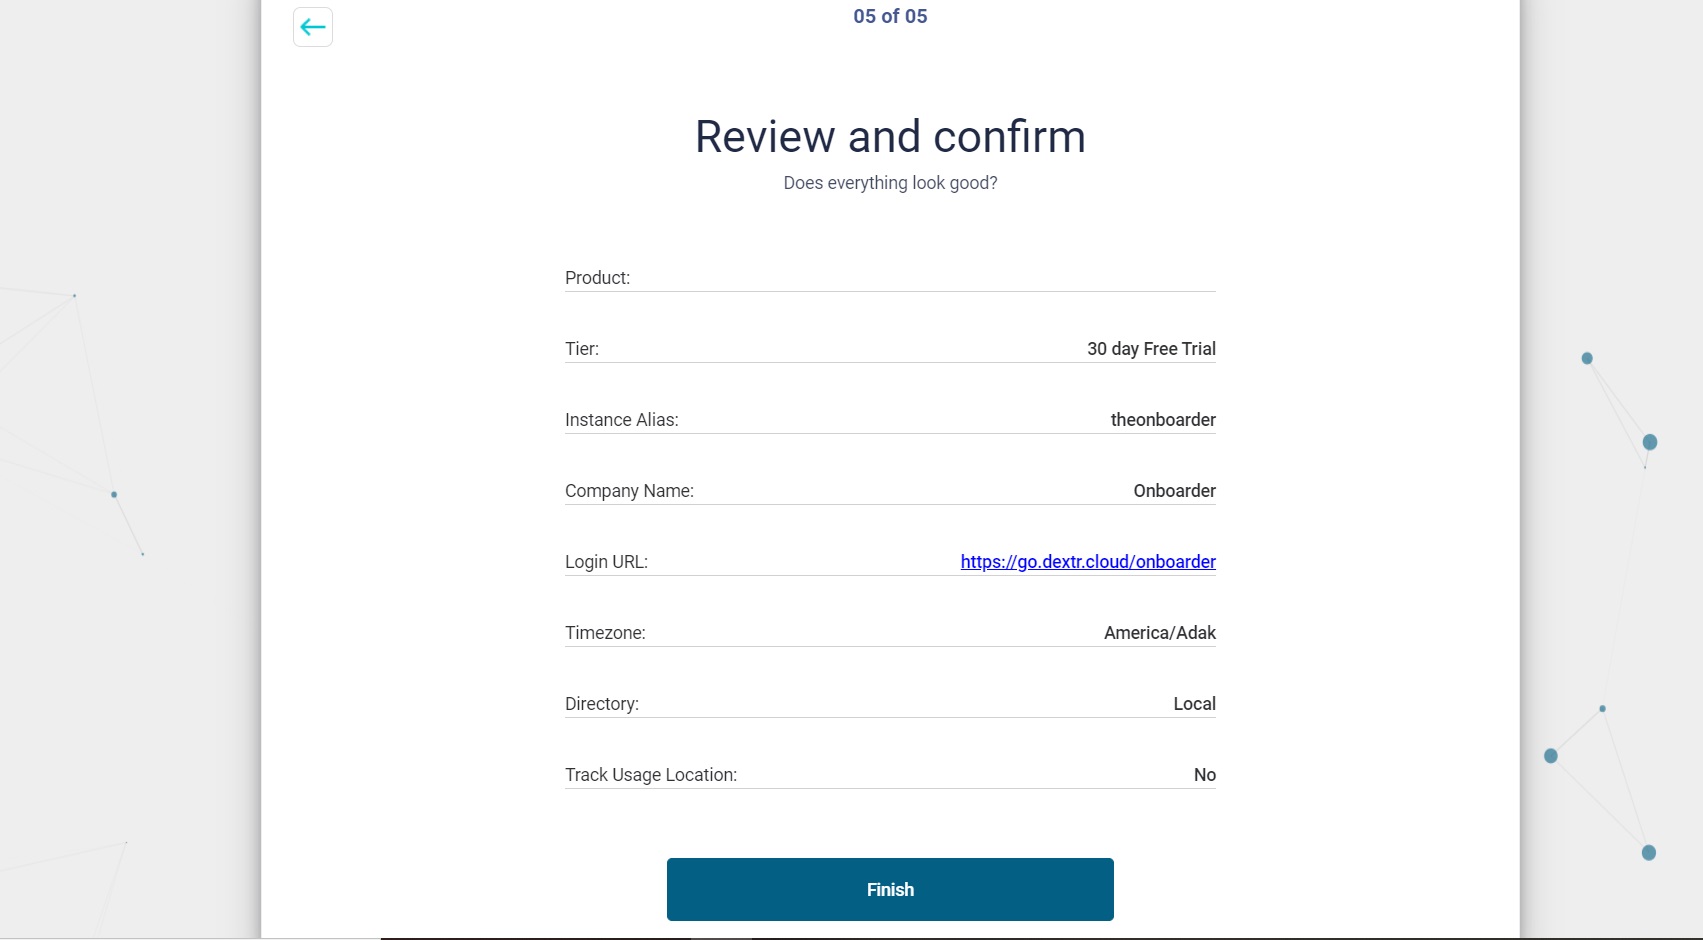
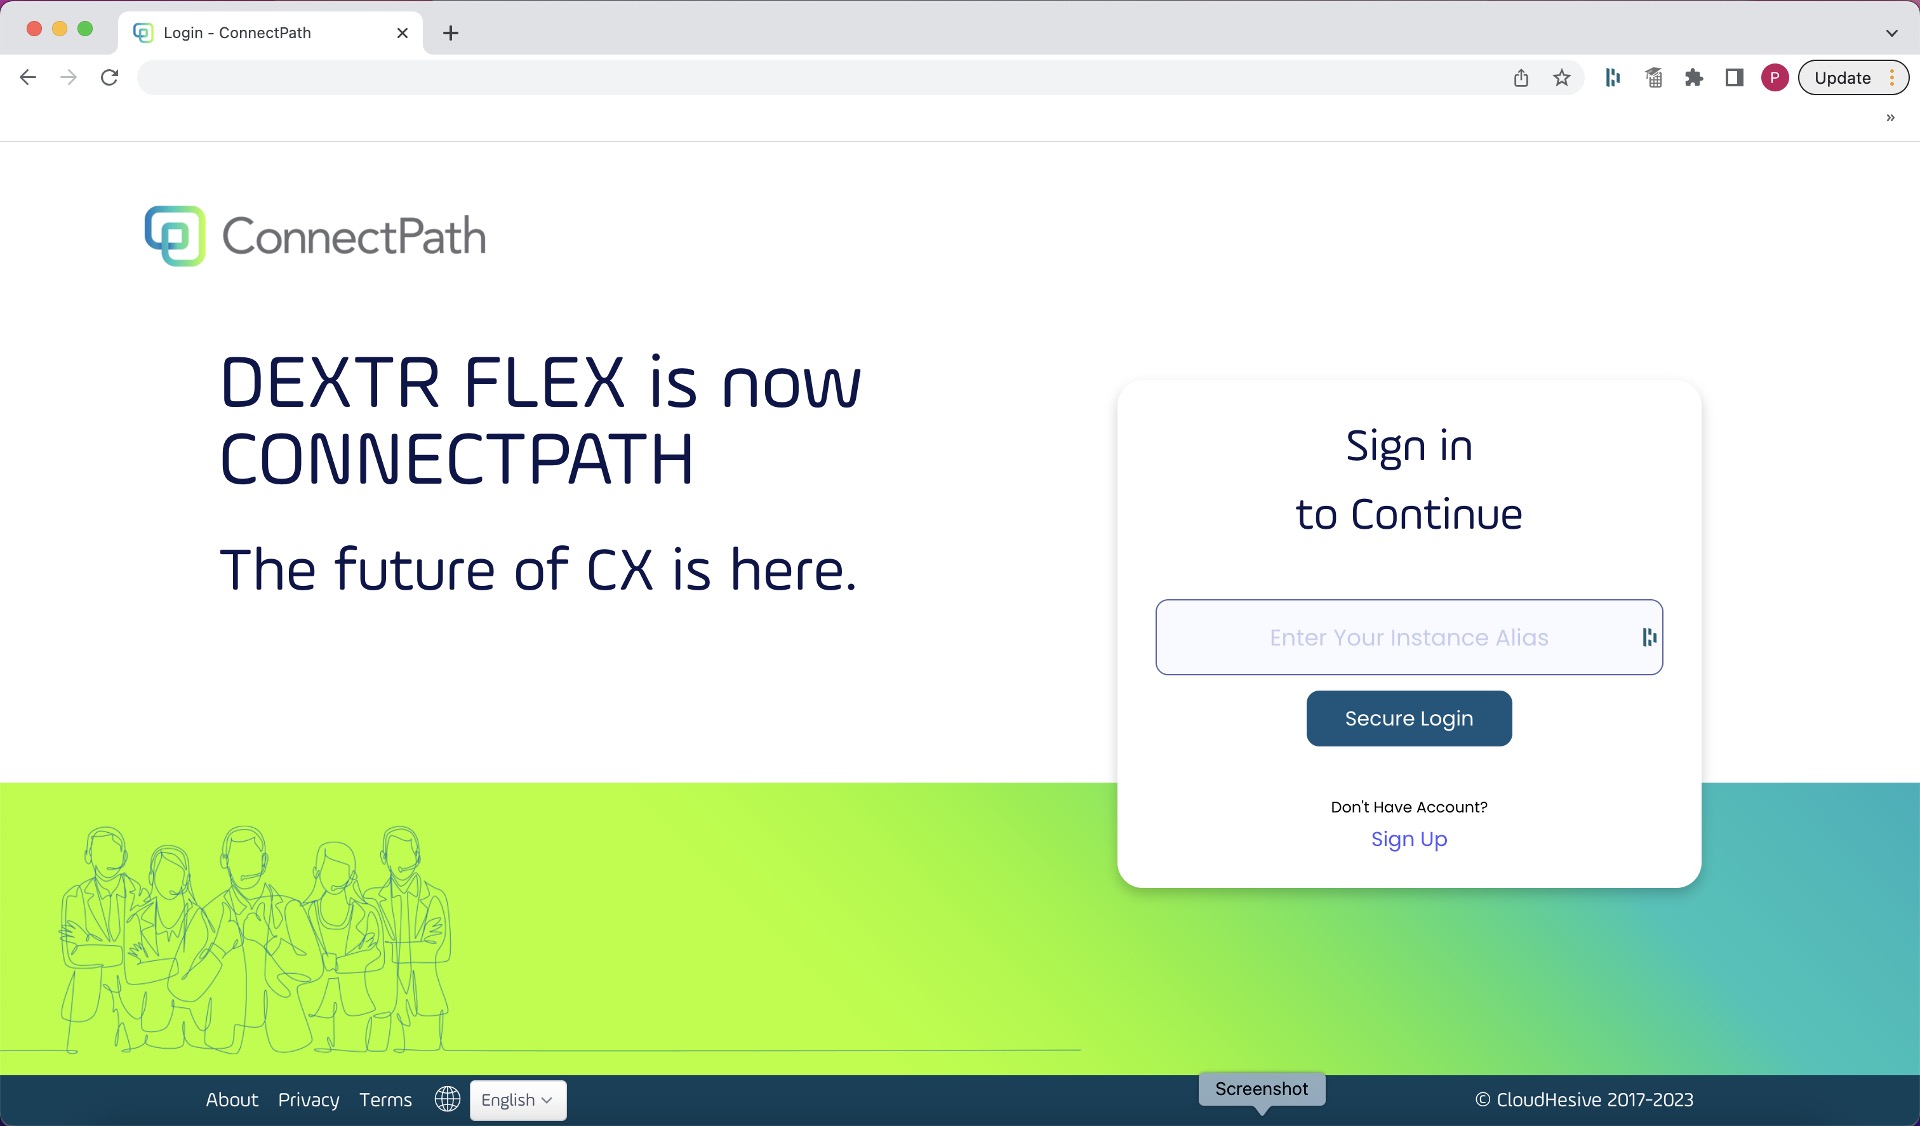
After this, you can click the Finish button and you’ll be redirected to the dashboard. Click Login, which will redirect you to the Login URL of your company and then click Secure Login .
And That’s it! You have now logged in as the Instance Admin and can start using ConnectPath.